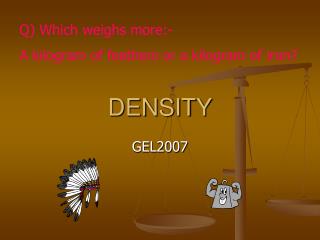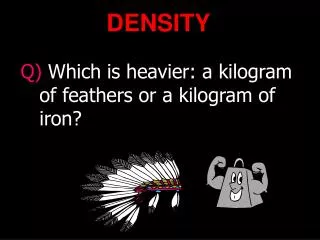
Density
Density. Vanderbilt University Student Volunteers for Science Spring 2008 Training Manual. Important!. Please use this resource to reinforce your understanding of the lesson! Make sure you have read and understand the entire lesson prior to picking up the kit!

Density
E N D
Presentation Transcript
Density Vanderbilt University Student Volunteers for Science Spring 2008 Training Manual
Important! • Please use this resource to reinforce your understanding of the lesson! Make sure you have read and understand the entire lesson prior to picking up the kit! • We recommend that you work through the kit with your team prior to going into the classroom. • This presentation does not contain the entire lesson—only selected experiments that may be difficult to visualize and/or understand.
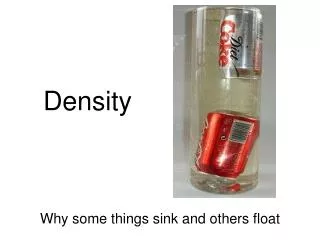
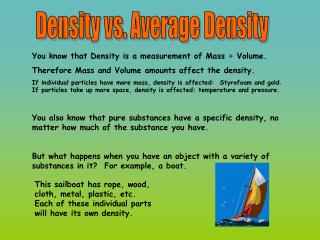
I. Introduction (pg.2) • A. Coke/Diet Coke Density: Demonstration • Fill the 2-liter bottle to the mark with water • Place the coke cans next to the bottle and ask student what they think will happen • Ask for the reasoning behind their guesses • The Diet Coke should float and the Coke will sink • Accept reasonable answers, but after a few guesses tell them the difference is because of their densities
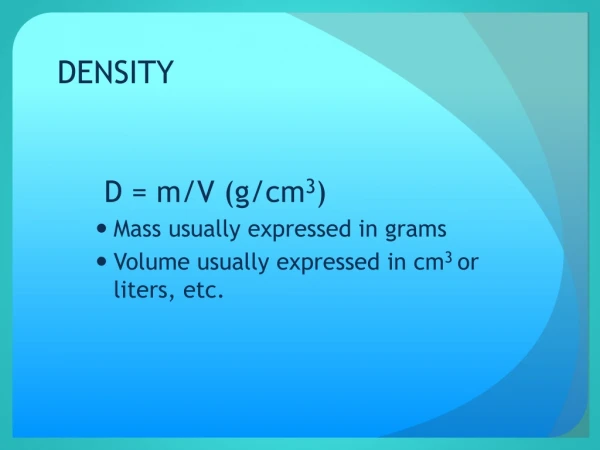
I. Introduction (cont’d) • B. Defining Density • Ask students if they know what density is. Tell them they can think of density as how much mass there is in a given volume. • In math terms D (density) = m/v (mass over volume). Write this relationship on the board. • Sum up the difference between high and low densities with the following generalizations:High Density means there is a lot of material in a given spaceLow density means there is little material in a given space • Draw the pictures to the right on the board.
II. Density Activities • A. Calculation • Make sure the students understand that two objects that have the same volume can have different densities. • Put the information to the right on the board. • Ask the students if they can explain the difference in mass between Diet Coke and Coke. • Explain that Coke contains 39 grams of sugar (14 sugar packets) while Diet Coke contains none. • Show the students 14 packs of sugar to emphasize how much sugar is in one can of Coke. • Using the information on the board, go through the density calculation with the students.
II. Density Activities (cont’d) • B. Density Activity • Note: While this activity is going on, one of the team members should assemble the materials for the next part. • Give each pair of students 1 packet of sugar and 1 2-ounce cup of marbles. Tell them to open the cup and imagine that the marbles are molecules of water. • Have the students pour all of the sugar into the cup and then ask them what they observe. (The crystals pack in around the marbles and fill in all empty spaces, just as it does with water). • Tell the students that the added sugar increases the density of the water. • Explain that density is a property of solids, liquids and gases, but this experiment will only be exploring liquids,
II. Density Activities (cont’d) • C. Oil and water bottle • Tell the students to look at the oil and water bottle and note that there are 2 layers. • Ask if the students know why there are 2 layers. (The liquids have different densities). • Explain that liquids with different densities will not mix with each other. The most dense liquid will always be on the bottom. • Tell the students to shake the bottle (not too vigorously) and watch as the liquids mix, then separate. • Ask the students if they have noticed this at home. (Oil and vinegar salad dressings are separated into 2 liquids until shaken. • If the students ask about the bead, tell them it will be explained later in the lesson.
III. Layering Liquids • A. Demonstration of Experimental Procedure • Point out the measuring lines on the cylinders. Tell the students that they should only pour a liquid until it reaches the next measuring line. • Show the students how to properly add the liquids to the cylinder. Put the cylinder in a 5-ounce cup and lean it against the edge. Pour the liquid down the side of the cylinder. After pouring, the cylinder can be set upright again. • Tell the students that they will be using 4 liquids: syrup, cooking oil, water, and rubbing alcohol. Emphasize the importance of being careful to keep everything in the plate.
III. Layering Liquids (cont’d) • Tell the students that they will add liquids two their cylinders for three trials. In each trial, they will work with 2 liquids. • Make sure they follow the procedure on their observation sheet because alcohol and water will not mix. • Tell the students to note the layering of the 2 liquids on their observation sheet. • After each trial, the liquids are poured into the waste container and the cylinder is returned to the 5-ounce cup for the next trial.
III. Layering Liquids (cont’d) • B. Experiment • Students should repeat the activity as shown in the demonstration. Circulate the room and encourage the students to take turns adding the liquids. • Make sure they are emptying the liquids into the waste container in between trials. After the experiment, a VSVS member can empty the waste containers into the 1-liter waste container. • Draw a picture of the cylinder on the board, with 4 layers shown. Ask the students where each liquid will be if they are all added together. • Guide them to the hypothesis that the correct order from bottom to top is syrup, water, oil, alcohol. Write this on the board
III. Layering Liquids (cont’d) • Tell the students that they will now test their hypotheses by adding all 4 liquids to the cylinder. Before the students start, share the following instructions with them. • Be careful not to overfill the cylinder. • Add the liquids in the order shown on the board. • If the hypothesis is correct, the liquids will layer with minimal trouble. If it is incorrect, the liquids will either move locations or there will only be 3 layers (this will happen if the students mix alcohol and water) • Write their observations on the remaining set of lines.
IV. Plastic Recycling Codes • Tell the students to look at their oil and water bottles and notice where the bead is. Ask the students if they know why the bead if here. • Tell the students to look at Section IV. of their Instruction Sheet and direct their attention towards the chart and the 7 triangular symbols. Inform them that there are hundreds of different types of plastic polymers in the world. Today the focus will be on two types – 1 and 2. • Tell the students that by dropping a piece of plastic in the column, it will sink until it encounters a liquid that is more dense than the plastic. • Ask the students what we can tell about the density of the bead in the oil and water bottle. It must be less than water (less than 1 g/mL). • Ask the students if it is plastic PETE (#1) or HDPE (#2). It is #2.
Clean-up • Pour all waste solutions into the 8-ounce jars, and then down the sink. If there is no sink, make sure the lids are screwed on tightly and all jars are put in a plastic bag. Make sure the bag is sealed. • We reuse all cups and bottles, so make sure everything is returned to the kit. • Please return the kit to the VSVS lab the same day you use it. • IT IS IMPORTANT THAT YOU RETURN THE KITS IN GOOD CONDITION. VSVS LAB WORKERS REALLY HATE MESSY OILY SUGARY SPILLS. RETURN MESSY KITS AT YOUR OWN RISK.