Download
1 / 28
280 likes | 300 Views
Learn how to resize and name your images for club competitions. Follow the step-by-step guide and use software like FastStone Photo Resizer 3.1 for easy resizing. Ensure your images meet the required size, file format, and naming conventions.

E N D
Step 1 – Select your image • Where is the image? • Folders and files • RAW vs JPEG
Step 2 – Protect your original • Duplicate the image • Why resize? • Print size vs projection size • Use the copy for resizing
Step 3 - Borders • Stroke • Colour • Thickness • Wider borders
1,050 Pixels 466 Pixels 1,400 Pixels
Border added of 292 Pixels 1,050 – image height / 2 = 292 Border added of 292 Pixels 1,050 – image height / 2 = 292
Step 4 – Get ready for re-sizing • Software • Proprietary • Photoshop (CS or Elements), Lightroom, Paintshop Pro, etc. • Freeware • FastStone, Irfanview, etc
Resizing Using Fastone Photo Resizer 3.1 • Free software available from http://www.faststone.org/FSResizerDownload.htm • Windows only
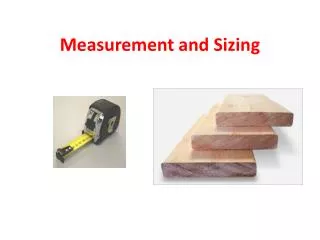
Step 5 – The science bit • Image shape • Landscape vs portrait & square(-ish)
Step 6a – Landscape format • Open Image size info • Set width to 1400 pixels • Check what the height has shrunk to • Must be 1050 pixels or less • If more than 1050, • Change the height to 1050 • Width will automatically shrink to less than 1400 width:height >/= 4:3
Step 6b – Portrait format • Open Image size info • Set height to 1050 pixels • Check what the width has shrunk to • Must be less than 1400 • If more than 1400 • Change the width to 1400 • Height will automatically shrink to less than 1050 • Ensure Resample image is ticked and select ‘Bicubic’ • Check image and apply a little sharpening if you feel it is necessary
Step 7 – Space, the final frontier • Colour space • Check this is Adobe RGB or sRGB
Step 8 – Naming your baby • File • Save as … • Select jpeg/jpg as file type • Your name_Title of your image • Save • Select quality to give file size of approx 500kb • Close file
Step 9 – Checking your work • Find the image • Using organisers • Bridge, PS Elements organiser, others • Windows Explorer • Editing software itself if necessary • Check • Name in correct format Eg James Kirk_New world.jpg • Size • Width not more than 1400 and Height not more than 1050 • File extension • Jpg (not jpeg or .jpg.jpg)
A little word on Portfolios • Composite 01_Title of portfolio_Your Name.jpg This is the composite image • 4 images 02_Title of portfolio_Your Name.jpg 03_Title of portfolio_Your Name.jpg 04_Title of portfolio_Your Name.jpg 05_Title of portfolio_Your Name.jpg These are the four individual images placed in the order you wish them to appear on screen • Each image must comply with sizing rules
Final step - Yippee! • Email your precious image to the competition email address& fingers crossed for the competition • New address from Sept 2013 wpc.competitions@gmail.com