Download
1 / 19
190 likes | 408 Views
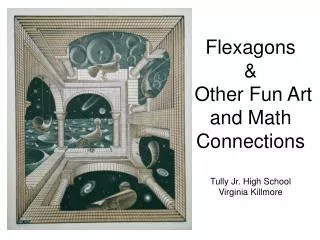
Flexagons & Other Fun Art and Math Connections Tully Jr. High School Virginia Killmore. What you will Learn. How Art and Math can create meaningful connections for students in your classroom

E N D
Flexagons & Other Fun Art and Math ConnectionsTully Jr. High SchoolVirginia Killmore
What you will Learn • How Art and Math can create meaningful connections for students in your classroom • You will learn by making 4 samples for your classroom As well as take home instructions for these samples • Share websites that teach students about art and math
Why Create These connections • Students observe and learn from connections between Art and Math • Reinforce what is learned in both disciplines and create meaningful activities for middle school students • Students will learn measurement skills • Students will learn to recognize and be able to classify geometric shapes • Students will to use vocabulary learned in Math and reinforced in Art • To physically investigate and analyze the attributes of geometric shapes. • Students will visually understand abstract concepts learned in Math
Samples We Will Make • Mobius Strip • Tessellation • Flexagon • Kaleidocycle
Mobius Strip • A mobius strip is a loop of paper with a half twist in it. Supplies • A 1”X 11” strip of paper • Scissors • Pencil • Ruler • Tape
How to Make a Mobius Strip. • Using a ruler and pencil Make a 1”strip on a piece of paper. • Cut out the strip • Give it a half twist (turn one end over). • Tape the ends together.
What to do With a Mobius Strip • After you make your mobius strip, take a pencil and draw a line along the length. How many sides does the mobius strip have? • Take a pair of scissors and cut the mobius strip along the line you have drawn. What happened? • What do you think will happen if you cut it down the middle again? Try it.
Flexagon • Flexagon is a sheet of paper folded and cut in a special way so that as well as having a front and a back you can fold them to reveal hidden sides.
Flexagon Supplies • 3 ½” X 22” Strip of oak tag or heavy paper • Ruler • Pencil • Colored pencils or markers
4 4 4 4 4 2 2 4 4 4 4 4 Flexagons Instructions • Mark the strip in 4” and 2” intervals as shown below and connect the marks to form ten equilateral triangles and a right triangle at each end of the paper
Instructions • Cut off the right triangles at each end • Lightly fold and score at each line
Flexagon instructions • Fold as follows • Count 3 triangles from the left and fold them to the back • Count 3 more triangles, and fold the other triangle to the front. • Place the end under the beginning and fold the last triangle over the first triangle. • Glue or tape the last triangle in place (do not tape over any edges)
How To flex • Pinch together two adjacent triangles, pushing the crease up. Then push the opposite side down and into the center • Flex outward and from the center to revel new face • If it doesn't work try the next Triangle
Tessellations • Supplies • Pencil • Marker • Scissors • Tape • 2 sheets of Colored paper – Draw a grid with 3”X3” inch squares on one sheet • 3X5 Card – Cut 2inches off creating a 3”X3” template • Instructions
Tessellation Instructions • Cut a wavy line from the bottom left corner to the top right corner of the square • Slide the left piece to the right side and tape it down • Cut a wavy line from the bottom left corner to the bottom right corner of the square • Slide bottom piece to the top and tape it down 3X3 Square Step 2 Step 1 Step 3
Instructions Continued • Trace the template to one of the sheets of colored paper and cut them out. • Align a shape with the top left grid Square and glue it down • Continue to paste the cut outs in a checkerboard pattern on the grid • Erase the grid lines and create details to make recognizable shapes.
Build a Kaleidocycle • Start with pattern included in kit • Enlarge it as desired I usually enlarge to fit a 12”X18” sheet of paper • Cut out pattern • Trace the pattern by taping it to oak tag board and drawing over lines using a ruler • Cut and score over each line • Fold and glue as instructed on pattern
Related Web Sites • Tessellations http://library.thinkquest.org/16661/http://www.tessellations.org/index.htm • MC Escher and Math http://www.mathacademy.com/pr/minitext/escher/index.asp • Flexagons http://www.mathemagic.org/MathsAndArt/flexagon.htm • http://www.mathematische-basteleien.de/flexagons.htm#Flexagons%20in%20the%20Internet • Geometry http://ccins.camosun.bc.ca/~jbritton/jbrubbergeom.htm
Disclaimer • I am not particularly brilliant • All this information is accessible on the web • Just do a google search on words like Moebius, flexagons, math activities • Ideas and printed publications provided here were shared with me by other teachers and found on the web