Lockout / tagout
180 likes | 404 Views
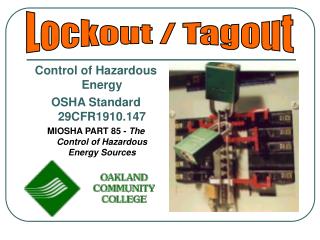
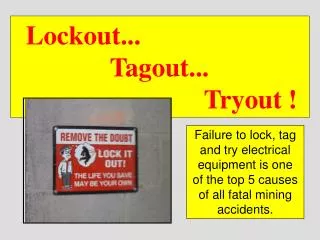
Lockout / tagout. What is lockout/tagout?. A method of keeping equipment from being set in motion and endangering workers. Do not try to un-jam any machinery without lock out. Ask Questions!. When should you use Lockout/Tagout?.

Lockout / tagout
E N D
Presentation Transcript
What is lockout/tagout? A method of keeping equipment from being set in motion and endangering workers. Do not try to un-jam any machinery without lock out. Ask Questions!
When should you use Lockout/Tagout? • Whenever you perform maintenance service, cleaning or un-jamming of equipment that could injure you by: • Unexpected startup of the equipment. • The release of stored energy. • When a guard needs to be removed. • when any part of your body may be caught by moving equipment.
In a Lockout... • A disconnect switch, circuit breaker, valve or other energy isolating device is put in the safe or OFF position. • A lock is attached to the energy isolation mechanism to insure that it remains in the safe or off position. • More than one lock can be used with a multi-lock hasp • Each lock must include the name of the user.
In a Lockout ... • The three most important things to remember are.. • TRY • LOCK • TRY AGAIN
Six Steps to a Lockout • Preparation for Shutdown. • Before you turn off any equipment you must know: • The types and amounts of energy that power it. • The hazards of that energy. • The locations of the isolation devices you need to control. • How that energy is controlled.
Six Steps to a Lockout (continued) • Equipment Shutdown. • Notify the Operating Department of your intent to do a lockout. Seek their input if necessary. • Notify any employees in the area of the lockout. • Shutdown the system using its normal operating controls. If the system is already down, test the normal operating controls to make sure they are the correct ones for the lockout. Then place the controls back to their off position. This is the 1st TRY Step.
Six Steps to a Lockout (continued) • Isolation of Energy Sources. • Turn off Electrical Energy Source. • Never turn off electrical devices under load. • Place all other Energy Sources in their safe positions. • This may require the assistance of Operating Departments in some cases. • Double check to be sure you have ALL Energy Sources locked out!
Six Steps to a Lockout (continued) • Application of LOCKOUT Devices. • Place your lock(s) on ALL Energy Isolating Devices. • Remember - Your name must be on EACH LOCK used. This is the LOCK Step. • If a tag is attached to your lock, fill it out completely. • If more than one lock is needed on the same device, use a multi-lock hasp. • Locks used for Lockout are NOT to be used for any other purposes.
Six Steps to a Lockout (continued) • Control of Stored Energy. • Be sure all forms of Stored Energy are RELEASED or BLOCKED and are in a Safe Position. • Stored Energy can include, but is not limited to: • Chemical Spring Tension • Hydraulic Gravity • Pneumatic Thermal • If possible in systems that have pressure, leave a vent valve in OPEN position. • Use extra caution when dealing with hydraulic systems that have accumulators.
Six Steps to a Lockout (continued) • Verify that Equipment is in a ZERO Energy State. • Try to start the equipment using the SAME controls you tried in Step 2. This is the 2nd TRY Step. • Double check All Energy Sources one last time to absolutely insure that they are in their safe positions and that locks are on correctly. • This step is the last insurance that the equipment is in a ZERO Energy State. It is very important. - Do NOT take any shortcuts.
Let the work begin…Safely • Do the work at hand, but... • Avoid doing anything that could re-energize the equipment. • Make sure none of the changes you are making could bypass or override the lockout.
Special Situations • Temporary Reactivation. • If you need to reactivate the locked out equipment you must: • Remove all tools. • Be sure everyone is clear. • Inform everyone affected. • Re-energize the equipment. • Do the required testing. • De-energize and lockout using the 6-step method.
Special Situations (continued) • Shift Changes. • If the service last more than one shift: • The lockout must stay intact. • All employees taking their locks off must wait until their replacements put their locks on.
Removing the Lockout • Be sure the equipment is safe to operate, is fully assembled, and that all guards are replaced. Also be sure all tools are picked up. • Be sure all of the employees who worked on the equipment are clear of the area. • Notify everyone who works in the area that the lockout is removed. • Carefully re-energize the system.
Review • Lockout/Tagout is a method of keeping equipment from being set in motion and endangering workers. • Lockout/Tagout Six Step Procedure. • Lockout/Tagout Removal. • Be sure equipment is safe. • Be sure people are clear. • Notify affected people. • Re-energize
Automated Systems • PLC’s, DCS and PC • They cause: • Unpredictable movement. • Start-up of equipment based on level, pressure, etc... • When working with automated systems, it is imperative: • That the equipment is locked out at its power source. • That you try to activate the equipment. • If you are unsure, find someone qualified and seek input.