1 Point Perspective
240 likes | 263 Views
Learn the principles of one-point perspective to create stunning 3D effects: Horizon Line, Vanishing Point, Receding Lines, and more. Practice drawing cubes from different viewpoints and apply the technique to create a detailed one-point perspective artwork.

1 Point Perspective
E N D
Presentation Transcript
Perspective: a formal method of creating a three-dimensional effect on a two-dimensional surface
Do Now: Copy the diagram 1 4 (view) 2 3
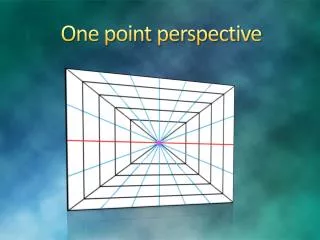
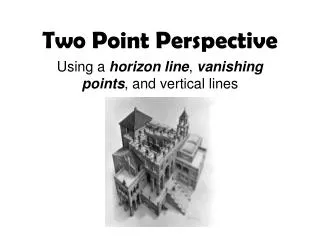
The lines used in perspective that slope backward to the vanishing point(s) 1. Receding Lines: The line determines bird’s eye view, eye level, and worm’s eye view. Where sky and ground meet. 2. Horizon Line: All lines lead to this point which may be on or off the canvas 3. Vanishing Point:
Other Perspective Terms the area above the horizon line. It is looking down on the ground. Bird’s Eye View:
the area below the horizon line. It is looking up at ground level. Worm’s Eye View:
Horizontal: holding your paper or canvas long ways Vertical: holding your paper or canvas up and down Overlap: To lie over and partly cover something Eye Level: the area at the same level as the horizon line. The viewer cannot see the top or bottom of the form
Repeat the following steps in your sketchbook Hold your sketchbook horizontally and using a ruler, draw a horizon line.
Using a ruler, draw a rectangle somewhere above the horizon line.
Using a ruler, connect the corners of the rectangle to the vanishing point.
Draw 1 horizontal line and 1 vertical line to close your cube.
Erase the receding lines going to the vanishing point This is an example of viewing something from Worm’s Eye View
Using a ruler, draw a rectangle somewhere below the horizon line.
Using a ruler, connect the corners of the rectangle to the vanishing point.
Draw 1 horizontal line and 1 vertical line to close your cube.
Erase the receding lines going to the vanishing point This is an example of viewing something from a Bird’s Eye View
Using a ruler, draw a rectangle somewhere on the horizon line.
Using a ruler, connect the corners of the rectangle to the vanishing point.
Erase the receding lines going to the vanishing point and the line going through the cube. This is a cube at eye level
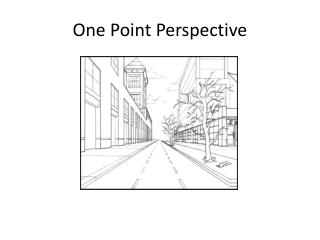
You will create a 1 point perspective drawing that will include the following: • A home with windows and a door • trees • a road • anything else creative you want The drawing should fully shaded showing a range of values. Don’t forget to use a ruler!