Download
1 / 15
150 likes | 302 Views
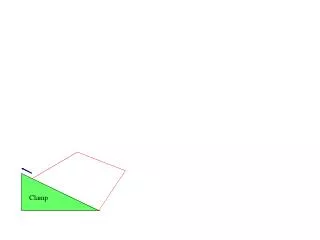
Recap Clamp Installation. RIKEN/RBRC Itaru Nakagawa. @RIKEN. @BNL. Clamp Schedule. Delivered to BNL. Octant-7 Clamp Status. Octant 7. 3710. 3710. 3710. 3711. 3711. 3711. 1-pin type . 1A. 3712. 1B. 3712. The dry air cover installed to here. 1B. 3713. 3713.

E N D
Recap Clamp Installation RIKEN/RBRC Itaru Nakagawa
@RIKEN @BNL Clamp Schedule Delivered to BNL
Octant-7 Clamp Status Octant 7 3710 3710 3710 3711 3711 3711 1-pin type 1A 3712 1B 3712 The dry air cover installed to here 1B 3713 3713
Octant-8 Clamp Status Octant 8 3810 3810 3810 3811 3811 3811 3812 3812 3813 3813 Conductive Rubber Type 1B 2A 4-pin type 2B 1A 1B 2A
Pre-installed Idendical
To be installed during next maintenance day on June 15 to bottom region of Oct-7&8. 40 Clamps Install(north St-3, oct7&oct8) Octant 7 Octant 8 3710 3810 3814 3714 3814 3714 3810 3710 Max 20 clamps /gap 3714 3814 3710 3810 3815 3715 3711 3811 3715 3815 Dry Air Cover x 8 3811 3711 3715 3815 4pin x 3 3816 3716 3711 3811 3816 3716 3812 3712 3717 3817 New Design x 8 3812 3712 Old Design x 10 Old Design x 10 3717 3817 Old Design x 11 3713 3813 1A 1B 2A 2B 3813 3713
Dry Air Cover Octant 7 3710 3710 10 additional dry air covers to be installed 3710 3711 3711 3711 3712 3712 Flow rate 100ccm/clamp? 3713 Manifold -> Requested to Carter 3713
40 Clamps Install Man Power SanghwaPark (SNU) Hideyuki@BNL Maintenance Day clamp Install Sanghwa, Kiyoshi@BNL Itaru@BNL Yoshimitsu@BNL Yoshimitsu@BNL~7/5 YoshimitsuImazu Yoshimitsuwill stay in BNL until the end of Run11 just in case.
6/15 Access Day Install • Work plan is discussed in DC (June 8). • Itaru, Yoshimitu, Sangwha, and Hideyuki will work on install. (All confined space trained) • Requested 8 hours access to CAD via Takao (RC). • Work permit, confined space survey are arranged. (Don Lynch). • Install as many as possible clamps up to 40 clamps. • Need to monitor stable condition for 1~2 hours after completion of the installation until the hall close. • Successful contact rate, drawing current w/ HV will be closely monitored during/after installation. • A new AC readout clamp is to be tested w/ anode calibration pulse and a pulser input from the center cathode cable.
Installation Procedure (1) Oct-8 • Take HV current snapshot. • Remove Preinstalled Clamps from Gap-0. • Install new clamps to Gap-1. • Install clamps to Gap-0. Oct-7
Installation Procedure (2) • Inspect target anode pads and record damaged/missing pad channels. • Apply conformal coating. • Plug-in V-readout pins to a clamp. • Mount the clamp. • Record V-readouts. Try unscrew and screw if contact is fragile. • Remove V readout pins. • Ramp up HV every 2 clamps install and check drawing current. • (Mount dry air cover)
Recording Contacts Damaged/missing pad Damaged/missing resister
Material Readiness Conformal coating+brush
Preparation 6/13 ~ 14 @ 1008 • Assemble GND Holders • Make/repair V readout boards • 2 boards w/ long pins✔ • 1 board w/ short pins✔ (for AC readout)
AC Readout HV side GND side DC Voltage Readout HV side GND side One AC readout clamp will be available for test on June 15th. AC Voltage Readout