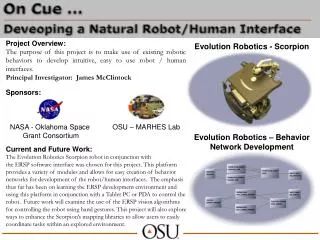
Project Overview
Develop and test a robotic solution for picking up and storing sacks using CAD, acrylic, and MDF materials. Assess design against set specifications and identify areas for improvement.


Project Overview
E N D
Presentation Transcript
Project Overview • Structural part Introduction • Laser cutting & forming • Model making • Designing & Developing • Manufacturing • Building & Analysing
Lesson 06 Starter Learning objective: Assemble and assess manufactured parts into a unique design solution, conduct testing on parts and the finished product to prove a concept, and develop potential improvement targets for the design. Quick task: Compare your original sketched idea to your built robotic solution. Identify three things, 1. Does your sketch match the build you completed? 2. How is it better? 3. How could you have made it match better? Key words: CAD, Library, heat processes, acrylic, MDF, profile, forming.
Testing and Assessing Developing suitable tests for your robotic solution Having completed the build of your robot, it is now time to conduct tests on the idea, and confirm how it does and does not conform to your original design plan (brief and specification). Design Brief To design a robotic solution that can pick up sacks and place them into various different height storage containers. Each sack will need to be picked up from the ground and placed into a trough at 2 feet high. The robot should be easy to drive and navigate around, and should fit into a small footprint (18 inch square). Design Specification FunctionThe robot should pick up one sack at a timeThe robot must be able to pick from the ground and score in a 2 foot troughMaterialsThe robot must be made from resistant materialsThe robot should use minimal materials where possibleAestheticsThe robot should look styled and speedy using shaping that flowsCostThe robot should cost as little as possible using minimal kit to achieve the solution
Testing and Assessing Example Testing Fix the cortex and battery to the VEX robot, and once you have wired and assembled the system together, use a joystick to test the operation (make sure to tether the controller and cortex first).Example test 1:Drive your robot up to a sack, operate the controller to try and pick up the sack, and then attempt to move the sack around.Ask yourself…Does the robot structure clash anywhere?Is the design hindering the robots ability to do the task?Could the design change easily to improve performance?
Testing and Assessing Example Testing Many of the VEX robotics parts are designed to provide ease of assembly, ease of performance once assembled, and perfect alignment so that motors and shafts are not under tension whilst in operation.Example test 2:Test the specific elements of your design where wheels, turntables and existing tank track elements are supposed to move freely.Ask yourself…Do wheels and gears and motion kit move freely?Is the design hindering the robots ability to do the task?Could structural parts be redesigned to make sure VEX parts will function to their optimum?
Testing and Assessing Example Testing Interaction with existing VEX parts is important to allow for the design solutions you create to function. VEX parts have very high tolerance levels, which you have attempted to work with when making your own parts.Example test 3:Fit specific VEX parts to the frame, and consider how well the structural elements match the existing parts.Ask yourself…Are holes correctly spaced so that VEX parts fit onto them well?Are tolerances of parts high enough to fit with the structural parts you have made?How do VEX parts need to be used differently when they fit to your manufactured parts.
Testing and Assessing Complete the evaluation form Section 1 asks you to take a photo, print it out, and place it at the top of the page.Section 2 asks you to outline your brief and then consider how you met the brief.Section 3 asks you to list the pro’s and con’s of your design solution against the design specification (what you did and did not meet)Section 4 asks you to identify the clear areas of improvement needed having completed all testing.Section 5 asks you to propose solutions, prior to sketching the idea out.
Lesson 06 Plenary As a class, let us consider the following questions?A. How do parts designed in 2D change when you build them in 3D?B. What types of testing can be carried out on robot solutions in acrylic?C. How are tests different when the robot is made from metal?D. Why is testing and subsequent improvement targets a key part of the design process?
Summary Learning objective: Assemble and assess manufactured parts into a unique design solution, conduct testing on parts and the finished product to prove a concept, and develop potential improvement targets for the design. • Today you have: • Built a unique design solution using laser cut VEX parts into a finished robot • Carried out testing on the robot solution, comparing to the specification • Identify possible improvements to the robot including specific changes to parts