Download
1 / 64
640 likes | 789 Views
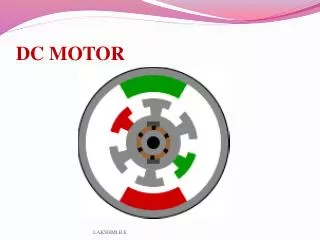
Introduction to Electric Motor Design & Simulation using Software from the Jaewoo Technology Co., Ltd. Distributed by Jaewoo Technology Co., Ltd. www. jaewoo.com Email: jw@jaewoo.com / cae@jaewoo.com.

E N D
Introduction to Electric Motor Design & Simulation using Software from theJaewoo Technology Co., Ltd. Distributed by Jaewoo Technology Co., Ltd. www.jaewoo.comEmail:jw@jaewoo.com / cae@jaewoo.com
Some people like to use SPUD to navigate the software - it isn’t always necessary but we will start here:
At the center of all the SPEED software is the Motor Design program: Here you can select the Design program that you wish you use.
Also on SPUD there are links to: On Line Manuals: Material databases: (Steel, magnet and brush)
Finite element packages: - But let’s start with the Motor Design.
Select and start a Motor Design program and obtain the Menu tool bar: Select New for a new design or Open an existing design – we’ll start a New:
Choose from a standard example: The best way to proceed is to begin with one of the default designs or maybe one of your own designs that is close to the machine you wish to develop.
The Outline Editor shows the lamination and some basic dimensions:
Main menu: • Consider the options • in a logical order: • Data Entry • Analysis • Tools • After Analysis: • Results
Data Entry Design data can be entered in various editors: The Outline Editor has already been mentioned.
The Template Editor(TED) for PC-BDC : All the parameters are conveniently organized. Page 1 is often sufficient to get started.
The Winding Editor is where the winding can be edited and various harmonics investigated:
Materials and magnets can be specified using the Materials dialog:
Click the right mouse button to find menu for View material: Saves time going through Materials and Magnet Databases when selecting.
Choose favorite units using the I/O Units: For fast use, many functions are available as Hotkeys:
To edit your Custom template select the template and pull the Editor|Options menu down on the toolbar: Add a variable name to list:
Analysis Whatever SPEED software is used there will be a variety of analysis or simulation options: We’ve been using PC-BDC as an example so we have Static Design, Dynamic Design, Torque/Speed curves, Thermal analysis and Ranging facilities. Most of these are press-and-run though the Ranging needs setting up (we’ll study that later).
Results • The results can be inspected in • graphical form with Simulation Graphs • Design sheet • Custom Design sheet • Thermal Design sheet • other forms such as Phasor Diagram
PC-BDC Static Design - current, e.m.f. and torque waveforms:
PC-BDC Dynamic Design – current waveform: Some switching anomalies in this!
Using the Integrated Step Length Adjustment ILSA (to 20): That’s better!
The standard Design Sheet lists input and output parameters:
Data can be added to the Design Sheet using User Defined Formulas: Add rotor diameter:
At the bottom of the Design Sheet: The Help bar: This is permanent in the Design Sheet until edited or deleted.
Any variable can be Ranged by clicking on the right-hand mouse button when highlighting a parameter in TED… …over a number of steps by selecting the Ranging option on the analysis menu… (more than one variable can be ranged at one time –though this isn’t 2-D ranging)
…giving a Design Sheet for each step…. Easy selection by clicking on variable with right-hand mouse button
Ranging graph: … a very powerful tool (sometimes too powerful!).
To Set up your own Custom Design sheet: Create your own .DSS file for custom:
From the Option|General menu option: Select the particular Custom Design sheet you wish to use:
Then your own Custom Design sheet is available: which can be copied to the clipboard and pasted as text into a word processor for your own use:
Tools There are many useful facilities in the Tools menu: • The main ones are: • Steel and Magnet Databases (direct access • rather than going back to SPUD) • FE Link (can be configured to bypass SPUD) • FE Results • Export Data
Calculator: OR Use the # sign in front of the Internal Parameter Index variable to extract the values, i.e., #piXXX:
Unit Converter: This is useful for refreshing your memory when switching between different units!
Scripting: SPEED software can now be interfaced with packages like Visual Basic: Select and load a .vbs file:
Execute the .vbs file: Results: This shows PC-BDC used as a “blackbox” procedure.
The Steel Editor and Comparator can be selected directly using Steel Databases for entering steel material data: …and inspecting characteristics.
Steel DBM facilities include loss calculation and parameter comparison:
Magnet Editor and Comparator can be selected in a similar way – functions include temperature effects:
FE Philosophy • PC-FEA (Available soon for distributors customers) • Unique to SPEED Lab – integrated into software • Improves accuracy of particular SPEED calculations • Automatic SPEED procedures (GoFErs) Productivity • External programs – Flux2D, OPERA, MAGNET • General purpose • Any geometry • Advanced problems Advanced analysis
Speed FEA Available soon to distributors customers PC-FEA is the SPEED Lab’s own finite element software designed to support the Motor Design. The FE Link allows several functions (GoFErs) to be carried out with a degree of automation. In PC-BDC, there are various GoFErs:
PC-IMDSPEED Procedures: PC-SRDSPEED Procedures: *PC-SRD is slightly different since there is a choice between Unimesh and PC-FEA.
Setting up the Mesh: The region nodes can be set up using the GDF editor. Editing may be necessary if the mesh is very large.
Running PC-FEA: The GDFeditor generates a .FEA file which can be edited: The manual contains descriptions of the commands.
Some lines are more important than others: Increasing maxangle and maxpoints can help If you’ve edited the mesh in the GDF editor then you may wish to comment-out the Mesh Optimisation line because it may put all the nodes back! - if you’re having problems then try not optimising anyway.