Download

1 / 44
440 likes | 1.36k Views
Looking Through the Viewfinder. Framing a Shot. The Task:. Select most Significant Details Show them in most effective way. Key Concept 1. Select those event details and tell the real story with clarity and impact. Overview. THE BASICS OF FRAMING A SHOT

E N D
Looking Through the Viewfinder Framing a Shot
The Task: • Select most Significant Details • Show them in most effective way
Key Concept 1 • Select those event details and tell the real story with clarity and impact
Overview • THE BASICS OF FRAMING A SHOT • Field of View, Vectors, Composition, and Psychological closure • Manipulating Picture Depth • Z-Axis, Lenses and perceived z-axis depth, Lenses and Depth of Field, Lenses and perceived Z-axis speed
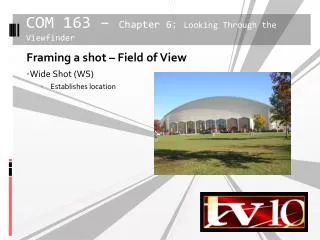
Framing A Shot • Field of View - Refers to How Close the Object Seems to the Viewer or How Much of the “Field” or Scenery in Front of You is in the Shot.
Field of View is Relative: • You and other crew members must agree on designations of what each shot will be in a particular show
Field of View Designations By Closeness to Subject • Extreme Long Shot - ELS or XLS • Long Shot - LS • Medium Shot - MS • Close-UP - CU • Extreme Close Up - ECU or XCU
Field of View Designations by Amount of Subject Seen • Bust Shot - Frames upper part of a person, Mid chest to above head
Field of View Designations by Amount of Subject Seen • Knee Shot - Frames knees to above head
Field of View Designations by Amount of Subject Seen • Two Shot - Two subjects of objects in the Frame (typically from mid chest to above head)
Field of View Designations by Amount of Subject Seen • Three Shot - 3 subjects or objects (usually mid calf to above head)
Field of View Designations by Amount of Subject Seen • Over the Shoulder Shot (O/S) - camera looks at someone over another person’s shoulder.
Key Concept 2 • Video is a close up medium • The close up is the most commonly used shot because the screen is relatively small. • Strength of TV is it’s ability to show detail with the Close Up and Extreme Close up. • Most Common Close up is the Face and the power of the Close up is ability to show human emotion.
Vectors • Directional Forces within the framed picture with various strengths • Understanding vectors helps with set blocking, design and talent movement
Vectors - 3 basic kinds • Graphic Vectors • Index Vectors • Motion Vectors
Graphic Vectors • Created by Lines or stationary object lines which lead the eye in a particular direction • Horizontal and Vertical Lines formed by the structure in our environment • Windows, doors, books, etc
Index Vectors • Obvious (intentional pointers) • arrows, hands etc.
Motion Vectors • Moving objects in a certain direction
Key Concept 3 • Vectors are directional forces within the screen that influence composition and blocking of talent and cameras.
Composition • Good picture composition helps stabilize the message • Compositional Factors • Subject Placement • Head Room and Lead Room • Horizon Line
Key Concept 4 • The most stable Picture is Screen-Center.
Subject Placement • Screen Center draws attention to the subject • Camera Operators should seek balance • Vertical lines can be strengthened with off center placement
Head Room and Lead Room • Headroom typically means the subjects eyes should be at the top 1/3 line of the screen
Key Concept 5 • Head Room neutralizes the pull of the upper screen edge.
Head Room and Lead Room • Lead Room typically means more room should be allowed in the direction a subject is pointing Lead Room
Key Concept 6 • Lead Room neutralizes the index or motion vector force and the pull of the frame
Horizon Line • Assuring background lines are parallel to the to screen edges • Purposeful tilted horizon lines can add dynamics
Psychological Closure • Filling in the blanks • Connecting the Dots • Completing the incomplete picture • Proper framing points us to the off screen space
Key Concept 7 • Close-ups that show only part of the object must provide sufficient visual cues for closure in the of screen space
Camera Operators • Must see both foreground subjects and background objects and settings • Be alert for visual hazards or picture un-balance or non-realism
Manipulating Picture Depth • Depth Dimension extends from the camera lens to the horizon • Z-Axis refers to screen depth. • Traditionally the z-axis is used to create the illusion of depth
Lenses and the Z-Axis • Wide Angle - Z-axis appears to be longer than it really is and objects seen farther apart. • Narrow Angle - Z-Axis seems shorter than it really is and objects seem closer together or compressed
Lenses and Depth of Field • Area of Z-axis in which objects appear in focus is the “Depth of Field” • Wide Angle - Greater Depth of Field • Narrow Angle - More Shallow Depth of Field
Key Concept 8 • With the zoom lens in a narrow-angle position (zoomed all the way in) you have shallow depth of field and focus is more difficult. With the zoom lens in a wide angle position (zoomed all the way out) you have great depth of field and focus is relatively easy.
Lenses and Z-Axis Speed • With narrow angle z-axis compression you have movement compression • zoomed out movement seems faster • zoomed in movement seems slower
Key Concept 9 • A narrow angle lens position (zoomed all the way in) compresses the z-axis and slows z-axis motion. A wide angle lens position (zoomed all the way out) stretches the z-axis and speeds z-axis motion.
Controlling Camera and Object Motion • Camera movement should be limited. • Zoom movement should be limited • Object or Subject movement is much preferred
Controlling Camera and Object Motion • Always try to keep the camera as steady as possible and have people and/or objects in front of camera do the moving. • Moving cameras attract attention to the camera
Key Concept 10 • Whenever possible, keep the camera still and let the event do the moving.
Key Concept 11 • Avoid fast and constant zooming in and out
Key Concept 12 • A zoom-in brings the object to the viewer; a dolly-in takes the view to the object
Controlling motion • Blocking talent movement along the z-axis rather than the x-axis is much easier to control. • Have talent move toward and away from the camera rather than side to side
Key Concept 13 • Z-axis movement is well suited to the aesthetic requirements of the small video screen and is relatively simple to shoot
Review • Field of View - Shot designations • Vectors - Directional screen forces • Psychological Closure - connecting the dots • Picture Depth - defining the z-axis