1 / 0

Active Assailant and Emergency Response Procedures

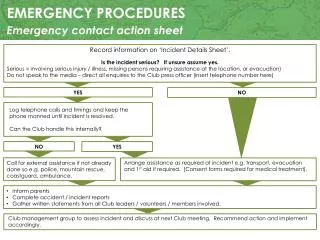
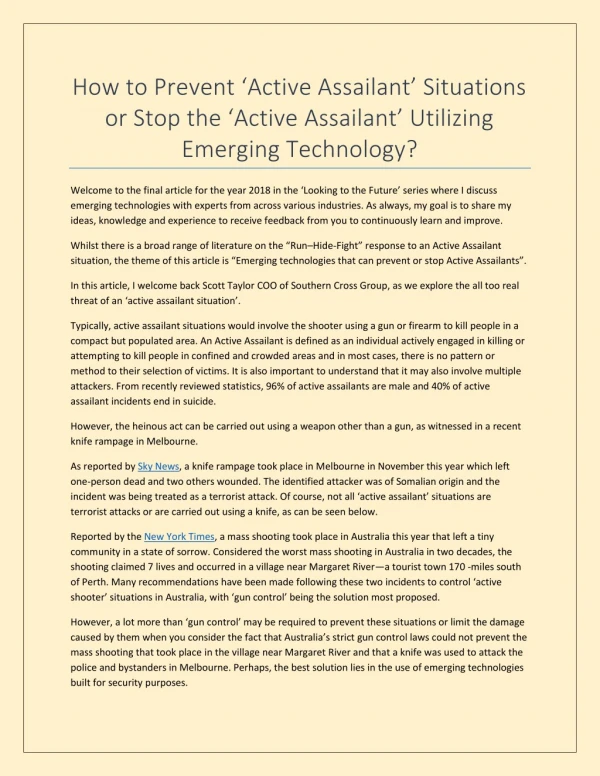
Active Assailant and Emergency Response Procedures. INTRODUCTIONS . Deputy Chief - Jason Trevino Sergeant - Ray Price. FBI. SHERIFF. TRIAL & ERROR. SWAT. HISTORY. OUR WAY. POLICE. MILITARY. Active Assailant .

ossie
Download Presentation

Active Assailant and Emergency Response Procedures

An Image/Link below is provided (as is) to download presentation Download Policy: Content on the Website is provided to you AS IS for your information and personal use and may not be sold / licensed / shared on other websites without getting consent from its author. Content is provided to you AS IS for your information and personal use only. Download presentation by click this link. While downloading, if for some reason you are not able to download a presentation, the publisher may have deleted the file from their server. During download, if you can't get a presentation, the file might be deleted by the publisher.

E N D

Presentation Transcript


  1. Active Assailant and Emergency Response Procedures
  2. INTRODUCTIONS Deputy Chief - Jason Trevino Sergeant - Ray Price
  3. FBI SHERIFF TRIAL & ERROR SWAT HISTORY OUR WAY POLICE MILITARY
  4. Active Assailant One or more persons who are randomly or systematically involved in the act of using deadly force on others & it appears, based on available intel that the suspect will not stop their aggressive, hostile actions without immediate & direct law enforcement intervention. The ongoing loss of life should be the primary motivator for L.E. intervention
  5. TRAINING On-going scenario based training utilizing air soft, conducted at area schools (16-24 hours) Teaching/Training with school staff Emergency Combat Medicine (REMSA - TCCC) Training/Coordinating with local agencies Interior/Exterior perimeter training Hallway/Room clearing
  6. EQUIPMENT
  7. EQUIPMENT
  8. EQUIPMENT
  9. EQUIPMENT
  10. EQUIPMENT
  11. EQUIPMENT
  12. What Initiates a LOCKDOWN Exterior and Interior Interior: Disturbance inside the building Active Assailant Exterior: Environmental Issues Neighborhood Disturbance Outside Law Enforcement Action Wildlife Lockdowns are predominately initiated by exterior factors.
  13. CODE YELLOW Shelter in place Outside/Off property or campus threat (Examples: Fire Department, Law Enforcement, Hazardous Materials, etc.) PROCEDURES: Secure Perimeter and doors. Cover windows. Report/Email your status (Example: GREEN, Room 145) Continue class room instruction Wait for further instructions Clear by “All clear, Green” *Fire Alarm activation requires escort by LE or Fire*
  14. CODE RED LOCK DOWN IMMEDIATE life threatening crisis on the property/campus. (I.E. Subject/s with weapons, active assailant) PROCEDURES: Immediately secure in a room. Cover windows. Report/Email your status (Example: GREEN, Room 145) Status Cards NO longer utilized in windows! Released by Law Enforcement (door keyed open) *Fire alarm activation requires escort by LE or Fire*
  15. STATUS DEFINITIONS: GREEN: ALL students/staff are accounted for and safe. YELLOW Missing student, extra students, have information. RED Have students /staff with LIFE THREATENING injuries, need immediate assistance.
  16. CODE YELLOW/RED STATUS FORM*Utilized by IC staff for accountability check
  17. Goal of L.E. in Active Assailant #1 goal of law enforcement is to stop the suspect(s) Everything else that takes place should support the #1 goal.
  18. 1st Officer On Scene Provide dispatch/responding units with details as available Make sure school has initiated a lockdown if appropriate Make decision to engage/isolate suspect(s) or wait for additional officers Solo/Single officer entry is trained and promoted by the WCSD PD
  19. Active Assailant Stopped by LE 70% of these successes have been by solo officers. 15% by two-officer deployments. 15% by three-officer deployments. There have been zero successes for anything initiated by four officers or more.
  20. RESPONSES Immediate Response – Going directly to the sight and sound of violence. Search Response – Unaware where the threat is and begin searching for the threat until the sight and sound of violence is found.
  21. Additional Units As additional units arrive, the IC should be directing them as to where to go. Additional entry elements should be formed and implemented until the suspect(s) have been stopped.
  22. Basic Perimeter Tactics
  23. Your text here Basic Perimeter Tactics *Windows Left to Right identified by numbers*
  24. Plain Clothes Officers Study #1 Kansas City (MO) PD Sgt. Ward Smith and a Force Science Analyst did a two-year study. Over 920 officers were observed in 2011. The targets used were 2-D, full-color, life-size photographs of male and female subjects, some threatening and some not. Included were armed targets that had a silver KCPD badge affixed either to the figure's belt or hanging from a simulated chain at chest level.
  25. Plain Clothes Officers Study #1 The targets were programmed to simultaneously turn toward officers being tested for variable amounts of time. Officers were instructed to "take appropriate action"--to scan, move and use cover, to discriminate under time compression between shoot and no-shoot targets, and to fire until adversaries were defeated.
  26. Plain Clothes Officers Study #1 Officers were briefed that they would be responding to assist an undercover plainclothes officers in an arrest situation. It was stressed to identify each target and officers were warned that they needed to pay close attention and be alert. Each fired about 125 rounds in the exercise.
  27. Plain Clothes Study #1 Overall, a no-shoot target with a belt badge was six times more likely to be shot than one with a neck badge. Even under full-light conditions, belt-badge targets were hit 1,272 times, compared to 196 hits for neck-badge targets. Under low light, belt-badge targets were hit 5,288 times, with neck-badge targets taking 843 hits. Combining both badge-placement locations, the no-shoot targets were four times more likely to be shot under low-light conditions than in a bright-light setting.
  28. Plain Clothes Study #1 923 veteran officers were observed in 2012. 2011 results were reviewed before they began. Shots mistakenly fired at belt-badge targets still far outweighed those striking chain-badge targets under both full-light and low-light conditions. The total numbers of inappropriate shots fired were down remarkably.
  29. Plain Clothes Study #1 Hits to brightly lit belt-badge targets plunged 82% and to neck-badge targets 88%. In low light, belt-badge targets drew 90% fewer shots and neck-badge targets showed a 92% reduction. Making the officers aware of the blue-on-blue risk had a very positive result. Exposure to the problem was a memorable way to have a life-saving impact.
  30. Plain Clothes Officers Study #2 Tactics & Survival Training Unit Los Angeles County (CA) SD Within the first 20 scenario's the PC was shot 95% of the time. They weren’t challenged. Their badges weren’t seen. They carried their badges on the belt, around the neck, in hand near their weapon, and in hand up in the air.
  31. Plain Clothes Officers Study #2 Badges on belts were not readily identified because responders were focused on the PC officers' weapons in hand. Badges around the neck were not readily identified because responders were focused on the PCs' weapons and hands (in the role players' shooting stance, the neck badges were not visible). A badge held in the support hand next to a PC officer's weapon was not readily identified because responders focused on the PC's weapon and shooting stance. Even when the PC officers' weapon was taken away, they were fired upon because responders identified their shooting-stance behavior and thought the badge being pointed was a gun.
  32. Plain Clothes Officers “HALO” The most effective badge position identified was the “HALO” position. PC officers' held their badges high above their heads, rotating the badge around like a halo. This allowed the badge to be presented in all directions, as close to 360 degrees as possible. Contact teams were less apt to engage the PCs because they recognized the position as less threatening, even though the PC held a gun in the other hand. This position drew the attention of contact officers and bought enough time for them to focus on the raised hand holding the badge.
  33. Plain Clothes Response – Lessons Learned Train first responders that not everyone holding a gun is a suspect. Establish a challenge protocol to limit the likelihood of blue-on-blue error. (role-players being shot dropped down to 50% after stressing the importance of challenge procedures) The longer the PC presents himself holding a gun or displaying armed behavior, the higher the likelihood of being misidentified and fired upon. As a PC choosing to respond to an armed threat, it was recommend keeping your weapon concealed as long as possible as you maneuver to a position of advantage. Only present the weapon when you absolutely, positively have to engage threats.
  34. Plain Clothes Response – Lessons Learned After engaging and conducting necessary after-action procedures, immediately holster, conceal the weapon, move to cover, and be prepared to “Halo" your badge. Train your officers in situational awareness to understand they are an UNKNOWN person when in plainclothes and their behaviors when holding a gun may be perceived as a threat to other first responders (uniformed as well as plainclothes and off-duty).
  35. CONTACT INFORMATION

    Deputy Chief Jason Trevino jtrevino@washoeschools.net Sergeant Ray Price rprice@washoeschools.net Washoe County School Police 775-348-0285
More Related