Download

1 / 63
640 likes | 781 Views
Intermediate Level. Lesson 11 Evidence and Sampling Management. Lesson 11 Objectives. At the end of this lesson, you will Understand: Crime Scene Approach Types of Physical Evidence Proper Recording and Documentation at a CBRNE Incident CBRNE Sampling Procedures

E N D
Intermediate Level Lesson 11Evidence and Sampling Management
Lesson 11 Objectives At the end of this lesson, you will Understand: • Crime Scene Approach • Types of Physical Evidence • Proper Recording and Documentation at a CBRNE Incident • CBRNE Sampling Procedures • Transportation of Exhibits through Decon
Crime Scene Approach A CBRNE Incident is a Crime!!! Whether Actual or a Hoax, a CBNRE Event will result in ***A Criminal Investigation***
Crime Scene Approach Therefore Our response to a CBRNE Incident Must be treated as a Criminal Investigation
Crime Scene Approach • In Canada, the goal of a criminal Investigation is to determine who is responsible and to prosecute the offenders under the laws of Canada. • The determination of guilt is made by the courts • Our job is to gather all the evidence in a unbiased and professional manner
Crime Scene Approach The collection of Evidence is performed in many ways: • Ident:………….Crime Scene Examination • Medics:……….Victims and Casualties • Hazmat:……….Scene assessment and intervention • Bomb Techs:…The devices and the information from it
Crime Scene Approach As a member of an Interoperable CBRNE Response Team, you will not only be responsible for your regular duties but you may be required to assist other members of the team. This may include: • Assisting other team members from EMS, FIRE, EDU and Ident • And many other tasks you may or may not be familiar with • Attend Court
Crime Scene Approach Our primary goal is to Save Lives From an Immediate Threat or Danger Or From Prevention or Deterrence
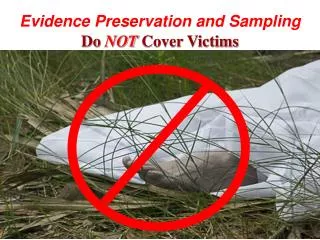
Crime Scene Approach When approaching a scene or while in a scene you must always be aware of the possibility of the existence of physical evidence. As Physical evidence is easily contaminated or destroyed.
Crime Scene Approach Therefore in your approach to a Crime Scene, You MUST: • Be able to describe the scene as you found it • Attempt to not move or disturb anything, and • Make note of anything you change or disturb
Crime Scene Approach Pre-plan your arrival to a scene based on the information you have received and your personal knowledge and experience as evidence may exist outside the scene This may mean arriving by a path not normally used and avoiding the “Path of Contamination”
Crime Scene Approach “Path of Contamination”: • Is the “Path” used by the suspect(s) entering, going through and existing the scene. • This area around the path of contamination is where the highest probability of finding physical evidence • Generally speaking it is usually the path (line) most direct between 2 points
Crime Scene Approach Physical Evidence may also be present outside the principle area of where the incident occurred, in the form of: • Tire and Footwear impressions • Discarded items or clothing from persons fleeing • Trash or garbage
Crime Scene Approach • Upon your arrival plan your entrance based on what you see and the information your have gathered • Avoid the Path of Contamination – this is the path used by the suspects, normally the most direct route in and out of a scene
Crime Scene Approach • If you must move something or something changes while you’re in a scene – record it in your notes • If you believe something is important and should be removed from the scene – Consult your operational command post, to have an Ident or the Police officer entered the scene • Make notes detailed notes
Crime Scene Approach Always be aware of the possibility of potential cross contamination with respect to CBRNE and Physical Evidence (IE – DNA, Hair, fingerprints)
Physical Evidence There are 3 types of Evidence: • Testimonial • Documentary • Physical Evidence
Physical Evidence Some of the most common physical evidence are: • Fingerprints • DNA • Footwear / Tire Impressions • Hair And Fibers • Physical Matches
Physical Evidence Physical Evidence: • If moved – Can be misinterpreted or discarded • Can be used to link scenes and suspects • Can be found in the scene, around the scene or on victims and suspect from the scene • Is Easily destroyed
Physical Evidence Physical Evidence may be: • Perishable due to climatic conditions • Visible or invisible to the naked eye • The only link between the scene and the suspect • Found almost anywhere – floor, ceilings, walls, on furniture, bodies, etc.
Physical Evidence Crime Scene FINGERPRINTS
Physical Evidence Fingerprint Identification is: • The most common means of Identification • The oldest means of Identification • The most reliable mean of Identification
Physical Evidence Fingerprints are: • Easily Destroyed • Often invisible (Known as latent) • The only means of positive Identification • Can be searched world-wide for Identification • Through N.C.I.S. (U.S.) and Interpol • Make up 80 % of all Physical Identifications • Fingerprints can be located on almost any surface.
Physical Evidence Fingerprints Good surfaces : - Glass – Lab Glassware - Smooth Plastic – Cd Cases - Some Papers – Bond paper - Painted or lacquered Surfaces - Poor Surfaces: - Rough – old wood - Porous - bricks
Physical Evidence DNA • Individual DNA is create at the point of conception • First used in England in the 1980’s • Is very individualizing – Except Monozygotic (Identical) Twins, Triplettes, etc • Extracting DNA - Decontaminates it
Physical Evidence GOOD SOURCES FOR DNA
Physical Evidence DNA DNA DEGRADATION • HEAT • FREEZE-THAW CYCLES • UV LIGHT • HUMIDITY • CHEMICALS • MICRO-ORGANISMS
Physical Evidence Other Types of Physical Evidence FOOTWEAR IMPRESSIONS TIRE TRACKS
Physical Evidence Other Types of Physical Evidence FIBERS PHYSICAL MATCH
Proper Documentation at a CBRNE Incident Documentation of a Crime Scene is one of the most important things a First Responder does. It begin the moment a call is received and continues until everything else is done. The notes you take will depend on your Services and Department. This will include your departmental reports, logs and most important - personal note books
Proper Documentation at a CBRNE Incident Your notes are considered an important investigative tool, as they are a: - Permanent Record - Guide the investigation - Reconstruction tool - Memory aid - Record of conduct
Proper Documentation at a CBRNE Incident Your notes should include: - Date, time and location - Full names, addresses and phone numbers - Investigative observations and activities -Collection, identification and handling of evidence - Diagrams
Proper Documentation at a CBRNE Incident Scene Sketch
Proper Documentation at a CBRNE Incident Best Practices - Note Taking: • Complete, accurate, readable and done ASAP • Investigative material only • Security • Business language • No personal opinions • Common abbreviations • Expand via memos and reports
Proper Documentation at a CBRNE Incident Best Practices: Paper Notes • ID your notebook • Number pages • Sequence • Maintain pages • Write legibly • No blank pages • Don’t erase • New idea = new notation
Proper Documentation at a CBRNE Incident Use of Notes at Legal Proceedings • Original notes • Legal consultation • Permission to reference • Do not read • Open to inspection and questions
Proper Documentation at a CBRNE Incident What is proof? The establishment of fact by evidence
Proper Documentation at a CBRNE Incident Continuity: • This refers to evidence and the chain (or trail) it takes from the time it is first observed at a scene until it arrives in court. • You must be able to establish that the chain of custody is not broken and be able to explain in detail any changes to the exhibit.
Proper Documentation at a CBRNE Incident Continuity will be proven by: In short, you recording any and all your involvement with any particular exhibit: • From your first involvement with it, to • Any changes that occurred while you possessed it • To Who you gave it to
Proper Documentation at a CBRNE Incident Your notes will prove continuity by recording:
The CBRNE Sampling Procedures Type of samples to be gathered at a CBRNE site? • Liquid • Air & Particulate residue • Solids
The CBRNE Sampling Procedures • The quantity and procedures will vary from Chemical to Biological to Radiological to Explosive • When taking samples - ensure you have a clean, uncontaminated work area and it is as possible close to the sample to be taken • ***Follow the steps and protocols describe by field of expertise***
The CBRNE Sampling Procedures • Changes gloves between each and every sample • Setup a new clean area for each sample if there was a possibility of contamination • Use new sampling tools for each sample – pipette, swab or swab • Complete each sample before starting on the next
The CBRNE Sampling Procedures • Mark each Sample with unique Identifier including : • Your initials • Date & Time • Where it was seized from
The CBRNE Sampling Procedures • Package the sample in accordance with each discipline as they have described • Complete a Sample Data Sheet for each Sample • An S.D.S. is required to accompany each individual sample and be submitted with it and the sample will not be accepted without it • You must include all presumptive test done on that sample – IE.: Rad Meter, E-Cam, H.H.A.
The CBRNE Sampling Procedures Example of a RCMP Sample Data Sheet
The CBRNE Sampling Procedures Pipette and Pump Pipette Pump Transfer Pipette Pipette