Download
1 / 4
40 likes | 76 Views
Solar cell cutting technique at the plant, utilizing an optical device cutting machine to cut off the cells. The size of a cell is determined by the electric power of the panels you want to use. This technique is not used for full cell size modules.<br>

E N D
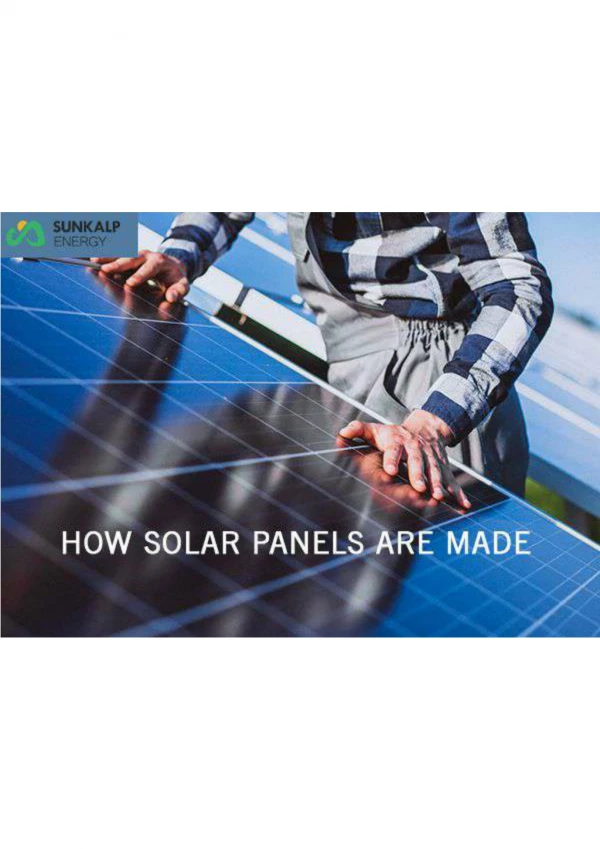
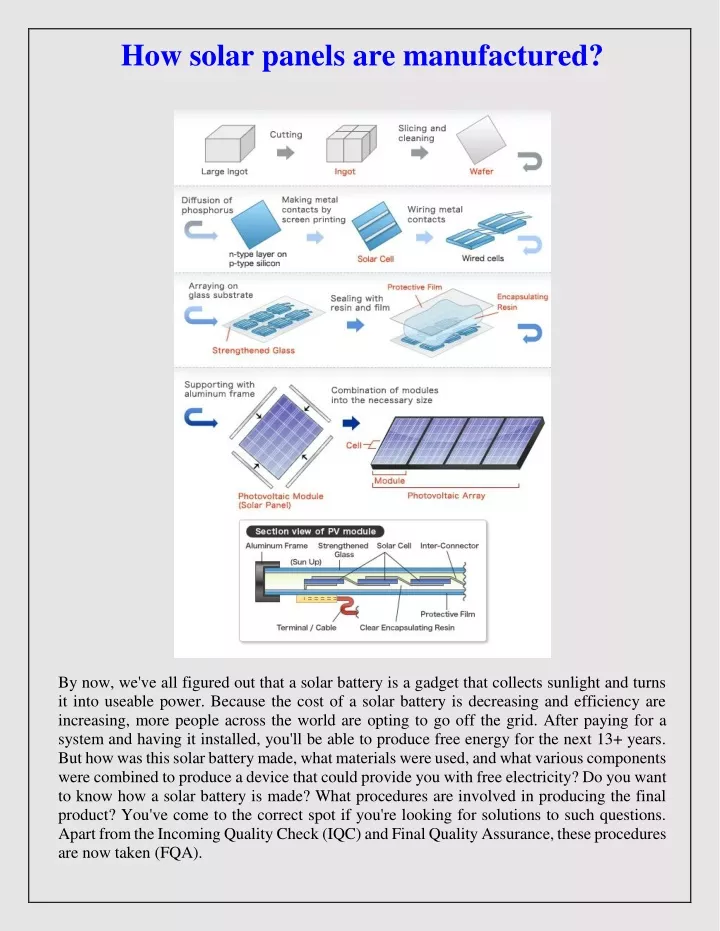
How solar panels are manufactured? By now, we've all figured out that a solar battery is a gadget that collects sunlight and turns it into useable power. Because the cost of a solar battery is decreasing and efficiency are increasing, more people across the world are opting to go off the grid. After paying for a system and having it installed, you'll be able to produce free energy for the next 13+ years. But how was this solar battery made, what materials were used, and what various components were combined to produce a device that could provide you with free electricity? Do you want to know how a solar battery is made? What procedures are involved in producing the final product? You've come to the correct spot if you're looking for solutions to such questions. Apart from the Incoming Quality Check (IQC) and Final Quality Assurance, these procedures are now taken (FQA).
Step 1: Cell Cutting Solar cell cutting technique at the plant, utilizing an optical device cutting machine to cut off the cells. The size of a cell is determined by the electric power of the panels you want to use. This technique is not used for full cell size modules. Step 2: Stringing method Solar stringing is a fully machine-driven technique in the manufacturing. We at Loom Star have a habit of victimizing any cell that is larger than 39 metric linear units. These cells are then put together or soldered together. The negative half is the greater Sun facing aspect (Blue / Black aspect), while the extremely inexpensive white side is favorable. Step 3: Solar Glass In the manufacturing, the solar glass technique When the cells are strung together, the machine transfers them to tempered glass that has an olefin vinyl acetate (EVA) encapsulating layer on top. Step 4: Visual scrutiny Solar A technician inspects the cells for any faults or errors in any string using the visual inspection technique at the plant. Step 5: tape recording In the manufacturing, solar tape recording is used. A technician tapes the cells into a matrix alignment during recording. Step 6: association Solar connections are made at the factory and then soldered together. Any extra material is removed. Step 7: Insulate Module association After assembling the Solar Model in the factory, the next step is to insulate the connections with a back sheet and EVA encapsulation. This technique keeps the module dry and mud- free. Step 8: Mirror Observation In the factory, the module is visually examined once more for any dirt particles, color match, and other issues.
Step 9: EI Testing The actual testing of the module produced to date is the solar EL testing technique at the plant, also known as EI Testing or Electroencephalogram examination. It's a testing technique in which the module is completely scanned in an EI machine. We can easily detect any dead or low-power cell, tangency cells, fractures, and so on. If such a mistake is discovered, the module is returned to the manufacturer for correction. Step 10: Lamination method In the manufacturing, solar lamination is used. At 140 degrees Celsius, the module is laminated. It takes around twenty minutes to complete this technique. After lamination, the modules were allowed to cool for 10-15 minutes until they reached room temperature. Step 11: Trimming Back Solar Trimming Back Sheet Method In the manufacturing, this process entails separating the excess material from the back sheet in order to produce perfectly shaped modules. Step 12: Frame Cutting Frames of different sizes are cut out for surrounding the panels in this stage of the solar frame cutting process at the plant. Step 13: Punching the Frame After the solar frames are punched at the factory, holes are punched inside the frames for mounting and grounding the panels.
Step 14: sealer filling / Framing Sealant Filling A sealer protects the panels from air, dust, and moisture while also assisting the module's secure attachment to the frame. Once the frame is attached to the module, it is transported back to the framing machine to be punched to ensure it is permanently connected to the frame. Step 15: Fixing Junction box In the manufacturing, the solar junction box technique is used. A junction box is attached to the module, and the sealer is used to secure it to the structure. The connections were then soldered and allowed for 10-12 hours to cure, ensuring that the structures were completely dry and correctly linked. Step 16: Clean Module The module is then cleaned outdoors to remove any residues of dirt, foreign particles, or more sealer using the Solar Clean Module process at the plant. Step 17: Module Testing In the factory, the module is linked to examine its output current, voltage, and power, among other things. For each module's output data, a report is produced. For the benefit of the users, a back label (with all information) is attached behind the module. Finally, the module is sent to the quality assurance department, where it is checked for insulating resistance. For a second, a 3000 V DC is applied to it. If the panel can withstand the present, it passes; otherwise, it fails. After that, it's transferred to Mechanical Load for examination. Step 18: Packing Solar Factory packing technique Following Last Quality Assurance (FQA), this is the final stage in the module manufacturing process, in which the modules are securely packaged into large boxes for shipping and storage.