Download
1 / 25
260 likes | 509 Views
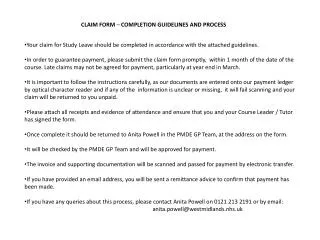
Electronic Warranty Claim Form. Purpose of Change. Eliminate the paper Warranty Failure Forms and move to an Electronic Warranty Claim Form . WIP; Decrease the amount of time from work completion until warranty submission.

E N D
Electronic Warranty Claim Form Rev. B 2.23.2011
Purpose of Change • Eliminate the paper Warranty Failure Forms and move to an Electronic Warranty Claim Form. • WIP; Decrease the amount of time from work completion until warranty submission. • Errors; Decrease the amount of errors sent on paper forms through required fields. • Research time will be greatly reduced via electronic paper trail of warranty claim form. Rev. B 2.23.2011
The Nuts and Bolts • How is this going to work? • Summarized in 5 steps… Rev. B 2.23.2011
The Nuts and Bolts • Step 1: (Technician) • While the technician is logged into their job in Intellitech they will type their ‘Complaint’, ‘Cause’ and ‘Correction’ onto the WO before logging out of the job. • Each segment will require it’s own CCC to be filled out. • Note: Remote technicians without VPN connection will have the ability to still send this form without using Intellitech. Rev. B 2.23.2011
The Nuts and Bolts • Step 2: (Technician) • After all segments of the repairs have been complete… • …and the technician has typed their comments into Intellitech, they will open the Electronic Warranty Form, on the intranet and send the claim to Candace. • Again, please do not send a claim as each segment is complete, only when all repairs are complete. Rev. B 2.23.2011
The Nuts and Bolts • Step 3: (Technician) • Once the technician submits the form it will automatically send an email notification to Candace, the Branch Admin, Service Mgr as well as the Technician if they have email access. Rev. B 2.23.2011
The Nuts and Bolts • Step 4: (Technician Admin) • Once the technician has sent the form they will document the date and time the form submitted. This should be noted on their paper WO. • Mark the WO complete and turn into their Branchs Admin to arrange normal process of PU or Del of the equipment. Rev. B 2.23.2011
The Nuts and Bolts • Step 5: (Admin) • After the equipment has been picked up/delivered the Admin should retain and file the original technician’s WO locally as they do with all other customer pay “code 5” WO’s. • DO NOT SEND PAPERWORK TO WESTMINSTER. Rev. B 2.23.2011
Questions thus far… • Before we begin going into the system, are there any questions? Rev. B 2.23.2011
Intellitech 2 1 3 Rev. B 2.23.2011
Intellitech • The technician should click on the ‘Complaint’ tab on the left side (see ex: #1) of the screen and enter the customer’s complaint and click ‘SAVE’ (see ex: #2). • The technician should click on the ‘Cause’ tab on the left side of the screen and enter the cause of failure for that specific segment of the repair and click ‘SAVE’. • The technician should click on the ‘Correction’ tab on the left side of the screen and enter the correction for that specific segment of the repair and click ‘SAVE’. Rev. B 2.23.2011
Intellitech • While the technician is in the “Logged On” screen they will want to make sure to update machine hours and verify that the serial number is accurate, this will make the process of sending the Electronic Warranty Claim Form easier. (see ex: #3) Rev. B 2.23.2011
Intellitech • Does the technician still need to… • Update DDC Codes? • Add memos for non-essential CCC comments? • Log on and off jobs? • Selecting premium codes? • YES! • This is not taking place of any other normal process, this is simply taking place of the hand written Warranty Forms. Rev. B 2.23.2011
Electronic Warranty Form Enter your WO # and select your segment – then click ‘Search’ Rev. B 2.23.2011
Electronic Warranty Form 1 2 3 4 Rev. B 2.23.2011
Electronic Warranty Form • Section 1; Verify model, serial and machine hours are correct. • If they are correct click the check box for verified • If they are not… type over with correct info and proceed Rev. B 2.23.2011
Electronic Warranty Form • Section 2; You need to verify that all of the parts listed are correct with the correct quantities. The parts shown should be either your key part failed and/or your associated parts. • If they are click the ‘verified’ box and proceed • If they are not you will need to stop and get the parts/quantities corrected before proceeding • Please note, this is a critical step as your warranty claim will be processed with these parts all listed to this specific failure and could influence your warranty payment from the manufacturer. Rev. B 2.23.2011
Electronic Warranty Form • Section 3; Enter your key part # failure and quantity from section 2 or if the key part was not replaced and billed to the segment, than type the key part # that failed. • From the drop down menu, select ‘Type of Failure’, type the ‘Area of Machine’ the failure happened and select the ‘Down Time’ • Next the hours you have billed to the segment will be pulled from the WO as a reference for you – You will need to type the # of diagnostic hours and repair hours • Please note, this is a critical step as your warranty claim will be processed with the hours you input in this area and could influence your warranty payment from the manufacturer. • If you have a DTAC case # or Special Authorization # (or agreement) enter in appropriate fields. • Your CCC will pull from what you typed and saved in Intellitech • If you DID NOT type the notes in Intellitech or are a remote tech, you can type your CCC on this form. Rev. B 2.23.2011
Electronic Warranty Form • Section 4; This section is to advise Candace who the warranty claim will be submitted to • From the drop down menu select the ‘Equipment Manufacturer’ i.e. • Deere, Bobcat, Toro, Honda, Stihl, Echo, MTD and Other short line vendors. • Engine failures will have a separate selection of manufacturers as well as required fields, which will be promoted when you select the ‘Component Failure’ • After you have satisfied all required fields of the form it will automatically refresh and at the bottom you will get a ‘Update’ button that will appear Rev. B 2.23.2011
Electronic Warranty Form Rev. B 2.23.2011
Electronic Warranty Form • Once the ‘Update’ button has appeared click it to lock in your information filled out on the form. • The form will automatically refresh and will prompt you to select your tech ID from the drop down menu. • Once you select your tech ID click ‘Submit to Warr Dept’. • Once you click ‘Submit to Warranty Dept’ the claim will be emailed to all of the aforementioned parties. Rev. B 2.23.2011
Electronic Warranty Form Rev. B 2.23.2011
Email Sent Page Rev. B 2.23.2011
Email Screen Shot Rev. B 2.23.2011
Final Questions • Intranet - Finch Services Rev. B 2.23.2011