Download

1 / 37
370 likes | 452 Views
Route.It is a UWF system that streamlines processes by sending online documentation to multiple employees for seamless completion. Learn how to initiate, detour, work with proxies, and track routes for efficient workflow management.

E N D
ROUTE IT PROCESSNAME HERE YOUR NAME HERE YOUR DEPARTMENT NAME HERE
Route It is a UWF system that sends a form or other online documentation to multiple employees who each do their part to complete a process. After one person completes his or her task, the route is sent to the next person in the process. What is Route It?
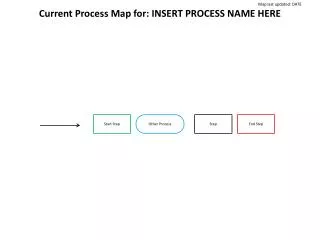
Next Steps Initiator The initiator clicks a link in Argus to open the Route It form. Once completed, the form is sent to the next person in the process. The next person in the process receives an email notification and an item in their Route It inbox. They must take action before the route moves on to the next person in the process. Request a Key Inbox in Argus ROUTE NAME HERE End of Route ENTER FINAL RESULTS OF THE ROUTE HERE
Starting a Route It process • If you receive a route from someone else • Detouring a route • Working with proxies • Tracking a route Topics
You are the initiator Starting a Route It Process
Click a link with a cog icon. Starting a Route It Process
Initiator form. Starting a Route It Process
Next page of form contains the Route It document and buttonsto completethe request Starting a Route It Process
ViewDocument Starting a Route It Process
Use buttons to complete the request Starting a Route It Process
Comments:Shared or private • Finish: Sends form to next person in process • Delete Request: Cancels request • Detour Request: Sends to someone not normally included in the process • Save and Return to Route List: Saves any information you entered so that you can complete the form later Starting a Route It Process
You are the second person in the route process and must take action. If you Receive a Route…
Two ways to receive a route • EmailNotification • Route It box onDirectory tab inArgus If You Receive a Route…
Step One: Click the link in the main menu If You Receive a Route…
Step Two: View Document If You Receive a Route…
Step Three: Respond • Comments • YOURBUTTON • YOURBUTTON • Detour • Save and return to Route List If You Receive a Route…
You are detouring the route Detouring a Route
Sends the route to someone who is not normally included in the route process • Use detours when… • You need information from someone else in order to complete the task • You want to make someone aware of the task being performed Detouring a Route
Step One: Press the Detour button from the Route It process Detouring a Route
Step Two: Select the person you want to detour to. Detouring a Route
Step Three: Enter comments and select detour method Detouring a Route
Return for your review and decision: After the detour, the route will return to you before going to the next person. Use this option when your task depends on input from the person you are detouring to. • Continue routing with your approval: Indicates that you approve the route, but sends the route as an FYI to the person you are detouring to. The task will not return to you after the detour. Detouring a Route
You are completing the detour If you receive a detour…
Notification via email (includes comments) If you receive a detour…
View document, enter comments, and use buttons to complete the detour If you receive a detour…
You are assigning a proxy to perform Route It tasks on your behalf Working with Proxies
Proxies are other UWF employees that you designate to perform tasks on your behalf. • Use to ease your workload or to handle your tasks when you are out of the office. • Be sure to choose a proxy that is appropriate for the task. Working with Proxies
“my proxies” page: use to add and delete proxies, and view your proxy assignments Working with Proxies
Different proxies can be set for your different roles and workflow tasks Proxy will receive email notification when a task requires action Working with Proxies
Proxies receive and work with Route It tasks just like the person that they are a proxy for. Working with Proxies
Keep in mind: Only one person can work on a task at a time. If a task is not completed or returned to the Route It list, it will be locked. Yellow Lock: Locked to someone else. That person must press “Return to Route List” before you can open the task. Red Lock: Locked to you. Only you can open the task. Working with Proxies
Tracking allows you to see what stage the route is at and any comments entered. • Anyone in the route process can track the route once it is past their part of the process. Tracking a Route
Open Route It from the box on the Directory tab. Tracking a route
The “help” menu provides instructions for each step in the process. Getting Help
Documentation and online tutorials available in the IT KnowledgeBase or at http://uwf.edu/help/kb/routeit Learn More About Route It
![[Insert Advisor Name Here] [Insert Company Name Here]](https://cdn0.slideserve.com/147625/slide1-dt.jpg)


![[EVENT NAME HERE] [Date here}](https://cdn1.slideserve.com/2438501/event-name-here-date-here-dt.jpg)


![[Your Name Here]](https://cdn2.slideserve.com/3778141/your-name-here-dt.jpg)