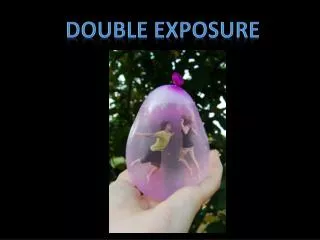
Double exposure
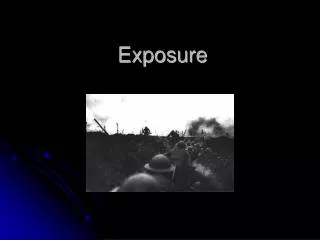
Double exposure. Double Exposure, or Multiple Exposure, is a photographic technique that combines 2 different images into a single image. .

Double exposure
E N D
Presentation Transcript
Double Exposure, or Multiple Exposure, is a photographic technique that combines 2 different images into a single image. The technique has been practiced for several years, and it became particularly famous recently, due to the fact that graphic editor like Photoshop can help to create the identical effect. Note the shadow in this photograph.
With double exposure technique, you can create certain effect like ghost image, mirror image, or simply merging a bright moon into the dark, lonely sky. The reason of using this technique varies, but they are surely created for same purposes – beauty and uniqueness.
Aisles In The Sky. “Some lovely cloud action and a nice vanishing point perspective on the aisle numbers.” (Image Source: Lomo-Cam)
Feelin Dizzy. Another example of how double exposure can emphasizes the feeling of the photo, pretty calm and chilling one. (Image Source: hodachrome)
Hideaway Hands Done without Photoshop, Dan Mountford is probably the genius who extended double exposure photography to become a new branch of art. (Image Source: •DΛN MOUNTFORD)
I Love You Magnificent piece that really showcases the specific effect that double exposure photography can achieve, I love this one! (Image Source: Experiment of the nature)
Open a photograph that you will be using for your background for your double exposure assignment.
Select a different image you wish to drag into your background image. • Make sure your “Layers palette” is open.
You can also expand or change the size of your selection by changing from “Edit in Standard Mode” to “Edit in Quick Mask Mode” (lesson 6) • Make a selection using any of the selection tools you learned about in lesson 4.
Feather the edges of the selection using the feathering tool located in the select area of your menu.
Use the “move” tool to drag the selection into your background photograph. Position the selection where ever you want with the “move” tool.
Change the size of the selection or layered photograph using “transform” or “free transform” (lesson 6).
Change the opacity of an object or layer; The Layers palette must be open. Move the slider to change the opacity
Use “Filters” to alter the image of a selection (which will later be our selection/layer in the double exposure).
Remember, and put to use all the tools and techniques you have learned throughout the year from your Photoshop lessons, including…….
Double Exposure Objectives Strive for a unified effect. Combine two images into a single photograph by using selections and the layering techniques Achieve visual coherence; an image that makes sense to the viewer. Developed an appropriate theme that inspires interest to the viewer