Download
1 / 29
290 likes | 384 Views
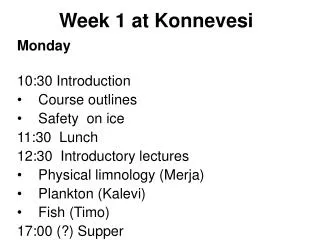
Week 1 at Konnevesi. Monday 10:30 Introduction Course outlines Safety on ice 11:30 Lunch 12:30 Introductory lectures Physical limnology (Merja) Plankton (Kalevi) Fish (Timo) 17:00 (?) Supper. Field work phase. Tuesday-Thursday 2 groups at small lakes (Merja & Kalevi)

E N D
Week 1 at Konnevesi Monday 10:30 Introduction • Course outlines • Safety on ice 11:30 Lunch 12:30 Introductory lectures • Physical limnology (Merja) • Plankton (Kalevi) • Fish (Timo) 17:00 (?) Supper
Field work phase Tuesday-Thursday • 2 groups at small lakes (Merja & Kalevi) • One group at Konnevesi (large lake) - the groups are rotated on daily basis - one English group - each group has specific responsibilities of reporting (Power Point) Friday (untill lunch) • Data handling
Small lake work • Two small lakes - depth mapping - snow, slush and ice thickness mapping - temperature mapping - oxygen mapping - ice structure - phyto- and zooplankton assemblages (vertical samples) - bottom animal samples
Small lake work… • Few other small lakes Limited number of measurements and samples according to the available time The aim of this part is to introduce into the variability between sites
Products • Depth maps (north-south oriented) • Lake area, volume, relative depth and hypsographic curve • Ice, slush and snow thickness distribution maps and graphs • Transect isotherms, and oxygen (longitudinal and orthogonal) • Variation in ice structure • Example vertical distributions of temperature, oxygen and oxygen saturation • Phyto- and zooplankton plankton species composition (tables) and vertical distributions (in relation to temperature and oxygen) of selected taxa • Bottom animals
Week 2 in Jyväskylä Monday-Wednesday - one group at Päijänne (part of day) - two groups looking at phytoplankton, and zooplankton samples in the lab - partly also preparing the results Thursday – Friday morning - finalising the presentations Friday afternoon - seminar presentations
Starting points • Evaluate the possible risks before entering on the ice • Think the practices how you would cope with the potential dangers e.g. - you are not alone - you have a mobile phone with enough battery life - availability of emergency transportation or access to warm place
Places of danger in winter field work: Running waters • Danger is radically emphasized by the fact that flow can draw you under the ice • Running waters are extremely unpredictable practically everywhere -Situation can change rapidly – never think that the same ice is equally thick next time
Places of danger in winter field work: Running waters • Basic rules: - never work alone - when moving on ice, one must verify the thickness of ice cover at each step - still additional precautions are compulsory (e.g. rope on the waist, possible availability of boat)
Places of dangerlake and pond waters • Flow of water is the key issue -In front of nflowing and outflowing rivers -Narrows -Ends of capes -Ground water seepage areas • Cracks in ice (unpredictable; whole winter)
Seasonality • Towards spring danger increases - melting begins -less cold -solar radiation starts to penetrate water - effects of flow are emphasized - ice structure is changing
Enhancement of safety • Ice needles (particularly useful in early winter) • Floating suit (note!, only extends life) • Rope ( • Rod • Skiis • Boat • Ice iron
Having fallen into ice • Get out of water • Try to limit cooling (it happens rapidly) - if you are near to lab or any equivalent >> go inside as soon as possible - if you can reach lab in reasonable time >> share dry clothes, if possible >> inform lab for necessary actions - If you are too far from lab (or equivalent) >> call help (or/and dry clothes, blankets, etc.) >> seek sheltered place and make fire
Having fallen into ice… 3.Return normal body temperature / have necessary treatment - bath - sauna
Coping with coldPersonal aspects • Wind is the worst enemy >> Rough guidelines: if weather is calm, avoid field work at temperature below -20 oC (when windy -10 oC) or use a shelter >> Clothing should be enough tight against wind >> Also face and ears should be protected (Note even in calm weather wind caused by driving on ice)
Coping with coldPersonal aspects… 2. Prevent getting wet >> Good watertight rubber boots >> Water repellent clothes >> Adequate gloves which still allow precise handling >> Do not get wet by swetting, too
Coping with coldPersonal aspects… • Keep yourself warm >> specific insulated boots >> enough insulated clothing for standing at one place - preferably clothing is layered so that during physically more demanding phases excessive heat accumulation can be limited (sometimes the use of zip may have similar function)
Coping with coldSampling devices etc. • All possible should be done ready in the laboratory before the field work >> markings (waterproof) >> systematic arrangement of bottles etc. >> prethinking of all details of work flow in the field 2. Keep all devices and bottles (particularly those with ground glass stoppers) dry before sampling
Coping with coldSampling devices etc. 3. During sampling minimize the time the devices are exposed to cold >> rapid well organised field practices >> a hole or or water filled depression in ice to keep devices when those are not needed (or sometimes warm water in insulated box) >> for critical cases a couple of liters hot water in a vacuum insulated bottle
Coping with coldSampling devices etc. • After sampling >> remove water (e.g. by blowing) from any parts of devices which must not freeze or immerse the whole device in water
Coping with coldSamples • Irrespective temperature immerse bottles with samples in lake water taken to a cool box - in critical conditions and with glass bottles this must be made within seconds • With box lid tightly closed bottles can be safely stored for hours in a few liters of cold lake water
Coping with coldSamples 3. In many cases, before going back to the laboratory it is necessary to immobilize sample bottles
Basic field tools • Ice drill • Ice tool • Ice saw • Slush sieve • Spade • Wet proof notebook
Moving on the ice • Short distances from the lab or the car - walking with a pulka • Long distances - motor sledge with pulka - notice fuel and oil requirements - some types unsuitable on bare ice - easiest way to get fallen into ice - in cold never leave into slush for longer time
Moving on the ice • In dangerous conditions - hydrocopter
Additional notes • When incubating something in lake, use iron wire to ascertain that you will not cut the hanging rope • Mark each hole made in ice which is larger than drill bore (e.g. with twigs of trees)
Winter limnology • Vacant research niche with exciting challenges BUT • Harsh and demanding season to work • Due to cold also more dangerous than in summer