Download
1 / 10
100 likes | 249 Views
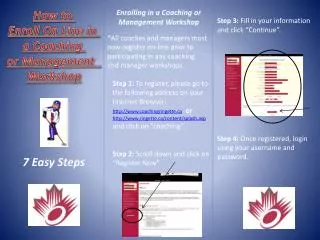
MOODLE COURSE SETUP IN 7 EASY STEPS. STEP 1 Disable pop-up blocker… Open Internet Explorer or your web browser. Click on “Tools” then choose “Pop-up Blocker” and select “Turn off pop-up blocker.” This enables Moodle activity windows to open when you click on their links. STEP 2

E N D
STEP 1 • Disable pop-up blocker… • Open Internet Explorer or your web browser. • Click on “Tools” then choose “Pop-up Blocker” and select “Turn off pop-up blocker.” This enables Moodle activity windows to open when you click on their links.
STEP 2 • Locate and log in…. • Use Internet Explorer (or another web browser) to navigate to your Moodle course where it is located on the Internet or a server. You should have a URL address to enter into the browser’s address bar. • If necessary, enter your username and password and click Login. These would have been set for you by your system’s Moodle administrator.
STEP 3 • Enter your course… • Click on the name of your course to access it. • Click the “Turn editing on” button in the gray bar on the top right.
STEP 4 • Your course settings… • Click on “Settings” in Administration block. • In the “Summary” field, type the purpose of your course. • At “Format” select “Topics format” to set up your course by subjects, chapters, or topics. Or, select “Weekly format” to set up your course by weeks. • At “Number of Weeks/Topics” select 10 to give you ten fields to work with. • At “Enrollment Key” set a password you will remember and give to students. (Change this after your students have enrolled to lock others out. Students only have to enter this the first time they log into the course and this enrolls them.) • Leave other settings at their defaults and click on “Save changes” at the bottom.
STEP 5 • Edit your profile… • Click on your name in the top right corner of the page. • Click on the “Edit Profile” tab. • Click on the “Show Advanced” button. • Make sure your first name, last name, email address, and City/Town are entered correctly. • Ensure that the rest of the settings match those in this graphic. • Enter a brief bio in the “Description” field. • Optional – Use the “Browse” button to upload a picture of yourself and list your hobbies in the Interests field. • Click on “Update profile” at the bottom.
STEP 6 • Add or Delete blocks… • Blocks are the fields with different headings (such as Latest News, Upcoming Events, and Recent Activity) on the left and right sides of the course page. • To delete any block you don’t wish your participants to see/use, click on the red x under the block heading. • To add other blocks, go to the Blocks field on the side of the page and click “Add” then choose the heading of the field(s) you wish to add.
STEP 7 • Set up your course framework… • Click on the edit icon in each field on the course page to put a heading in it. Name these by subjects, chapters, units, topics, weeks, etc. (i.e. Ch. 2: Plants) • Use “Add a resource” or “Add an activity” fields to set up the tools you want your students to use. Step-by-step directions for adding resources and activities will be taught in the coming weeks of this course.
HELPFUL HINTS • Always remember to save changes when editing. • To see your course as students will see it, click on “Switch role to” at the top right of the page and select “Student.” Click it again and choose “Teacher” to go back to your original role. • To hide a field or activity to prevent students from seeing it until you are ready, click the eye icon to close the eye and hide the related object. Click the eye icon again to open the eye and reveal the activity/resource. • For more information about a topic, click the question mark icon beside it.