Blood smear examination
781 likes | 2.55k Views
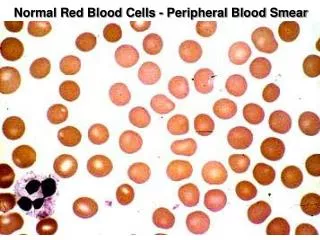
Blood smear examination . Making Blood smear. Preparation of blood smear. There are three types of blood smears: The cover glass smear. The wedge smear . The spun smear. The are two additional types of blood smear used for specific purposes Buffy coat smear for WBCs < 1.0×10 9 /L

Blood smear examination
E N D
Presentation Transcript
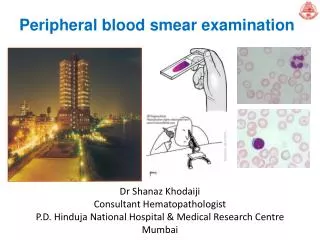
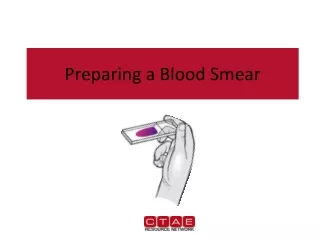
Blood smear examination Making Blood smear
Preparation of blood smear • There are three types of blood smears: • The cover glass smear. • The wedge smear . • The spun smear. • The are two additional types of blood smear used for specific purposes • Buffy coat smear for WBCs < 1.0×10⁹/L • Thick blood smears for blood parasites .
Wedge blood smear • Specimen : EDTA blood within 2 to 3 hours & collected to the mark on tube. • Not's : May change RBCs morphology such as Spiculated (crenated) cells if : • Excessive amount of anticoagulant to specimen • Old blood - long standing. • Warm environment (room temperature) may hasten changes.
Procedure • placing a drop of blood from mixed sample on a clean glass slide. • Spreader slide using another clean glass slide at 30-40 degree angle. • Control thickness of the smear by changing the angle of spreader slide • Allow the blood film to air-dry completely before staining. (Do not blow to dry. The moisture from your breath will cause RBC artifact.)
high HCT small angle low HCT large angle
Characteristics of a Good Smear • Thick at one end, thinning out to a smooth rounded feather edge. • Should occupy 2/3 of the total slide area. • Should not touch any edge of the slide. • Should be margin free, except for point of application.
MORPHOLOGIC CHANGES DUE TO AREA OF SMEAR • Thin area- Spherocytes which are really "spheroidocytes" or flattened red cells. True spherocytes will be found in other (Good) areas of smear. • Thick area - Rouleaux, which is normal in such areas. Confirm by examining thin areas. If true rouleaux, two-three RBC's will stick together in a "stack of coins" fashion..
Common causes of a poor blood smear • Drop of blood too large or too small. • Spreader slide pushed across the slide in a jerky manner. • Failure to keep the entire edge of the spreader slide against the slide while making the smear. • Failure to keep the spreader slide at a 30° angle with the slide. • Failure to push the spreader slide completely across the slide. • Irregular spread with ridges and long tail: Edge of spreader dirty or chipped; dusty slide • Holes in film: Slide contaminated with fat or grease • Cellular degenerative changes: delay in fixing, inadequate fixing time or methanol contaminated with water.
Biologic causes of a poor smear • Cold agglutinin - RBCs will clump together. Warm the blood at 37° C for 5 minutes, and then remake the smear. • Lipemia- holes will appear in the smear. There is nothing you can do to correct this. • Rouleaux - RBC’s will form into stacks resembling coins. There is nothing you can do to correct this
Slide Fixation & Staining LEISHMAN'S STAIN
Principle like Romanowsky Principle Leishman's stain : a polychromatic stain • Methanol : fixes cells to slide • methylene blue stains RNA,DNA === blue-grey color • Eosin stains hemoglobin, eosin granules ===orange-red color • pH value of phosphate buffer is very important
Staining Procedure • Thin smear are air dried. • Flood the smear with stain. • Stain for 1-5 min. Experience will indicate the optimum time. • Add an equal amount of buffer solution and mix the stain by blowing an eddy in the fluid. • Leave the mixture on the slide for 10-15 min. • Wash off by running water directly to the centre of the slide to prevent a residue of precipitated stain. • Stand slide on end, and let dry in air.
Causes & correction • Too Acid Stain: • insufficient staining time • prolonged buffering or washing • old stain • Correction: • lengthen staining time • check stain and buffer pH • shorten buffering or wash time
Too Alkaline Stain: • thick blood smear • prolonged staining • insufficient washing • alkaline pH of stain components • Correction : • check pH • shorten stain time • prolong buffering time
Performing A Manual differential And assessing RBC Morphology
Principle • White Blood Cells. • Check for even distribution and estimate the number present (also, look for any gross abnormalities present on the smear). • Perform the differential count. • Examine for morphologic abnormalities.
Principle • Red Blood Cells, Examine for: • Size and shape. • Relative hemoglobin content. • Polychromatophilia. • Inclusions. • Rouleaux formation or agglutination
Principle • Platelets. • Estimate number present. • Examine for morphologic abnormalities.
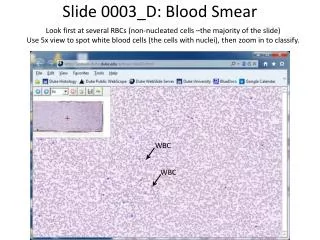
procedures • Observations Under ×10 • Check to see if there are good counting areas available free of ragged edges and cell clumps. • Check the WBC distribution over the smear. • Check that the slide is properly stained. • Check for the presence of large platelets, platelet clumps, and fibrin strands.
Observing direction: Observe one field and record the number of WBC according to the different type then turn to another field in the snake-liked direction *avoid repeat or miss some cells
Observations Under× 40x : WBC Estimates • Using the × 40 high dry with no oil. • Choose a portion of the peripheral smear where there is only slight overlapping of the RBCs. • Count 10 fields, take the total number of white cells and divide by 10. • To do a WBC estimate by taking the average number of white cells and multiplying by 2000.
Observations Under × 100: Platelet Estimates • Use the oil immersion lens estimate the number of platelets per field. • Look at 5-6 fields and take an average. • Multiply the average by 20,000. • Note any macroplatelets. • Platelets per oil immersion field (OIF) • <8 platelets/OIF = decreased • 8 to 20 platelets/OIF = adequate • >20 platelets/OIF = increased
Evaluate WBC Morphology • Note if any abnormal white cell morphology is present • Hypersegmented poly's (5 or more lobes) • Vacuolation of neutrophils • Toxic granulation of neutrophils • Dohle bodies • Atypical Lymphocytes • Smudge cells
Manual Differential Counts • These counts are done in the same area as WBC and platelet estimates with the red cells barely touching. • This takes place under × 100 (oil) using the zigzag method. • Count 100 WBCs including all cell lines from immature to mature. • Reporting results Absolute number of cells/µl = % of cell type in differential x white cell count
Observing and Recording Nucleated Red Blood Cells (nRBCs) • If 10 or more nucleated RBC's (NRBC) are seen, correct the • White Count using this formula: Corrected WBC Count = WBC x 100/( NRBC + 100) Example : If WBC = 5000 and 10 NRBCs have been counted Then 5,000× 100/110 = 4545.50 The corrected white count is 4545.50.
Tips on Diff's • Do not count cells that are disintegrating • smudge cells • eosinophil with no cytoplasmic membrane and with scattered granules • Pyknotic cell (nucleus extremely condensed and degenerated, lobes condensed into small, round clumps with no filaments interconnecting). • Basket cells
ABNORMAL DIFFERENTIALS • 200 Cell diff: a. WBC > 15.0 (>20.0 for babies under 1 month and labor unit) b. Three or more basophils seen. • If more than five immature WBC's are seen (or any blasts) let someone else diff slide and average results. • Correct WBC for NRBC's if you seen ten or more NRBCs/100 WBC. • Always indicate number of cells counted on diff. • If any cell type is extremely elevated (such as bands, monos, or eos > 20) indicate that you are aware of the abnormality by circling or checking on the card next to the results.
Recording RBC Morphology • Scan area using ×100 (oil immersion). • Observe 10 fields. • Red cells are observed for size, shape, hemoglobin content, and the presence or absence of inclusions. • Abnormal morphology: Red cell morphology is assessed according to See the following sample grading system. Note that red cell morphology must be scanned in a good counting area. Two questions should be asked • Is the morphology seen in every field? • Is the morphology pathologic and not artificially induced? Table 1 & 2 represents a system derived to determine a quantitative scale.
Red Blood Cell Morphology • A normal red blood cell should be approximately the same size as a normal lymphocyte nucleus or 2 normal sized red blood cells should fit side by side across a normal sized poly (not a hypersegmented poly).
Reporting results • Where possible use macrocytic and microcytic, rather than simply anisocytosis alone, when describing red cell morphology. • Use specific cell morphology when possible, rather than simply reporting poikilocytosis. • When red cells are normocytic, normochromic, report out as NORMAL. When abnormal morphology has been noted, DO NOT indicate normal on the report form. • EXAMPLE: 7-10 microcytic RBC's/OIF is reported out as: 2+ microcytosis or Moderate microcytosis.
Diameter:12-16 Cytoplasm : pink Granules: primary secondary Nucleus: dark purple blue dense chromatin Stab neutrophil
Diameter: 12-16 Cytoplasm : pink Granules: primary secondary Nucleus: dark purple blue dense chromatin 2-5 lobes Segmented neutrophil
Diameter: 14-16 Cytoplasm : full of granules Granules: large refractile, orange-red Nucleus: blue dense chromatin 2 lobes like a pair of glass Eosinophil
Diameter: 14-16 Cytoplasm : pink Granules: dark blue –black obscure nucleus Nucleus: blue Basophil
Diameter: small 7-9 large 12-16 Cytoplasm: medium blue Granules: small agranular large a few primary granules Nucleus: dark blue \round dense chromatin Lymphocyte
Diameter: 14-20 Cytoplasm : grey blue Granules: dust-like lilac color granules Nucleus: blue large irregularly shaped and folded Monocyte