Download
1 / 50
500 likes | 611 Views
This tutorial guides managers through creating a performance plan using a Performance Management System. It covers selecting rating periods, copying competencies, adding/deleting/changing objectives, and more. Estimated time: 25 minutes.

E N D
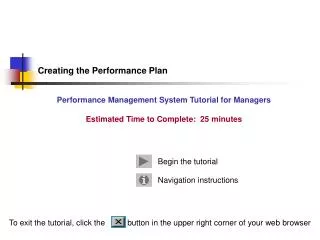
To exit the tutorial, click the button in the upper right corner of your web browser Creating the Performance Plan Performance Management System Tutorial for Managers Estimated Time to Complete: 25 minutes
Table of Contents • Process Overview • Selecting a Rating Period • Preventing Employee Access to the Performance Plan • Copying Competencies/Objectives from a Previous Plan • Adding/Deleting/Changing Competencies • Adding/Deleting/Changing Objectives/Factors • Adding Comments to the Progress Review/Comments Area • Certifying & De-Certifying the Performance Plan Click the Next button Back Next
Table of Contents This section of the tutorial will cover all steps necessary for creating a Performance Plan on an employee using the Performance Management System The Process Flow Overview gives you a visual idea of how the process works. Process Overview The Update or Create a Plan section guides you step by step through how to use the Performance Management System to create a Performance Plan on an employee. Update or Create a Plan To go directly to a section click the button to the left OR Click the Next button Back Next
HR sets up initial performance record in Lawson Process Overview Email notification is received by supervisor Supervisor creates performance plan on Manager Self-Service Supervisor & employee discuss the performance plan Supervisor certifies performance plan Email notification is sent to employee Employee certifies performance plan on Employee Self-Service Email notification is sent to supervisor Process Overview Here is the basic process for creating a performance plan These are only the main steps of the process There are intervening steps that will be covered in more detail in this tutorial Click the Next button Back Next
HR sets up initial performance record in Lawson Process Overview Email notification is received by supervisor Supervisor creates performance plan on Manager Self-Service Supervisor & employee discuss the performance plan Supervisor certifies performance plan Email notification is sent to employee Employee certifies performance plan on Employee Self-Service Email notification is sent to supervisor Process Overview As you can see, your first indication that a plan must be created is when you receive an email notification If you do not have email, the notification will come from your agency’s HR office Click the Next button Back Next
HR sets up initial performance record in Lawson Process Overview Email notification is received by supervisor Supervisor creates performance plan on Manager Self-Service Supervisor & employee discuss the performance plan Supervisor certifies performance plan Email notification is sent to employee Employee certifies performance plan on Employee Self-Service Email notification is sent to supervisor Process Overview Now let’s begin creating a new performance plan! Click the Next button Back Next
Creating the Performance Plan From the Performance Management Main Menu-Manager screen, click the Create/Update an Uncertified Plan button. If you do not know how to get to this screen, please review the Getting Started section of this tutorial by clicking the button in the upper right corner to return to the Table of Contents. Click the Next button Back Next
Creating the Performance Plan The Plan Menu appears showing the name, process level, and current position of the employee you selected from your Direct Reports screen. Click the Next button Back Next
Creating the Performance Plan The most current rating period shows in the Select Rating Period area. Click the Next button Back Next
Creating the Performance Plan The rating period dates are system generated based upon the dates entered by HR when the initial performance record is set up in HRMN. After the initial dates are set up, the subsequent rating periods will automatically generate after each performance review is completed. Click the Next button Back Next
Creating the Performance Plan By checking the Prevent Employee Access box you can prevent your employee’s ability to view the performance plan. Click the Next button Back Next
Creating the Performance Plan The Prevent Employee Access feature enables you to create the performance plan prior to your one-on-one discussion with your employee. One of the many benefits of the performance management system is the optional participation of your employee in creating and/or reviewing their performance plan before certification. In order to do this, the Prevent Employee Access box must be un-checked to allow the employee access to the plan from their self service account. Once you have completed and certified the plan, you will not be able to prevent employee access to the plan. Click the Next button Back Next
Creating the Performance Plan For this tutorial we will leave the box checked and prevent employee access. Click the Next button Back Next
Creating the Performance Plan Another benefit of the Performance Management System is the ability to copy the competencies and objectives from a previous plan to use in a new plan. Click the Next button Back Next
Creating the Performance Plan If you use the copy previous plan feature, you will see the competencies & objectives of the previous plan and be able to make changes to them. If this is a new employee, or the first performance plan using this system, there will be no data to copy until the first performance plan and review have been completed and certified. Click the Next button Back Next
Creating the Performance Plan To begin creating the first performance plan in the new system, you will need to select the competencies that will be evaluated for this rating period. To do this, click the Competencies button. Click the Next button Back Next
Creating the Performance Plan The Selected Competencies Screen appears showing any required competencies based on your employee’s job group code. Group 1 employees do not have any required competencies; therefore, you will be sent directly to the Select/Add Competencies screen. Click the Next button Back Next
Creating the Performance Plan To add a competency click the Select/Add Competencies button. The Select/Add Competencies screen appears. Any competencies listed on the previous screen will already be selected on this screen. Click the Next button Back Next
Creating the Performance Plan To add a competency click the box to the left of the competency. To save, click the Save Selections to Plan button. Click the Next button Back Next
Creating the Performance Plan When you return to the Selected Competencies screen, only your selected competencies will be listed. Click the Next button Back Next
Creating the Performance Plan To delete a competency, click the check box under the Delete column to the right of the competency. Then click the Save Changes to Current Plan button. Click the Next button Back Next
Creating the Performance Plan You will be prompted to verify the change. Click OK to save changes to the Selected Competencies. The competency you selected will be deleted from the Selected Competencies screen. Click the Next button Back Next
Creating the Performance Plan The Full Description button next to each competency provides additional information/details about the competency. This text box is informational only and cannot be modified. Click the Next button Back Next
Creating the Performance Plan The Comments button allows you to add additional comments to the competency. The comments should be specific to your employee’s job. Click the Next button Back Next
Creating the Performance Plan Enter your comments into the text box. You are limited to 10,000 characters, including spaces, for this text box. Click the Next button Back Next
Creating the Performance Plan Each text box has a spell check feature available. You must have Microsoft Word on your computer in order to use this feature. If your web browser is not properly set up, a text box will appear with instructions on how to adjust your web browser settings to enable this feature. Otherwise, the spell check box appears. Click the Next button Back Next
A red asterisk ( ) will appear next to the comments button indicating that there are comments entered for this competency. Creating the Performance Plan To Save, click the Save Comments button. Then click the Back to Selected Competencies button. Click the Next button Back Next
Creating the Performance Plan The Development Plan button allows you to add development details to the competency. Click the Development Plan button. Click the Next button Back Next
Creating the Performance Plan Enter your development plan details into the text box. You are limited to 10,000 characters, including spaces, for this text box. Again, the a spell check feature is also available. Click the Next button Back Next
A red asterisk ( ) will appear next to the development plan button indicating that there are development plans entered for this competency. Creating the Performance Plan To Save, click the Save button. Then click the Back to Selected Competencies button. Click the Next button Back Next
To return to the Selected Competencies screen, click the in the upper right-hand corner of the web browser screen. Creating the Performance Plan You also have access to the Behaviorally Anchored Rating Scales (BARS) documentation from this screen. The link directs you to the appropriate group information based on the group code entered in the HRMN system. Click the Link to BARS Document button. Click the Next button Back Next
Creating the Performance Plan After completing this section of the performance plan, click the Save Changes to Current Plan button then the Return to Plan Menu button. Click the Next button Back Next
A red asterisk ( ) will appear next to the Competencies button Indicating that competencies have been selected and comments added to this area. Creating the Performance Plan Click the Next button Back Next
Creating the Performance Plan Your next step is to add objectives to the performance plan. Click the Objectives/Factors button. Click the Next button Back Next
Creating the Performance Plan When you first enter this area, a blank text box will appear on your screen. Enter the first objective in to the text box. You are limited to 3,000 characters, including spaces, in this text box. Again, the spell check feature is available to you. To save this objective, click the Save Changes button. Click the Next button Back Next
Creating the Performance Plan To add a new objective, click the Add New Objective button. Each objective will be labeled with consecutive numbers and shown on the blue bar in parentheses. Click the Next button Back Next
Creating the Performance Plan If you copied the objectives from a previous plan, the first objective with text will appear on your screen. Again, each objective will be labeled with consecutive numbers and shown on the blue bar in parentheses. Click the Next button Back Next
Creating the Performance Plan You can navigate to each objective by clicking the Next or Previous buttons at the bottom of the screen. Click the Next button Back Next
Creating the Performance Plan If you do not have changes to the copied objectives, click the Save Changes button. The objectives from the previous plan will be saved to the new plan. Click the Back to Plan Menu button to return to the Plan Main Menu screen. Click the Next button Back Next
Creating the Performance Plan To add a new objective, click the Add New Objective button. A new blank objectives screen appears. Enter the next objective into the text box. When each objective is saved the system will number it automatically. Click the Next button Back Next
Creating the Performance Plan Now let’s go over how to delete an objective. First you will need to navigate to the objective you want to delete by clicking the Next or Previous buttons at the bottom of the screen. For this example, we will delete objective 3. Click the Next button Back Next
Creating the Performance Plan Click the Delete this Objective button. A warning message will appear verifying that you want to delete this objective. Click OK to delete the objective or Cancel to return to the Objectives screen. For this example, we will click OK to delete. Click the Next button Back Next
Creating the Performance Plan The objectives will re-number automatically after each deletion. Click the Next button Back Next
A red asterisk ( ) will appear next to the Competencies button Indicating that objectives have been added to this area. Creating the Performance Plan To make changes to an existing objective, select the objective you want to edit, then click in the text box and make changes. When finished, click the Save Changes button. Then, click the Back to Plan Menu button. Click the Next button Back Next
Creating the Performance Plan The Progress Review/Comments Area can be used by both you and your employee to communicate progress and issues. Click the Progress Review/Comments button. Click the Next button Back Next
Creating the Performance Plan The Progress Review/Comments screen appears. To add comments, click in the Supervisor text box. To save comments, click the Save Supervisor Progress Review/Comments button. Click the Next button Back Next
A red asterisk ( ) will appear next to the Progress Review button Indicating that comments have been added to this area. Creating the Performance Plan Click the Back to Plan Menu button to return to the Plan Main Menu. Click the Next button Back Next
Creating the Performance Plan Now would be the time to schedule your face-to-face meeting with your employee to discuss the performance plan. If you would like your employee to review the plan on-line prior to your discussion, the Prevent Employee Access button must be un-checked. After you’ve had your discussion and made any necessary changes to the plan, you are ready to certify it. Click the Next button Back Next
To exit this section, click the button in the upper right corner of your web browser • This concludes the Creating the Performance Plan section of the Performance Management System Tutorial for Managers. • If you have any questions on this section please contact your agency’s Human Resources Office or Performance Management Liaison. Back Next
Navigation Instructions These navigation buttons will show at the bottom of each screen in the tutorial Returns you to the first page of the tutorial you are in Will take you to the navigation instructions Takes you to the first screen of the tutorial section you are in Takes you to the previous screen Back Takes you to the next screen Next Takes you to the last screen of the tutorial section you are in Most screens will have some animation. When the animation is complete, you will be prompted to click on a button Click the Back button Back