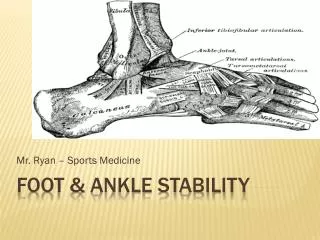
FOOT & ANKLE STABILITY
Mr. Ryan – Sports Medicine. FOOT & ANKLE STABILITY. Stages of Soft Tissue Healing. Stage 1 — Acute inflammatory, Approx. 2 days Phagocytes — Specialized cells that engulf and gobble up the dead cells. Leukocytes — Infection fighting white blood cells.

FOOT & ANKLE STABILITY
E N D
Presentation Transcript
Mr. Ryan – Sports Medicine FOOT & ANKLE STABILITY
Stages of Soft Tissue Healing • Stage 1— Acute inflammatory, Approx. 2 days • Phagocytes— Specialized cells that engulf and gobble up the dead cells. • Leukocytes— Infection fighting white blood cells. • Platelets— Cells that carry blood clotting materials. • Stage 2— Repair, 6 weeks-3 months • Fibroblast— Begin building fibers across the area of injury (form the scar) • Stage 3— Remodeling, 1 year or more • Rebuilding of tendons, ligaments, and muscles
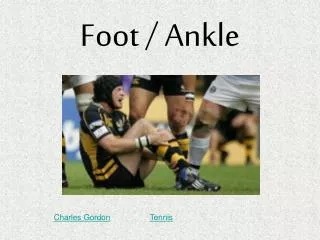
There are differing opinions on whether taping an ankle is as functional as it may seem… Some Athletic Trainers believe that wrapping an ankle provides support, stability, and aids in preventing injuries. While other trainers do not deny the benefits of wrapping an ankle, some believe that wrapping an ankle “WEAKENS” the joint by simply not strengthening it. (NATURE VS. NURTURE) TO tapeOR NOT TO tape…
Wrapping too tight limits range of motion and cuts off blood circulation. Wrapping too loose is caused by improper tape angle. This results in “blousing”. Leave open areas. (TAPE CUTS & BLISTERS!) Improper angles on Heel Locks. Accidentally poke, prod, or jostle the athlete. Drop or set down your roll of tape. ANKLE taPING– WHAT NOT TO DO…
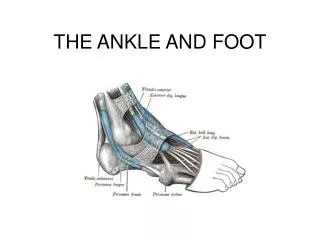
Make sure the athlete’s foot is at 90 degrees! Place three “ANCHORS” at approximately mid ankle. Where the gastrocnemius begins to contour to the achilies tendon. Make sure that it is not limiting ROM. The “ends” of your tape should start facing at an upward angle and work their way downward. This allows for the tape to contour to the lower limb. TAPING AN ANKLE STEP 1 – proximal anchors (3)
Place around the tarsal – metatarsal joint area. Pull tape from the Plantar side of the foot to provide support and prevent “blousing” STEP 2 – DISTAL ANCHOR (1)
Used to limit inversion/eversion movements in the ankle joint. Inversion sprains – Stirrups should be applied medial to lateral. Eversion sprains – Stirrups should be applied lateral to medial. 3 stirrups should be applied. 1. Covering the malleolus directly. 2. Front side of the malleolus. 3. Backside of the malleolus. All three stirrups should cross the heel/calcaneous at the same point. STEP 3 – STIRRUPS (3)
These strips should be placed underneath the proximal anchors. Until 1” from the bottom of the foot. They help to secure the stirrups and provide support. Pull tape from the achilies tendon side. The “end pieces” of tape should be facing downward. STEP 4 – CLOSE UP – CIRCULAR STRIPS
Begin on lateral side of the ankle using ½ the tape above malleolus. Tape angling down and posterior under the calcaneous. Come up to the dorsal side of the foot towards the medial malleolus. Go down and around the calcaneous. Come up to the dorsal side and finish. STEP 5 – HEEL LOCKS (2)
Starting on the lateral side of foot Bring the tape over to the medial side To the arch of the foot and under the foot. Continue around the back of the ankle and finish where started. STEP 6 – FIGURE 8
Place more strips around to secure heel locks. Check for gaps and cover them with strips. Be sure there are no significant folds in tape to avoid blistering or cuts. STEP 7 – CLOSE UP