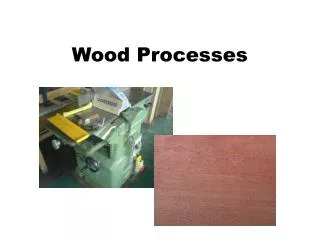
Wood Processes
Wood Processes. PRODUCT DESIGN. Wood Turning. The Lathe. Wood Turning. This machine is a piece of equipment which is used to turn timber into round shapes, like round table legs, lamp bases and wooden bowls.


Wood Processes
E N D
Presentation Transcript
Wood Processes PRODUCT DESIGN
Wood Turning The Lathe
Wood Turning • This machine is a piece of equipment which is used to turn timber into round shapes, like round table legs, lamp bases and wooden bowls. • The timber blank is held in the machine and a cutting tool is brought into contact with the revolving wooden blank which gradually takes on a cylindrical shape as wood is cut away. • The woodturning lathe is a relatively simple machine consisting of two stands, a bed, a headstock, a tailstock, toolrests and electric motor providing the drive through a system of pulleys and a belt. headstock faceplate tailstock toolrest electric motor bed
The Lathe • Wood turning is the process of forming round objects on a lathe. • There are two methods of turning, between centres and faceplate turning. • Turning between centres is used to produce long cylindrical items such as table legs. • Turning with a faceplate is used to produce items such as bases or bowls. As the wood rotates, special cutting tools are used to create shape. between centres faceplate turning
The Power Router Product Design
Routing • Routers are typically used to cut grooves, hollow out larger areas and create decorative trims along the edge of a piece of wood. The shapes that can be cut by your router are limited only by the number of router bits that you own.
Routing • Router bits can be categorised in two camps: edge bits and non edge bits. Edge router bits have small nylon (or metal) wheels on the bottom of them (see picture) that run along the wood. This allows you to rout along the edge of the wood without using a fence. Non-edge bits do not have this wheel, and are therefore more commonly used when routing a groove down the middle of a piece of wood. However, they can also be used along the edge of the wood as long as you use a rip fence or a router table.
Routing • To rout a straight groove, either use a rip fence, a router table or clamp a straight rule across the wood so that the router can guided along it. It is important to note that there is a right and wrong way to run your router along the edge of a piece of wood. Typically routers rotate in a clockwise direction (when viewing the router from the top). It is therefore best to move the router from the left towards the right (when facing the wood). Routing in the wrong direction will cause the router bit to dig into the wood and may cause splintering of the wood. To ensure that your router abides by the left to right rule, consult your router manual. • Router bits are made out of either High Speed Steel (HSS) or are Carbide Tipped. Carbide Tipped are far better, although they are significantly more expensive. However, as Carbide Tipped bits last up to 20 times longer, they do work out to be cheaper in the longer term.
Spindle Moulding Product Design
Fence Work piece Tool Table Spindle Moulding • Spindle moulders are mostly used for cutting mouldings and certain woodwork joints. The machine consists of a cutter block that rotates at high speed on a vertical spindle protruding through a hole in the worktable. Adjustable fences guide the work past the cutter block. A large variety of shaped cutting tools are available for spindle moulders. All wood working machines need to be handled with care, but a spindle moulder can be particularly dangerous.
Spindle Moulding • Special purpose spindle moulding machines are made for industry. The range of mouldings is vast and most timber merchants carry large stocks. • Examples of mouldings include door and window frame section. Virtually any timber can be used for mouldings, but those with finer textures give smoother surfaces for final finishing. The properties of MDF make it especially suitable for mouldings that are usually finished by coating. Spindle Moulding Machine MDF
Spindle Moulding Spindle moulding machines are used to cut decorative edges and panels in a range of furniture.
Joining Product Design
Jointing – Frame Construction Mortise and Tenon Joint Cross Halving Joint Bridle Joint Tee Halving Dovetail Tee Halving Joint Picture Frame Chair Frame
Jointing – Box and Carcass Construction Through Housing Joint Rebate Joint Finger Joint Stopped Housing Joint Drawer Construction Dovetail Joint
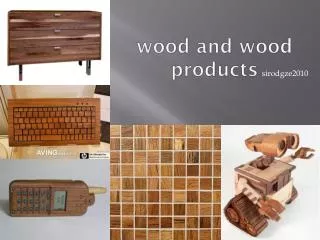
Laminating Product Design
Laminating Definition: A board consisting of layers of wood bonded together with the grain from each layer at right angles from the neighbouring grain.
Machines Product Design
Mortising Machine • Heavy duty mortising machines are found in industrial • workshops where cutting mortise and tenon joints is • an integral part of the mass production process. • Hollow Chisel Mortiser • This machine has a special auger drill in the centre of a square, hollow chisel that has four cutting edges. When plunged into the workpiece it cuts a square hole. The drill cuts out the waste whilst the chisel squares off the corners. To cut a long, rectangular mortise the workpiece is slid sideways between each cutting.
Bandsaws The bandsaw is an efficient, versatile machine whose main uses are handling large quantities of wood and shape cutting. It can cut thicker timber than the average circular saw and the thin blade means that wastage is minimal. The blade itself is a continuous loop of metal driven over two or three large wheels. A bandsaw can be used to cut outside curves but not inner curves without cutting through the material.
Jigsaws • The jigsaw is a very versatile tool. It will cut any man made board and rip or cross cut solid timber reasonably well. Its real advantage, however, is its ability to make curved cuts. When fitted with appropriate blade the jigsaw will also cut sheet metal and plastics
Fretsaws • Powered Fret saws are usually connected with lightweight craftwork and model making. A fret saw can be used to produce very accurate work as well as being able to cut very tight curves.
Finishing Product Design
Stains/ Dyes - To change the colour of wood and retain the texture and grain a number of dyes and stains are available. The stain/dye can be brushed on to the wood or applied with a tightly tied rag . Allow to dry and coat with varnish or wax to seal the surface. Oil/Wax - Some timbers, e.g. teak do not varnish well because their own oil content and should be finished by applying a teak oil or similar product. They can also be waxed to seal the surface. The oil or wax should be applied in thin layers with rag and polished thoroughly with a clean rag between coats. The more work put in, the better the finish! Preservatives – For timber used externally. Creosote is the cheapest and most common and once applied the brush should be cleaned thoroughly in paraffin before washing with soapy water leaving it to dry. Wood preservatives are normally harmful to the skin. Safety goggles and gloves should be worn and contact with the skin avoided. Finishing
Painting Wood - There are a number of advantages in applying paint to wood it protects the surface b) it means less expensive timber can be used c) the colour can be changed to match any new colour scheme. STAGE 1 - once surface is prepared a primer coat should be applied and allowed to dry. It will seal and protect the surface. When dry lightly rub with glass paper. STAGE 2 - the undercoat should be applied. The shade should match that of the finished coat. STAGE 3 - the final coat should be applied. There are a number of types available, gloss, eggshell, matt vinyl, etc. After each coat is applied, the brush should be cleaned thoroughly in turpentine and then in warm soapy water before being dried ready for use in applying the next coat. Finishing
Varnishing - will protect the surface of the wood and will allow the natural colour and texture of the wood to be seen. STAGE 1 - the first coat of varnish will seal the surface of the wood. For this coat the varnish should be thinned with turpentine in equal amounts and applied in a thin, even coat to all surfaces. When dried, the surface should be rubbed down carefully with steel wool. STAGE 2 - Further coats of varnish should be applied until the required finish is achieved. Steel wool should be used between each coat to smooth the surface. Finishing