Download
1 / 41
410 likes | 544 Views
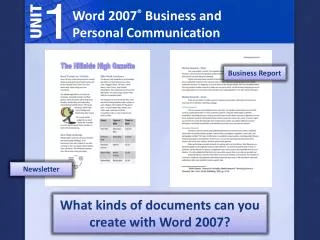
Word 2007 ® Business and Personal Communication. Business Report. Newsletter. What kinds of documents can you create with Word 2007?. #1. Lesson 1: Create a Document. With Microsoft Word 2007, you can create memos, business letters, newsletters, and reports.

E N D
Word 2007® Business and Personal Communication Business Report Newsletter What kinds of documents can you create with Word 2007?
#1 Lesson 1: Create a Document With Microsoft Word 2007, you can create memos, business letters, newsletters, and reports. This presentation shows you the basics you need to know in order to create and organize Word files. Business Letter
Lesson 1: Create a Document View This Presentation to Answer the Following Questions: •What are the parts of the Word screen? • How do I create and manage folders? • How do I name and save a document? • How do I key and edit text? • How do I print and close a document? • What vocabulary words should I review?
Lesson 1: Create a Document The Word screen contains Title bar Quick Access Toolbar Buttons Document pane Ribbon Scroll bars Start button and Status bar Office Button
#2 Lesson 1: Home ButtonPrint and Print Preview The Microsoft Office Button is new in 2007, it is located in the upper left corner of the screen and allows you to Open New documents, Open existing documents, Save, Save As, Print, Print Preview and Close.
#3 Lesson 1: Create a Document The bar at the top of the screen is called the title bar. The title bar displays the name of the current document or file.
#4 #5 Lesson 1: Create a Document Scroll bars move a document up and down or left and right on the screen. The status bar displays the current page and total page count.
#6 #7 Lesson 1: Create a Document The Ribbon is a panel that organizes commands into tabs and groups. Tab Button The Ribbon is designed to help you quickly find a button, which is a small icon that can be clicked to perform various tasks. Group
#8 Lesson 1: Create a Document The Quick Access Toolbar is a customizable toolbar for easy access to your most commonly used command buttons.
Lesson 1: Create a Document TechCheck What are some features of the Word screen? Answers include: • Title bar • Status bar • Menu bar • Scroll bars • Ribbon
Lesson 1: Create a Document TechCheck Which feature of Word allows you easy access to your most commonly used command buttons? Answer: The Quick Access Toolbar allows you easy access to your most commonly used commands.
Lesson 1: Create a Document By mastering good file management, you will be able to save time and prevent the loss of information.
Right Click on the Computer Desktop Choose New Choose Folder Rename with your first and last name Always save your work in this folder #9 Create Desktop Folder
#10 Lesson 1: Create a Document File management includes: Naming and saving documents. Creating and organizing folders so that work can be easily saved and located.
#11 Lesson 1: Create a Document A folder is an item that helps you organize files. To create a new folder, click the Office Button and choose Save As.
#12 Lesson 1: Create a Document To save a document with its current name, click the Save button on the Quick Access Toolbar. If you want to rename the document, use the Save As command.
#13 Lesson 1: Create a Document Use the Save As dialog box to name and save a document so that you can find it and work on it again. You should save your document every 5 to 10 minutes to protect your work from being lost.
Lesson 1: Create a Document Academic Skills Check Why is good file management an important skill to master? Answers include: • Good file management helps save time. • Good file management helps prevent the loss of information.
Lesson 1: Create a Document Tech Check What are some ways you can practice good file management? Answers include: • Name and save documents. • Create and organize folders so that work can be easily saved and located.
#14 Lesson 1: Create a Document In a Word document, you can… Undo or redo actions. Correct spelling errors. Key and edit text. Delete text. Print and close a document.
Lesson 1: Create a Document To key, or insert, text into a document, click in the document where you want the new text to begin. Then key the text into the document pane.
#15 Lesson 1: Create a Document The insertion point is the blinking vertical bar that shows where the text you key will appear on the screen. Insertion point The insertion point is also known as the cursor.
Lesson 1: Create a Document The use of proper spelling in a document is important to clear communication. Word helps you find and correct spelling errors as you work on a document.
#16 Lesson 1: Create a Document A wavy red line under a word indicates that the word may be misspelled. Do not forget to proofread. A document with errors will not be well received by readers.
Lesson 1: Create a Document In addition to using Spell Check, you should edit a document by: Printing a copy. Choosing a proofreading partner to read the document. Reading it aloud.
Lesson 1: Create a Document Sometimes you need to edit, or change, your documents by deleting text.
#17 Lesson 1: Create a Document To erase a change you have just made to a document, click the Undo button. To restore a change, click Redo.
#18 Lesson 1: Create a Document To print a document, first choose Print Preview. Print Preview allows you to see the page as it will appear when printed.
#19 Lesson 1: Create a Document Once you are satisfied with the document, click Print to open the Print dialog box. Use the Print dialog box to make choices such as the number of copies, or which printer you will use.
#20 Lesson 1: Create a Document After you have finished and saved your work in a document, you can close it. You can also close a document by clicking the Close button. To close a document, use the Close command in the Office menu. Close
Lesson 1: Create a Document Tech Check What are some ways to make changes in a Word document? Answers include: • Key text • Edit text • Delete text • Undo or Redo actions
Lesson 1: Create a Document Tech Check In addition to using the Spelling and Grammar tool, what else should you do to proofread a document? Answers include: • Print a copy. • Read the copy aloud. • Choose a proofreading partner to read your document.
Lesson 1: Create a Document Tech Check How do you erase a change you have just made in a Word document? Answer: To erase a change you have just made to a Word document, click the Undo button.
Lesson 1: Create a Document Academic Skills Check Why is it important to use proper spelling in a document? Answer: It is important to use proper spelling because a document with errors will not be received well by readers.
Lesson 1: Create a Document Vocabulary Review button A small icon that can be clicked to perform a specific task.
Lesson 1: Create a Document Vocabulary Review title bar The bar at the top of the screen that displays the name of the current window.
Lesson 1: Create a Document Vocabulary Review status bar The bar at the bottom of the screen that displays information such as the current page or slide number and the total number of pages or slides in the document.
Lesson 1: Create a Document Vocabulary Review scroll bar A bar at the right side or bottom of the screen that allows you to move up and down or left and right in a document or a worksheet.
Lesson 1: Create a Document Vocabulary Review Ribbon A panel in Microsoft Office 2007 that organizes commands into tabs. The Ribbon changes depending on which applications and tools are activated.
Lesson 1: Create a Document Vocabulary Review insertion point A blinking vertical bar that indicates where the text you key will appear on the screen. Also known as a cursor.
Lesson 1: Create a Document Vocabulary Review folder An item that helps you organize files.