Download
1 / 129
1.43k likes | 1.79k Views
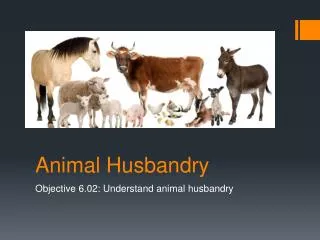
B10 Animal Husbandry Practice. Vaccination Practices Dead Vaccines Injections Given to Livestock Proper Sanitation Procedures for Live Vaccines Techniques for Castrating Livestock Techniques for Dehorning Cattle Methods and Techniques of Cattle Identification. Lesson Outline.

E N D
Vaccination Practices Dead Vaccines Injections Given to Livestock Proper Sanitation Procedures for Live Vaccines Techniques for Castrating Livestock Techniques for Dehorning Cattle Methods and Techniques of Cattle Identification Lesson Outline
Vaccinating Animals • Preventing disease is far less expensive than using a veterinarian to treat animals with emergency problems.
Vaccination Schedule: Calves • At birth to one week of age: • Scours prevention products - This consists of 3 different avenues of protection: • Oral vaccination of new calves with a modified live rota and coronavirus product. This must be the first product administered, and colostrum delivery must be delayed by 30 minutes to ensure that the modified live viruses have time to replicate. • Oral antibody supplementation. • Oral colostrum - Remember that the dam will produce protective antibodies in her colostrum. Colostral enhancement can be accomplished through vaccination of the dam with products that stimulate antibody protection against E. coli, clostridial organisms, rota and corona viruses.
At Birth to One Week of Age • Respiratory protection using intranasal infectious bovine rhinotracheitis (IBR) and parainfluenza (PI-3) vaccination products. • Avoid all other vaccinations in calves less than one week old. They are still recovering from the stress at birth and have high levels of natural steroids that will compromise response to vaccinations. Calves at this age do have an intact immune system but they are weak in some components that may cause them to fail to produce the right response. Immunization of animals less than one week of age should be limited to oral (antibody, colostrum, rota/corona) and intranasal (IBR/PI-3) products and vaccines.
Vaccination Schedule: Calves • Between 3 and 5 weeks of age: Avoid vaccination during this period in the calf’s life. During this period, the calf is experiencing a decline in certain immune system cells it received from its mother in the colostrum. Its immune system is also undergoing a time where it is starting to produce these protective cells on its own. Vaccination during this time may produce a poor or adverse response. Adverse responses to vaccines given at this time may persist and predispose the animal to future adverse responses to vaccinations.
Vaccination Schedule: Calves • At castration and branding time (older than 5 weeks): • Give a shot of Bovi-shield Gold 5 which contains: • Bovine viral diarrhea (BVD - type I and II), • Infectious bovine rhinotracheitis (IBR), • Bovine respiratory syncytial virus (BRSV), • Parainfluenza (PI-3) killed or modified live vaccine. • Reading product labels can help ensure that the product can be used on calves nursing pregnant mothers. Research from Cornell University indicates that using a killed BVD product as the first and possibly the second dose may enhance the immunity to BVD. • 7 or 8-way vaccine for clostridial organisms.
Vaccination Schedule: Calves • For optimal protection, the BVD, IBR, BRSV, PI-3 and the 7 or 8-way vaccine for clostridial organisms should be boostered in 3-4 weeks.
Vaccination Schedule: Calves • At 2-4 weeks pre-weaning: • BVD (type I and II), IBR, BRSV, PI-3 modified live vaccine. (All found in the Bovi-shield Gold 5 vaccination) • 7 or 8-way clostridial vaccine • Pasteurella vaccine • Leptospirosis vaccine (recommended) • Bang’s vaccine for heifers (consult a local veterinarian) - Consider administering Bang’s vaccine on a separate day to spread out gram-negative antigen exposure. It is best to never administer more than two gram-negative vaccines at one time.
Vaccination Schedule: Calves • At weaning: • A BVD (type I and II), IBR, BRSV, PI-3 modified live vaccine. • A 7 or 8-way clostridial booster. • Pasteurella and Lepto boosters if given 3-4 weeks previously.
Vaccination Schedule: Replacement Heifers & Adult Cows • All replacement heifers and adult cows should receive the following at 4-8 weeks pre-breeding: • A BVD (type I and II), IBR, BRSV, PI-3 modified live vaccine • Vibriosis vaccine • Leptospirosis vaccine • Trichomonas fetus vaccine (optional) • Pinkeye vaccine (optional)
Vaccination Schedule: Replacement Heifers & Adult Cows • Three to four weeks prior to calving: • Injectable scours product. • 7 or 8-way clostridial booster or a C & D clostridial product, depending on the area.
Vaccination Schedule: Bulls • Breeding bulls should receive the following on an annual basis: • BVD (type I and II), IBR, BRSV, PI-3 modified live vaccine • 7 or 8-way clostridial booster • Vibriosis vaccine • Leptospirosis vaccine • Trichomonas fetus vaccine (optional) • Pinkeye vaccine (optional) • Bull populations should be subject to the same type of vaccination programs as the replacement heifers • If not previously exposed to a Lepto-hardjo bovis vaccine, a dose should be administered, followed by a booster dose 4-6 weeks later before introducing bulls with the female population
Proper Vaccination Practices • Develop a vaccination schedule with the help of a veterinarian. • Refrigerate vaccines prior to use and use entire contents after opening. • Follow all label directions exactly. • Give only the recommended dose by the recommended method. • Use sterile syringes that have not been used for other purposes. • Throw away all outdated and opened bottles. • Do not mix vaccines unless required by the manufacturer. • Do not vaccinate sick animals.
Vaccination Tools Disposable Syringes
Vaccination Tools Pistol-Grip Syringe
Modified Live Vaccines • Advantages: • One dose required • Faster, stronger and more durable response • Fewer post vaccination reactions • Disadvantages: • Not recommended for pregnant animals • Possible viral shedding to other animals • Improper handling may inactivate the vaccine
Killed Vaccines • Advantages • Recommended for pregnant animals • Stable in storage • Disadvantages • Multiple doses required • Weaker immune response • Shorter duration immune response • May cause reactions
Injection Methods and Sanitation Procedures • Always use sterile instruments. • Boiling is the most satisfactory method of sterilization. Boil for 5 to 10 minutes. • Chemical sterilization of syringes with alcohol or detergents is unsatisfactory if a live vaccine is to be injected. It can kill the live agents.
Syringe Filling • To facilitate drawing liquid and preventing a vacuum in the bottle, with the syringe, insert into the bottle the amount of air equal to the quantity of fluid to be drawn.
There Are Eight Main Types of Injections: • Subcutaneous: SQ • Intramuscular: IM • Intravenous: IV • Intraperitoneal: IP • Intradermal: ID • Intrarumen: IR • Intranasal: IN • Oral vaccines: PO
SQ: Subcutaneous Injections • A subcutaneous injection is given under the skin. • Use a 16 or 18 gauge needle, ½ an inch long. This short of a needle will break off less often, will go just under the skin, and has little chance of going into the muscle if inserted at a slant. • Insert the needle under the skin on the neck, behind the shoulder or elbow.
IM: Intramuscular Injections • IM injections are given in the muscle. • It should be given in the neck to prevent gristle in the best cuts of meat.
Intramuscular Injections • Use a 16 or 18 gauge needle 11/2 or 2 inches long. • Remove the needle from the syringe, and hold it with the fingers. The needle is inserted before the syringe is attached. Insert the needle straight in rather than at an angle.
Intramuscular Injections • With the needle attached, draw back on the plunger to make sure that you are not in the blood stream. • Squeeze the plunger as smoothly as possible. • If the injection goes into the fat instead of the muscle, the injection was wasted.
IV: Intravenous • Intravenous injections are given only when the animal’s life is at stake and the medicine must be administered immediately. • If the animal is in a squeeze chute, pull its head to one side with a halter and tie the rope securely to part of the chute or other stationery object. • If the animal is laying down, pull the head around and put the rope around the hind leg just above the hock, pull tight and tie.
Intravenous • Clean the jugular region of the neck with alcohol. This will sanitize the area and make the vein easier to see. • Press on the vein with your fingers. It will fill and bulge out. • Once the vein is fully filled, the needle should be placed in a downward direction and inserted into the vein. • If you are having trouble filling the artery by hand, place a ¼ inch or less rope with a slip knot around the animal’s neck down near the shoulder. Draw the rope tight and the vein will instantly fill with blood.
Intravenous • Care must be taken to avoid the carotid artery, which is located just behind the jugular vein. No injection should ever be given in the carotid artery. • When the lower hand is removed, no blood should come out of the needle. If blood continues to squirt out of the top of the needle, it could be in the carotid artery.
Intravenous • If the medicine is being administered by syringe, the injection should be made slowly over the span of at least a minute. • If the injection is gravity flow, administer it slowly. Watch for glazed eyes, rapid breathing and shakiness. • Do not give more than 250 CC in a 15 minute period.
IP: Intraperitoneal • This is an injection into the abdominal cavity. • This is mainly used for the administration of large quantities of fluids or antibiotics. • The solution is warmed to body temperature. • Insert a two inch long 14 gauge needle in the right flank at a point in the center of the triangle formed by the loin, last rib and a line from the hip bone. • This type of injection will produce less shock than an intravenous injection and will give complete medication in less than an hour.
ID: Intradermal • This is a injection into the skin layers. • This method is used when a small amount of medicine is needed to be absorbed at a slow rate. • Use a 24 gauge needle about 1inch long. • Insert the needle into the skin so that the imprint of the needle can be seen. • The injection will leave a small bump in the skin.
IR: Intrarumen • Used to administer emergency medication to relieve bloat. • Insert a 14 gauge needle 3 inches long into the left flank.
IN: Intranasal • Intranasal vaccines are packaged with special applicators that fit on the end of a syringe. • Restrain the cow or calf and squirt the contents quickly into the nasal passages. • The animal may sneeze or cough, but this does not reduce the effectiveness of the vaccination. • Never inject any intranasal product in the muscle or skin.
Oral Vaccines (PO) • Oral vaccines are used to vaccinate newborn calves. First, elevate the animal’s head slightly, placing the syringe containing the vaccine at the side and back of the calf’s mouth. Next, discharge the contents of the syringe. Finally, hold the animal until all of the vaccine has been swallowed.
Udder Infusions • Udder infusions are given to correct problems like mastitis. • Disinfect the end of the teat with a cotton ball and alcohol. Squeeze the teat to find the hole. • Insert a two inch cannula (plastic flexible needle) and inject the medication. Hold the end of the teat to prevent the medicine from coming out. Then work the medicine up in the udder.
Growth Implants • Growth promoting implants are slow release pellets placed under the skin of the ear. • These implants contain hormones that supplement the animal’s natural hormone production to increase growth rates and feed efficiency. • They have been used throughout the United States for more than 25 years in commercial beef cattle. It is estimated that over 90% of all fed cattle are now implanted at least once in their lifetime.
Growth Implants • Growth is largely controlled by the pituitary gland and its secretions of growth (somatotrophic) hormone. • Implants act on the pituitary to produce increased levels of growth hormone. • The effect of these elevated hormone levels is an increase in the synthesis of muscle tissue and a reduction in the deposition of body fat.
Growth Implants • Using a $1 implant to yield a gain of 20 lbs. more than non-implanted cattle nets a 20:1 return on investment when calves are worth $1 per pound. • Follow the label directions carefully regarding age and weight restrictions and reimplanting. • Be especially careful when implanting potential replacement heifers. Using the wrong product and/or implanting at the wrong age or wrong weight can all impair fertility. Reimplanting replacement heifers is not recommended.
Growth Implants • None of these implants are registered for use in bull calves and use of these drugs will reduce fertility. • Procedure for implanting growth hormones: • Clean and disinfect the back side of the ear with alcohol. • Deposit the implant between the skin and the cartilage of the ear, just below the horizontal midline. The implant must not be placed too close to the head. Most implants should be placed in the middle third of the ear.
Growth Implants • The insertion site of the needle will be towards the outer tip of the ear, one needle length from the desired "middle-third" position.
Growth Implants • Avoid placing the implant in the site of an old implant or in an area that will be used for an ear tag. • Do not crush implants. • Avoid injuring the major blood vessels of the ear. • Disinfect the implant needle between applications.
Castration • Why castrate animals? • Prevents problems with male animals fighting for dominance. • Helps provide a higher quality meat when the animal is slaughtered.
Elastrator Castration • Because of the lack of blood loss, this method of castration is preferred. However, it should never be done on animals older than 3 months. • If it is difficult to get the elastrator band over the testicles, the animal is too big and a surgical castration approach is needed. • The first step is to load an elastrator band or "cheerio" onto the elastrator.