Download

1 / 35
390 likes | 1.07k Views
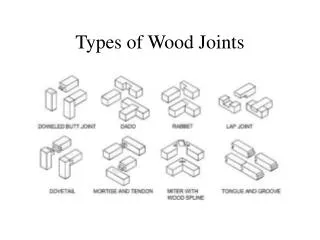
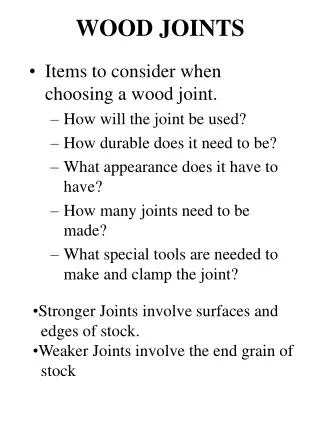
Traditional Wood Joints. A description of the joints you should know and the processes with the tools/equipment required to create them. LOOSE TONGUED JOINTS.

E N D
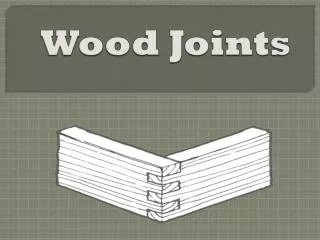
Traditional Wood Joints A description of the joints you should know and the processes with the tools/equipment required to create them.
LOOSE TONGUED JOINTS Loose tongued joints are used to join planks edge to edge to form a larger board like a table top in which case they are always glued only. Bare faced tongue and groove or Loose tongue and groove joints can be used to join chair rails to chair legs. Note the glue blocks for extra strength.
BISCUIT JOINT Biscuit joints are similar to loose tongued joints and are used to join planks edge to edge to form a larger board like a table top in which case they are always glued only. The biscuit joint is not visible after glue has been added to all surfaces and the boards are sash cramped together until glue is set.
BUTT JOINTS Butt joints are the easiest of all to make. Wood is butted face to edge or end to edge and nailed, screwed or dowelled together. Strength can be added by gluing the joining faces. These joints are not recommended for hardwood unless pilot holes and screws or dowels are used to hold them together.
BUTT JOINTS These joints are the most straightforward of all of the wood joints simply because they require no cutting out. All you need to do is ensure both ends are square and bring them up to each other at right angles as shown below and nail (and glue) the faces together. BUTT JOINT Notice that the nails have been driven in at an angle in a process called Dovetail Nailing. This is to give both parts more of a grip and help prevent the pieces from being pulled apart too easily.
CORNER REBATE JOINTS The shoulder or lapped joint is very common and is used for furniture and box constructions such as jewellery boxes. The joint below is a simple lapped joint. The shoulder can be seen clearly, this is usually planed using a rebate/shoulder plane or combination plane. This type of joint is often seen as a corner joint. CORNER REBATE JOINT Here is a shoulder plane taking the rebate out with the help of a piece of scrap wood clamped in place. There are a few other ways of creating a rebate.
HOUSING JOINT HOUSING JOINT Housing Joints are most commonly used when a shelf is being fitted within a model. A groove is cut out of the side pieces at a certain height, wide enough for the shelf material to fit into. The shelf can then be glued and/or nailed in place. A neater finish can be achieved by using a Stopped Housing Joint, as shown. You could imagine that this joint would be slightly trickier to cut out neatly although the joint will look better from the front of the model. STOPPED HOUSING JOINT Notice how the photo on the left of the Housing Joint shows the cut out in the end piece but the photo on the right shows a neater finish because a Stopped Housing was used.
HOUSING JOINT A neater and quicker joint can be achieved by using a machine Router and an appropriate cutter (see left). Due to the un-guarded rotating blade and the power of the motor you will not be able to use this piece of equipment. Ask your teacher if they can cut this joint with this machine.
MORTISE & TENON JOINT An animation of a Mortise and Tenon joint is shown opposite. This type of joint has a wide range of uses and is particularly useful when manufacturing furniture. The marking out and cutting of Mortise and Tenon joints are described in this presentation. THE MORTISE GAUGE The mortise gauge is a special type of marking gauge. It is used to mark wood so that a mortise can be cut into it. It is crucial that it is set to the correct size of mortise chisel. The mortise chisel is then used to remove the waste wood. The mortise gauge is normally made from a hardwood such as Rosewood with Brass being used for the parts that slide along the stem.
SETTING THE MORTISE GAUGE 1. The distance between the fixed spur and the adjustable spur is set so that it matches the width of the mortise chisel. The width of the mortise chisel should match the width of the mortise to be cut in the wood.
TRI SQUARE MARKING OUT THE MORTISE 2. A TRI SQUARE and a marking knife are used to mark the lines at the ends of the mortise. Try square
MARKING OUT THE MORTISE – cont. 3. The stock of the mortise gauge is pressed against the side of the wood. It is then pushed along the wood until the mortise is marked out correctly.
CUTTING OUT THE MORTISE – cont. 4. The Mortise Chisel is then used to break the surface of the waste wood by gently tapping the handle with a Mallet. 5. The waste wood is then slowly removed, this time, by applying more force to the handle of the Chisel with the Mallet. The waste is removed until the entire Mortise hole has been cut to the correct depth.
TRI SQUARE MARKING OUT THE TENON cont. The width of the Tenon is marked all the way round the wood. Normally a marking knife is used to produce a precise line, with the aid of a TRI SQUARE. A pencil can then be used make the line stand out.
SETTING THE MORTISE GAUGE - again The MORTISE GAUGE is now used to mark out the width of the tenon. It should be the same width as the mortise which has just been cut into the wood. The fixed spur and the adjustable spur of the gauge are set to the width of the mortise chisel. The MORTISE GAUGE is used to mark the size of the Tenon. The stock of the marking gauge must be held firmly against the side of the wood as it will have a tendency to follow the grain of the wood rather than a straight line.
CUTTING THE TENON A TENON SAW is used to saw down the gauged lines of the Tenon. The wood is normally held firmly in a woodworkers VICE. When sawing, take time to check that the saw is cutting straight down and that it is on the waste wood side of the Tenon.
CUTTING THE TENON – cont. The wood is then supported by a Bench Hook and a TENON SAW is used to finally remove the waste wood. This leaves the shoulder of the joint.
CUTTING THE TENON – cont. A FIRMER CHISEL or BEVEL EDGED CHISEL can be used to remove rough edges and to straighten the Tenon. The wood must always be held in a woodworking VICE as a chisel my slip if the wood moves. If the marking out and cutting have been carried out accurately the Mortise and Tenon should fit together forming a firm joint.
Tenon and mortise joints are very strong joints mostly used in furniture making and for heavy doors and gates. They are not easy joints to make. The secret in making a good tenon joint lies in careful and accurate marking. The tenon’s width should not be less than a third of the thickness of the wood especially if wood of the same thickness is joined. The shoulders may be of any width and may also be offset when the mortise is made in rebated wood. Make the mortise before rebating the wood. If the top of the mortised wood is to be in line with the edge of the tenoned wood a haunched tenon can be made with the haunch cut back to be in line with the shoulders. Haunched tenon joint
CROSS HALVING JOINTS Cross halving joints are probably the most simple of joints to mark out and cut. They are used whenever it is necessary to join two pieces of wood that cross over each other. Sometimes these joints can be seen on the strengthening rails of tables and chairs. Using this would joint would create a ‘+’ or a ‘X’ shape with two pieces of wood.
Tee half joint Halved joints or lap joints are mostly used to assemble light frames which are going to be covered with hardboard or plywood. Half the thickness of each piece of wood to be joined is cut away with a tenon saw and the joint is glued and screwed or nailed. Halved lap joints are also used to join long lengths of timber as for fencing.
DOVETAIL JOINT The ‘DOVETAIL JOINT’ is very strong because of the way the ‘tails’ and ‘pins’ are shaped. This makes it difficult to pull the joint apart and virtually impossible when glue is added. This type of joint is used in box constructions such as drawers, jewellery boxes, cabinets and other pieces of furniture where strength is required. It is a difficult joint which requires practice. There are different types of dovetail joint and when cut accurately they can be very impressive. The box shown here is particularly strong due to the dovetail joints at its’ sides.
DOWEL JOINTS Some other dowelled joints in use. Here is another way to create a joint in wood. It is a permanent method but it is not the strongest joint as the parts can eventually pull apart, especially as the joint becomes old. Modern glues that are very strong have meant that this joint is often used to quickly fix parts together. DOWEL JOINT These dowel pins can be used to mark the wood to help ensure the distance between the holes is a good match. Obviously when using this jointing method, you have to make sure the distance between the holes is exactly the same as the distance between the dowels.
Marking a mortise by machine With the 4 point chisel (see top right) and an auger drill positioned in the centre, the Mortiser can cut square holes in wood. Using a Mortiser (see far left) you set the depth of the mortise (the hole in your joint) using the depth stop to the left of cutter on the machine. By moving the black wheel you adjust the position of the cutting head. Starting at the corners and working to the centre along each line marked will produce a clean mortise.
Marking and making mortise and tenon joints. 1. Mark the depth of the tenon on both edges and faces of one of the pieces of wood. 2. Set the pins of the mortise gauge to the width of the tenon and set the block to the width of one shoulder. Mark the tenon on the edges and end of the wood. 3. Using the same settings of the mortise gauge mark the mortise on one side of the other piece of wood. 4. Set the marking gauge to the centre of the mortise and mark a centre line. 5. When making a blind tenon drill holes (with a diameter slightly smaller than the width of the tenon) closely together along the centre line at a depth slightly more than the length of the tenon to create an escape route for excess air and glue. A 1 mm (or smaller) hole can be drilled from the side into the base of the mortise for the same purpose. This hole can easily and unobtrusively be filled with wood filler or beeswax if necessary. When making a through tenon it is best to mark the tenon on both sides of the wood and to drill from both sides or to watch and “back drill” to avoid splintering the wood.
Marking and making mortise and tenon joints. 6. Remove excess wood with a sharp chisel, always working from the centre to the edges of the mortise. Keep edges of the tenon and mortise as sharp as possible. 7. Place the wood from which the tenon has to be cut at a 45° angle in a vice and with a tenon saw start cutting the tenon cheeks at the highest point on the waste side of the marking. When the depth line of the tenon is reached, turn the wood around and finish cutting from the other side. Then cut the shoulders and lastly the haunch. Remove excess wood with a sharp chisel till the tenon fits tightly in the mortise. 8. Glue the two parts together. 9. A dowel or screw inserted from the side may be used to strengthen the join. 10. A through mortise can be strengthened by inserting small wedges in the opposite end of the wood to hold the tenon in place.
Bridle joints or open mortise and tenon joints Bridle joints or open mortise and tenon joints are used in furniture making especially to join the legs to the cross pieces. Marked in the same way as mortise and tenon joints the only difference is that the mortise is cut into the wood from the end.
Marking for dovetail joints. 1. Square the ends of the wood to be dovetailed. 2. Set the sliding bevel to a suitable pitch of between 1 in 6 for heavy work and 1 in 8 for smaller and more detailed work. Avoid sharp angles as the points of tails break easily. 3. Scribe the tails on the end and face of the wood and mark the “waste” pieces. 4. Clamp the wood in a vice and cut on the waste side with a tenon saw. 5. Lay the two pieces over each other and transfer the markings through the cuts with a tenon saw. 6. Remove the waste between tails and pins with a chisel. Dovetail joints are very strong and neat joints used primarily to make drawers and boxes. It needs a lot of practice to make a good dovetail joint.
Glue blocks.Small pieces of quadrant or a length of quadrant run the entire length of the joint make excellent glue blocks and give a neat finish especially on the inside of drawers and boxes. Angle braces are always glued and screwed or nailed Dowel Tip: When screwing into end wood drill a hole and insert a dowel. Then screw into the dowel through the end wood.
Dowels are mostly used to strengthen butt, mitre and rebated joints but are also used to join wood when making or repairing small tables, chairs and doors. When joining wood to be rebated or grooved, drill the holes for dowels first. The diameter of a dowel should not be more than a third of the width of the narrowest wood to be joined. Cut the necessary length from dowel sticks and lightly chamfer the ends. Good dowel sticks have a “V” groove along the length to allow excess glue and air to escape. If your dowels do not have this groove you can run one in by using a marking or mortise gauge. Alternatively you can allow a little space at the end of the hole in which the dowel is inserted to allow for the extra glue and air but this will weaken the joint.
Knock down fittingsKnock down (KD) fittings are mainly used within flat pack furniture or for assembly by the user. They are used within kitchen units or self-assembly furniture. Knock down (KD) fittings are often plastic fittings which can be joined together with one screw or bolt. A simple knock down fitting is a 'block joint'. Block joints are simply plastic blocks that take screws in different directions.
MARKING OUT A FINGER JOINT – on the second piece of wood 7. The first side is placed above the second side of the joint and the joint is marked out. Again a pencil is used although the traditional tool would be a marking knife. 8. Marking out the joint when both pieces are together can be difficult but a steel rule or a tri square can be used to straighten any lines. Again, the waste wood must be clearly identified. 9. The tenon saw is used to cut down the lines marking the middle section of the joint. The wood must be secured in the vice in the same way as before. Remember, the saw is used to cut straight down the joint, on the waste side of the pencil line. 10. A coping saw is used to remove the waste wood. Again the wood is secured in the vice. 11. If the joint is slightly inaccurate a firmer or bevel edged chisel can be used to correct it. A G cramp is used to hold the wood firmly. Scrap wood is placed underneath to protect the surface of the bench from the chisel. The second side of the joint should now be complete. 12. The joint should fit together accurately. If the stages outlined above have been carried out carefully.
MITRE JOINTS A Mitre Joint is used where two pieces of wood need to be positioned next to each other at exactly 90o. A 45o cut is made on either end and when they are placed against each other, a 90o corner is achieved. MITRE JOINT The most common use for Mitre Joints is in the construction of wooden picture frames. They are often made up of four pieces of wood with Mitres cut on both ends of each. Using this would joint would create an ‘L’ shape with two pieces of wood.
MITRE joints are always cut to 45° in a mitre box so that they will form a 90° corner when joined. As no end wood is ever seen these are very neat joints but they are weak. Normally used for picture frames where they are nailed with panel pins. When used for other purposes they must be strengthened with glue blocks, angle braces or loose tongues. Mitre joints should always be glued.
BRIDLE JOINTS These joints are used when a light frame is needed and strength is not the main requirement. For example, a picture frame. One part of the joint fits into the other part and is glued permanently in position. The angled bridle joint can be used a a substitute for a mortise and tenon joint, again if strength is not important. PLAIN BRIDLE JOINT ANGLED BRIDLE JOINT Using this would joint would create a ‘T’ shape with two pieces of wood. Using this would joint would create an ‘L’ shape with two pieces of wood.