Download
1 / 32
320 likes | 426 Views
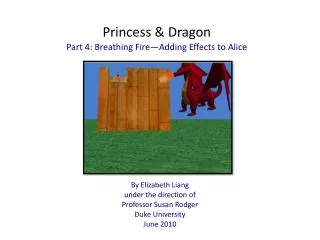
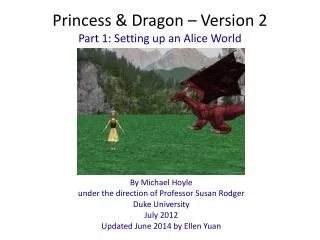
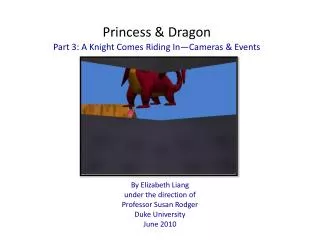
Princess & Dragon Part 3: A Knight Comes Riding In—Cameras & Events. By Elizabeth Liang under the direction of Professor Susan Rodger Duke University June 2010. Introduction.

E N D
Princess & Dragon Part 3: A Knight Comes Riding In—Cameras & Events By Elizabeth Liang under the direction of Professor Susan Rodger Duke University June 2010
Introduction • Welcome to Part 3 of the Princess & Dragon tutorial. In Part 2 we covered how to change camera views in an animation, create and edit object and world level methods, and how to change properties. • Part 1: Objects • Part 2: Methods & Properties • Part 3: Cameras & Events • Part 4: Billboards, Sound, & 3D-Text • In Part 3 we’ll add more animation so that a knight will come in on a horse. • This will cover more on camera views as well as introduce you to new events and functions.
Step 1: Adding Objects First a knight and horse must be added to the scene. Click on the Add Objects button to go to the Adding Object Screen. Click on the Medieval gallery folder and add a horse and a knight.
Step 1: Positioning Objects Use the positioning tools to turn the horse and knight toward the camera. Then move the knight so that he is in the middle of the horse with the mouse tool. Finally move the knight up until he looks like he is sitting on the horse.
Step 1: Vehicle Reviewed To glue the knight to horse, click on knight in the object tree. Under properties, set the vehicle of the knight to the horse, the entire horse. Remember that changing the vehicle property this way is an instant change to the property and part of the set up of the world. There is no dragging in a line of code so it is not part of the animation.
Step 1: Positioning Objects Continued Right Click on the knight’s right leg in the object tree select roll, left 0.1 revolutions. Now Roll the left leg right 0.1 revolutions. This will move the legs of the knight so he looks more like he is riding.
Step 1: Vehicle Review Continued Right click on the horse in the object tree and under properties, change the vehicle of the horse from the world to the camera. The trick here is to glue the horse to the camera so that when the camera view changes in the scene editor, the horse (and knight) moves with it. When we are done creating a new camera view we can simply ‘unglue’ the horse.
Step 1: Camera Positioning Drive the camera to the right until you can no longer see any of the other objects. Now you can ‘unglue’ the horse from the camera by setting the horse’s vehicle back to the entire world.
Step 1: Dummy Object Review Remember that a Dummy Object allows us to save the position of the camera and return to it. It’s like bookmarking a camera view. We did this with the originalView and towerView. Now we want to add a bookmarked vamera view of the knight and horse into the CameraViews folder. Click on the more controls button under the positioning tools, select drop dummy at camera.
Step 1: Dummy Object Review The dummy object will appear in the CameraViews folder in the object tree. Rename it knightView. Right click on the camera in the object tree and select camera set point of view to, CameraViews, originalView. Click on DONE. Now it’s time to animate!
Step 2: Change Camera View First we want the camera to swing over to the knight during the animation. Drag a camera set point of view to method into the very end of my first method. Select CameraViews and then knightView.
Step 2: knightRescue World Method Now let’s create a new world level method. In this method the knight will ride over to the princess and yell at the dragon to drop her. Then the knight will catch the princess. Click on world in the object tree and under methods, click on create new method. Name it knightRescue.
Step 2: Animation Click on knight in the object tree. Drag in a knight say method into the new knightRescue method. He will call out a damsel in distress! You will notice the AnimateBreathing method in the knight’s methods. We won’t use it in this tutorial but some objects come with more complicated methods unique to that object built in.
Step 2: Animation Continued Click on the horse in the object tree. Drag in a turn to face method and select cinderella, the entire cinderella. Then have the horse move forward 15 meters.
Step 2: Mouse Click Event To test the method, we will create a new type of event. Click on create new event in the events editor and select When the mouse is clicked on something. Select the entire knight and knightRescue for the blanks. Click Play and once the camera moves to the knight click on him to see the method play. You may want to have the knight also sayClick on me! in the animation so that the audience knows you must click on him for the animation to continue
Step 2: Animation Continued The animation looks fine so far but we want to make sure that the knight makes it to the tower. Let’s change the camera view and check. Click on camera in the object tree and drag in a set point of view to method. Select CameraViews, originalView. Now press Play.
Step 2: Testing Depending on where you moved the camera when creating the new view, the horse and knight may be in the final shot of the animation. If not, change the amount that the horse moves forward from 15 to 20 and test again, the knight and horse should be in view when the animation ends.
Step 3: New Camera View We can also create moving camera scenes by tying the camera to an object. Drag in a camera set point of view to method between the two horse methods and select the knight, upperBody, neck, head, helmet, faceGaurd.
Step 3: New Camera View Continued Once again the vehicle property will be used to tie the camera to the knight as he is moving. Drag the camera vehicle property into the code after the set point of view to knight’s facegaurd command and select the entire knight. Drag in another one after set point of view to originalView and set the vehicle to world. Press play to see what the knight sees!
Step 3: Animation Click on the knight in the object tree and scroll down until you find the knight say method. Drag it into the method and have him say “let her go!”
Step 3: Animation Now let’s finish the animation and rescue the princess. Click on dragon in the object tree and find the list of methods. Drag in the turn to face method and select the entire knight. Drag in a move forward command and for now select 1 meter.
Step 3: Functions Since we do not know how far the dragon is from the knight we will use a function. A function in Alice does not change the world like a method but it gives us information about the world like the distances between two objects. Click on the functions tab in the details pane. Find the dragon distance in front of function under the proximity functions. Drag it into the code over the 1 meter until there is a green box. Drop and select knight, the entire knight.
Step 3: Animation Continued Click on horse in the object tree and drag in a turn to face command. Select the entire Cinderella. Following that, drag in a horse move forward command and select 1 meter. Set the duration of both commands to 0.5 seconds by clicking on more… at the end of each line. We want the horse to bring the knight to Cinderella, so we will use a function since we do not know the exact distance.
Step 3: Function Continued Click on knight in the object tree and then find his list of functions. Drag the knight distance in front of function over the 1 meter and select the entire Cinderella.
Step 3: Animation Continued Drag in Cinderella’s vehicle property into the method and set it to the entire world. This will ‘unglue’ her so that when the dragon moves, she will no longer move with it. Now drag in a Do together. We will now drag in commands to make Cinderella fall into the arms of the knight and the dragon fly away.
Step 3: Animation Continued Drag two lines inside the Do together. One line to have Cinderella turn backward ¼ revolution. Another line to have the dragon move up 10 meters (remember to click on the dragon in the object tree for a list of its methods). Click on the more… after both commands and Set the duration for 0.25 seconds.
Step 3: Animation Continued Play the world at this point. You will see that Cinderella is left on her back in the air. Because animation happens relative to the object we need to move her backward to make her fall. Drag in another Do together and into that, drag a Cinderella move backward command (remember to click Cinderella in the object tree to get a list of her methods). Set it right now for 1 meter. We will use another function to determine how far she will fall.
Step 3: Function Continued Drag in Cinderella’s distance above function onto the 1 meter in the move backward command. Modify the amount she falls by clicking on the arrow following the Cinderella distance above knight function. Select math, Cinderella distance above knight + and select other. Punch in 0.9.
Step 3: Animation Continued Drag in a Cinderella roll left command set it for ¼ revolution and duration 0.25 seconds. Drag in another Cinderella move command for down ½ meter. The next step of the animation is to raise the knight’s arms to catch her.
Step 3: Animation Continued First find the arms of the knight under his upperBody in the object tree. For each arm, drag in a turn forward command, select ½ revolution. Press Play to see the final animation!
Final Code This slide and the next slide contain the final code for world.knightRescue.
Congratulations! Congratulations on finishing Part 3! Part 4 will teach you how to embellish your animations so that they are more Engaging. We will use billboards, sound, and 3D text to make this world come to life!