Download
1 / 6
80 likes | 270 Views
Solar-Powered Oven Project PowerPoint. STEM Project. By: Matthew “Alex” Tartaglia. Project Summary. The primary objective of the project is to build a solar powered oven by calculating correct measurements and using the following resources: Wooden Slabs (Different Sizes) Hammer Nails

E N D
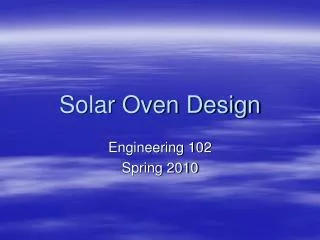
Solar-Powered Oven Project PowerPoint STEM Project By: Matthew “Alex” Tartaglia
Project Summary • The primary objective of the project is to build a solar powered oven by calculating correct measurements and using the following resources: • Wooden Slabs (Different Sizes) • Hammer • Nails • Black Felt • Heavy Duty Aluminum Foil • Power Saw • Measuring Tape • Gorilla Glue • Mirrors • Paint (Non-Toxic) • Styrofoam • Decorations • Solar Power (Own Definition)-Harnessing or using the sun’s energy to power certain technologies • Solar power has various uses, such as: • Water Treatment • Heating • Water Heating • Lighting • Optimizes the Productivity of Plants (Plants produce more) • The people working on the project get to have one partner. Each pair of partners will bake 6 cookies inside their oven. Awards will be given based on: Best Team Work, Most Creative, Most Efficient, Overall Best Oven. Best Team Work goes to the pair working together the best. Most Creative goes to the oven with the best design on it. The Most Efficient award goes to the pair that has the over in which the oven is most efficient. (Efficiency is based upon who’s oven can cook an egg in their oven fastest.) Best Overall Oven will go to the pair with the best oven all-around. • This project is part of STEM, which means Science, Technology, Electronics, and Math. This project incorporates all of those things.
Materials We Are Using And Their Purposes • We will be using most of, if not all, the materials given to us to build our solar oven. Here are the materials we will be using and their purposes: • Wooden Slabs-To make the base of the oven. • Black Felt-To absorb the heat. • Styrofoam-To act as an insulator to keep the heat in. • Aluminum Foil-To absorb the sun’s heat. • Mirrors-To reflect the sun into the foil to increase the heat it brings in. • Gorilla Glue-To hold everything in place • Power Saw-To make the right sized Wooden Slabs • Measuring Tape-To make the correct measurements • Hammer & Nails-To hold everything the glue can’t together • Paint-To decorate the oven
We got the perimeter by multiplying 5.65 by 2 and 8.25 by 2, then we add them together. For area, we multiplied 5.65 and 8.25. Measurements Perimeter: 27.8 in. Area: 46.6 in. sq. 5.65 in. 8.25 in.
The Process Here are the steps we took to make our ovens. Step 1-We receive our wood. Step 2-We measure out the wood according to how big we need it. Step 3-We then cut the wood. Step 4-After we cut the wood, we assembled the wood to how we want it (without gluing). Step 5-We glue the wood. Step 6-We hammer and nail the wood unable to be glued. Step 7-We lay Styrofoam across the bottom and around the inside of the oven. Step 8-We lay black felt across bottom on top of the Styrofoam. Step 9-We cover all of the inside with aluminum foil. Step 10-We take two scrap Styrofoam rods, wrap the aluminum around them, then tape/glue them to the sides standing straight up.
Changes and Findings I don’t know if I would change anything. I liked the way my oven cooked the cookies. Though, I would probably make black felt the bottom, with paper on top for the cookies to cook. I found even though they don’t cook as fast on aluminum as on black felt, they still cook eventually, and you have to give it time. The project in all was pretty fun, and I am glad how my project worked out. Also thanks to my partner, Alida.