Download
1 / 5
50 likes | 179 Views
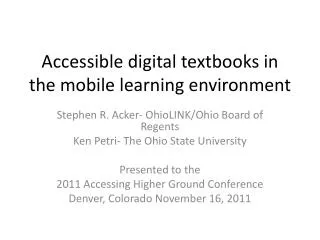
Learning AreasLevelsObjectives CategorySoftwareDescriptionAuthor. . . . Computer Studies

E N D
1. This Virtual Classroom Tour template has been provided so you can develop your own Virtual Classroom Tours. Use the template to record a special learning project that you have found particularly successful in your classroom. Then share the project with other teachers in your school, district or beyond.
Here�s how:
Follow the prompts on each slide and in the embedded Word documents in this PowerPoint template to insert your project information. When you have finished inputting all of the project information that is requested, delete the prompts. Select each one and press the Delete key. The first Word document, on slide 1, includes general information and does not need to be changed by you.
Note: To enter the title of your Virtual Classroom Tour you must select View, Master, Slide Master, and enter it on the slide master. Then click Close Slide Master. This will cause the title to appear on each of the slides.
As you are working on your Virtual Classroom Tour make sure that the Auto save feature of PowerPoint is turned off. This will help to prevent the size of your file from getting too large. Go to Tools, and Options. Click on the Save tab, and uncheck the box that says Save Autorecover info. Remember to manually save your work frequently!
This Virtual Classroom Tour template has been provided so you can develop your own Virtual Classroom Tours. Use the template to record a special learning project that you have found particularly successful in your classroom. Then share the project with other teachers in your school, district or beyond.
Here�s how:
Follow the prompts on each slide and in the embedded Word documents in this PowerPoint template to insert your project information. When you have finished inputting all of the project information that is requested, delete the prompts. Select each one and press the Delete key. The first Word document, on slide 1, includes general information and does not need to be changed by you.
Note: To enter the title of your Virtual Classroom Tour you must select View, Master, Slide Master, and enter it on the slide master. Then click Close Slide Master. This will cause the title to appear on each of the slides.
As you are working on your Virtual Classroom Tour make sure that the Auto save feature of PowerPoint is turned off. This will help to prevent the size of your file from getting too large. Go to Tools, and Options. Click on the Save tab, and uncheck the box that says Save Autorecover info. Remember to manually save your work frequently!
2. This Virtual Classroom Tour template has been provided so you can develop your own Virtual Classroom Tours. Use the template to record a special learning project that you have found particularly successful in your classroom. Then share the project with other teachers in your school, district or beyond.
Here�s how:
Follow the prompts on each slide and in the embedded Word documents in this PowerPoint template to insert your project information. When you have finished inputting all of the project information that is requested, delete the prompts. Select each one and press the Delete key. The first Word document, on slide 1, includes general information and does not need to be changed by you.
Note: To enter the title of your Virtual Classroom Tour you must select View, Master, Slide Master, and enter it on the slide master. Then click Close Slide Master. This will cause the title to appear on each of the slides.
As you are working on your Virtual Classroom Tour make sure that the Auto save feature of PowerPoint is turned off. This will help to prevent the size of your file from getting too large. Go to Tools, and Options. Click on the Save tab, and uncheck the box that says Save Autorecover info. Remember to manually save your work frequently!
This Virtual Classroom Tour template has been provided so you can develop your own Virtual Classroom Tours. Use the template to record a special learning project that you have found particularly successful in your classroom. Then share the project with other teachers in your school, district or beyond.
Here�s how:
Follow the prompts on each slide and in the embedded Word documents in this PowerPoint template to insert your project information. When you have finished inputting all of the project information that is requested, delete the prompts. Select each one and press the Delete key. The first Word document, on slide 1, includes general information and does not need to be changed by you.
Note: To enter the title of your Virtual Classroom Tour you must select View, Master, Slide Master, and enter it on the slide master. Then click Close Slide Master. This will cause the title to appear on each of the slides.
As you are working on your Virtual Classroom Tour make sure that the Auto save feature of PowerPoint is turned off. This will help to prevent the size of your file from getting too large. Go to Tools, and Options. Click on the Save tab, and uncheck the box that says Save Autorecover info. Remember to manually save your work frequently!
3. Open the Word documents at the bottom of each slide by double clicking the icons. Follow the prompts [in the yellow boxes] for inserting information about your learning project.
Open the Word documents at the bottom of each slide by double clicking the icons. Follow the prompts [in the yellow boxes] for inserting information about your learning project.
4. Open the Word documents at the bottom of each slide by double clicking the icons. Follow the prompts [in the yellow boxes] for inserting information about your learning project.
Also, include student work samples with this slide. Here�s how:
Be sure the work sample is a Microsoft Office document.
From the Insert menu choose Object�.
Select Create from File� and click Browse�.
Find the file you want to include and click OK.
Select Display as icon and click Change Icon� and add a suitable caption.
Click OK to add the caption and click OK to embed the file.
With the work sample icon selected, from the Slide Show menu choose Action Settings�.
Select Object action: and from the drop-down list choose Open.
Click OK.
Position the Student Work Sample icon at the bottom of the slide. You can go to View, Grid and Guides, and click Display Grid on Screen for a grid on which to line up your icons.
Open the Word documents at the bottom of each slide by double clicking the icons. Follow the prompts [in the yellow boxes] for inserting information about your learning project.
Also, include student work samples with this slide. Here�s how:
Be sure the work sample is a Microsoft Office document.
From the Insert menu choose Object�.
Select Create from File� and click Browse�.
Find the file you want to include and click OK.
Select Display as icon and click Change Icon� and add a suitable caption.
Click OK to add the caption and click OK to embed the file.
With the work sample icon selected, from the Slide Show menu choose Action Settings�.
Select Object action: and from the drop-down list choose Open.
Click OK.
Position the Student Work Sample icon at the bottom of the slide. You can go to View, Grid and Guides, and click Display Grid on Screen for a grid on which to line up your icons.
5. On this slide, embed the student handouts and the resources created for this project. Some examples are a student project overview, Internet and other resources, directions for art projects, or instructions to students for peer editing of projects. To embed the resources, follow these steps:
Have the resource document available.
From the Insert menu choose Object.
Select Create from File� and click Browse�.
Find the file you want to include and click OK.
Select Display as icon and click Change Icon� and add a suitable caption.
Click OK to add the caption and click OK to embed the file.
Position the document icon at the bottom of the slide. You can go to View, Grid and Guides, and click Display Grid on Screen for a grid on which to line up your icons.
On this slide, embed the student handouts and the resources created for this project. Some examples are a student project overview, Internet and other resources, directions for art projects, or instructions to students for peer editing of projects. To embed the resources, follow these steps:
Have the resource document available.
From the Insert menu choose Object.
Select Create from File� and click Browse�.
Find the file you want to include and click OK.
Select Display as icon and click Change Icon� and add a suitable caption.
Click OK to add the caption and click OK to embed the file.
Position the document icon at the bottom of the slide. You can go to View, Grid and Guides, and click Display Grid on Screen for a grid on which to line up your icons.
6. Add any assessment materials you developed for the project to this slide.
Have the resource document available.
From the Insert menu choose Object.
Select Create from File� and click Browse�.
Find the file you want to include and click OK.
Select Display as icon and click Change Icon� and add a suitable caption.
Click OK to add the caption and click OK to embed the file.
Position the document icon at the bottom of the slide. You can go to View, Grid and Guides, and click Display Grid on Screen for a grid on which to line up your icons.
To include the Standards targeted through your learning project, open the Mapping the Standards document and then add your own standards at the bottom of the document. Links are included to help you search for local curriculum and technology standards.
Add any assessment materials you developed for the project to this slide.
Have the resource document available.
From the Insert menu choose Object.
Select Create from File� and click Browse�.
Find the file you want to include and click OK.
Select Display as icon and click Change Icon� and add a suitable caption.
Click OK to add the caption and click OK to embed the file.
Position the document icon at the bottom of the slide. You can go to View, Grid and Guides, and click Display Grid on Screen for a grid on which to line up your icons.
To include the Standards targeted through your learning project, open the Mapping the Standards document and then add your own standards at the bottom of the document. Links are included to help you search for local curriculum and technology standards.