Get Started with GENI: A Hands-On Layer 2 Experiment Tutorial
420 likes | 528 Views
Are you ready to dive into the GENI Portal? This tutorial will guide you step-by-step through a simple Layer 2 experiment using GENI resources. You'll learn how to sign into the GENI Portal, reserve virtual machines (VMs) across the U.S., establish a management environment, and execute your experiment. This hands-on experience focuses on understanding GENI terminology and workflows, empowering experimenters to manage projects, slices, and resources effectively. Join us on this journey to explore the capabilities of GENI!

Get Started with GENI: A Hands-On Layer 2 Experiment Tutorial
E N D
Presentation Transcript
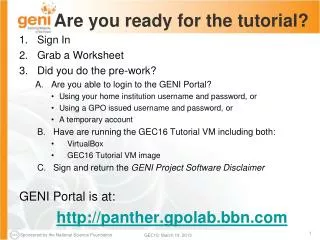
Are you ready for the tutorial? • Sign In • Grab a Worksheet • Did you do the pre-work? • Are you able to login to the GENI Portal? • Using your home institution username and password, or • Using a GPO issued username and password, or • A temporary account • Have are running the GEC16 Tutorial VM including both: • VirtualBox • GEC16 Tutorial VM image • Sign and return the GENI Project Software Disclaimer GENI Portal is at: http://panther.gpolab.bbn.com
Tutorial: Getting Started with GENI Using the GENI Portal Sarah Edwards, Marshall Brinn, Aaron Helsinger, Tom Mitchell GENI Project Office 19 March 2013
Hands On Exercise Do a Simple Layer 2 Experiment in GENI Reserve two VMs across the US from each other connected by a Layer 2 circuit VM in Utah VM in MA Layer 2
Understand GENI Terminology project slice experimenter resource aggregate
Experiment Workflow • Part I: Design/Setup • Step 1: Establish Management Environment • Step 2: Obtain Resources • Part II: Execute • Execute Experiment • Part III: Finish • Teardown Experiment
The GENI Portal is… A web-based tool for experimenters to manage experimenters, projects, and slices. Includes simple tools to reserve resources. More to come in the future.
Experimenter An experimenteris a researcher who uses GENI resources Different types of experimenters have different roles and permissions: • Advisor vs Grad Student • Teacher vs TA vs Student Experimenter
Projects Project Projects organize research in GENI Projects contain both peopleand their experiments A project is led by a single responsible individual: the projectlead Lead Slice Members
Creating Projects • Only project leadscan create projects. • Project namesare public, unique and permanent • A project may contain many experimenters; an experimenter may be a member of many projects • Projects have an optional expiration (e.g. for classes, tutorials) For today’s tutorial we will all join a project which expires on Friday
Experiment Workflow • Part I: Design/Setup • Step 1: Establish Management Environment • Step 2: Obtain Resources • Part II: Execute • Execute Experiment • Part III: Finish • Teardown Experiment
Part I: Step 1: Establish Management Environment • Pre-work: Login to the Portal • Generate and Download SSH Keypair • Join a Project Project Name: GEC16PortalTutorial Tutorial instructions: http://groups.geni.net/geni/wiki/GENIExperimenter/Tutorials/PortalSimpleLayer2Example
Creating a GENI account • GENI Portal is at: https://panther.gpolab.bbn.com • Anyone with an account at a supported identity provider (usually your school or employer) can log in, but they will have no privileges • If you don’t have such an account, we will make you an account at the GPO Identity Provider • You must be a member of a project to do anything interesting
InCommon Leverage InCommonfor single sign-on authentication Experimenters from 288 educational and research institutions have InCommon accounts • For many experimenters: • no new passwords • familiar login screens
You are here Profile Help Projects Slices Log Messages
In your local VM … > mv ~/Downloads/id_geni_ssh_rsa ~/.ssh/. > chmod 600 ~/.ssh/id_geni_ssh_rsa > ssh-add ~/.ssh/id_geni_ssh_rsa
Join a Project GEC16PortalTutorial
Resource A resourceis a piece of infrastructure A resource can be real or virtual. Resource specifications are used to describe and request resources. Examples: • Compute: computer vs virtual machine (VM) • Wireline Network: VLAN or OpenFlow • Wireless: WiMAX
Aggregate InstaGENI Rack ExoGENI Rack An aggregatemanages a set of reservableresources Aggregates include: GENI racks OpenFlow WiMAX
Slice A sliceis a container of resources used in an experiment. A slice can contain resources from one or more aggregates A slice is in a single project A slice has an expiration Slice names are public, reusable and unique
Putting it all together Member: project Lead: Experimenter slice Experimenter aggregate aggregate resource resource Layer 2 VLAN
Experiment Workflow • Part I: Design/Setup • Step 1: Establish Management Environment • Step 2: Obtain Resources • Part II: Execute • Execute Experiment • Part III: Finish • Teardown Experiment
Part I: Step 2: Obtain Resources slice • Create a slice • Reserve VM at Two Aggregates • Utah InstaGENI • GPO InstaGENI • Check Whether VMs are Ready to be Used VM (Mass) VM (Utah) Layer 2 VLAN Wait for blinking ball
Extend slice expiration Extend resource expiration Add Resources
Add Resources at Utah InstaGENI Wait for blinking ball Add Resources at GPO InstaGENI
Experiment Workflow • Part I: Design/Setup • Step 1: Establish Management Environment • Step 2: Obtain Resources • Part II: Execute • Execute Experiment • Part III: Finish • Teardown Experiment
Part II: Execute Experiment Internet ssh • Login to nodes (two nodes: client & server) • Run your experiment • Send IP Traffic • Disable IP • Send Layer 2 (non-IP) Traffic • Logout of nodes Control Interfaces client (Utah) server (Mass) Layer 2 VLAN Data Interfaces Experimenter
$ /sbin/ifconfig client $ /sbin/ifconfig server
Worksheet Project Name: GEC16PortalTutorial Slice Name: portal01 Client Server Control Interface Name eth ___ IP Address __ . __ . __ . __ Data Interface Name mv ___ . ___ Initial IP Addr 10 . __ . __ . __ Des IP Addr 10 . 10 . 1 . 2 /24 MAC Address __ : __ : __ : __ : __ : __ Control Interface Name eth ___ IP Address __ . __ . __ . __ Data Interface Name mv ___ . ___ Initial IP Addr 10 . __ . __ . __ Des IP Addr 10 . 10 . 1 . 1 /24 EtherType: 10001
# configure your IP $ sudo /sbin/ifconfigmv2.3 10.10.1.2/24 # disable IP on your nodes $ sudo /sbin/ifconfigmv2.3 0.0.0.0 # start L2 server $ sudo /usr/local/bin/pingPlusListener10001 $ exit # configure your IP $ sudo /sbin/ifconfigmv10.1 10.10.1.1/24 # should SUCCEED $ ping 10.10.1.2 –c 5 # disable IP on your nodes $ sudo /sbin/ifconfigmv10.1 0.0.0.0 # should FAIL $ ping 10.10.1.2 –c 5 # start L2 client $ sudo /usr/local/bin/pingPlus01:02:03:04:05:06 mv10.1 10001 $ exit Be careful! client server
Experiment Workflow • Part I: Design/Setup • Step 1: Establish Management Environment • Step 2: Obtain Resources • Part II: Execute • Execute Experiment • Part III: Finish • Teardown Experiment
Part III: Finish Experiment When your experiment is done, you should always release your resources. • Normally this is when you would archive your data • Delete your resources at each aggregate project resource experimenter aggregate slice
Congratulations! You have… • Run your first GENI Experiment! • Exercised your knowledge of GENI terminology • Used the GENI Portal
What’s Next? • (If needed) Request a permanent account • Are you a Professor or PI? • Ask to be a Project Lead so you can create projects • Invite students to join your project • Are you a Student? • Ask your professor to create a project • Request to join that project Keep experimenting!
Learn about other tools • Tools that are integrated with the Portal • Flack GUI is linked on each slice page • InstaGENI Tutorial on Thurs from 8:30-10am • Omni command line tool (config linked on bottom of Profile page) • Advanced Networking Experiments Tutorial on Wed from 1:30-3:30 • Get help at GEC • Drop In Session • Coding Sprint • Help Table • Get help after GEC • Portal specific questions: portal-help@geni.net (Sarah, Tom, Aaron & Marshall) • Everything else: help@geni.net (Niky and Vic)
Welcome to GENI! Don’t forget to fill out the tutorial survey! http://tinyurl.com/GEC16-Tut-Feedback