Download
1 / 13
170 likes | 795 Views
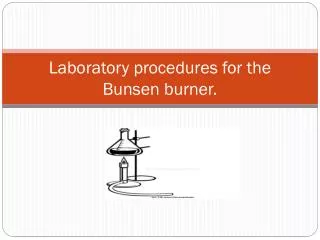
Laboratory procedures for the Bunsen burner. Objectives. To absorb proper safety technique with the Bunsen burner. To familiarize you with the Bunsen burner. To identify the parts of the Bunsen burner. Introduction.

E N D
Objectives To absorb proper safety technique with the Bunsen burner. To familiarize you with the Bunsen burner. To identify the parts of the Bunsen burner.
Introduction • The best way to become familiar with chemical apparatus is to actually handle the pieces yourself in the laboratory. Great emphasis is placed on safety precautions that should be absorbed whenever you perform an experiment.
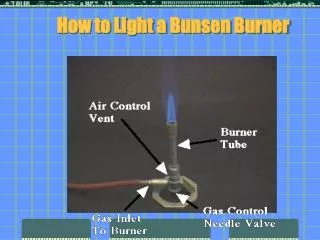
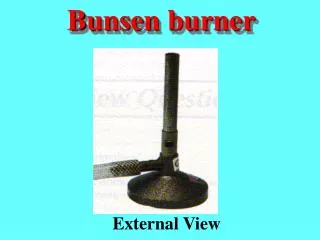
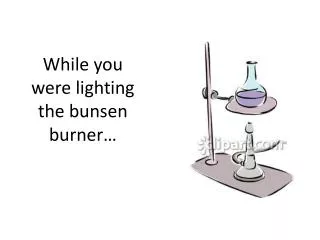
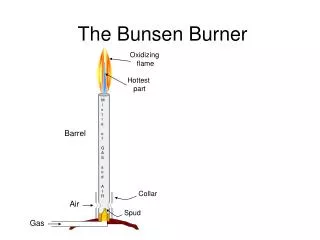
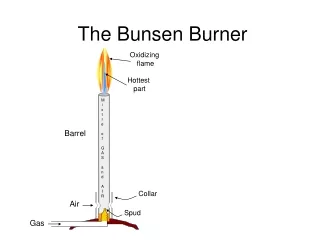
The Bunsen Burner • The Bunsen burner is commonly used as a source of heat in the laboratory. Each burner has a gas inlet located in the base, a vertical tube or barrel in which the gas is mixed with air, and adjustable opening or ports in the base of the barrel. These ports admit air to the gas stream. The burner will have an adjustable needle valve to regulate the flow of gas on the supply line. The burner is always turned off at the gas valve, never at the needle valve.
Safety • Let’s see if you guys know the safety procedures at this point. • Run your own checks, and do your best at the lab stations. • I will penalize you for a point each time I see something that is not safe practice.
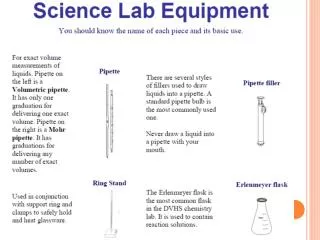
Apparatus and materials • Crucible tongs • Striker • Burner and tubing • Iron wire • Cardboard • Match
Procedure • In your lab journals, draw a schematic of the bunsen burner. • Write down how to use it. • Write down any tips for yourself on how to use the other tools as well.
Procedures • Completely close the air inlet. Sketch and indicate the color of the flame in the space provided. • With your crucible tongs, hold an evaporating dish in the top part of the flame for 30 seconds. Describe the appearance of the evaporating dish.
Procedures • Adjust the burner so that more air enters the barrel and the flame is burning with a slight roar. The flame should be about 2 to 3inches high and should have a sharply defined inner blue clone. Use a white piece of paper as a background to help you better see the flame and sketch it in your notebook.
Procedure • Hold a piece of iron wire with your forceps and move the wire to each of the four regions of the Bunsen flame as indicated in Figure 1-2. Observe how brightly the tip of the wire glows. • Indicate the region of the flame in which the iron wire glowed the most (a, b, c, or d). Refer to Figure 1-2
Procedure • Without adjusting the air inlet, turn off burner using the gas inlet valve. Allow the burner to cool.
Final Activity • Your final task: • Ignite the match with the bunsen burner.
Closing Procedures • Clean up and put away all equipment. • Complete any questions not answered and have your lab checked for grade.