Download
1 / 2
20 likes | 124 Views
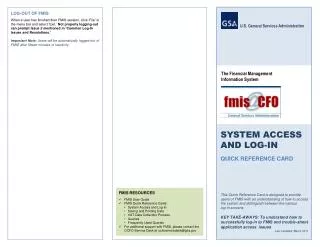
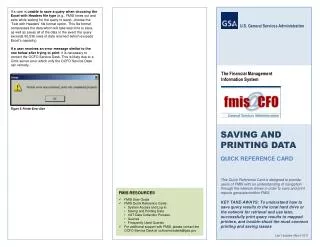
This Quick Reference Card provides essential guidance for users of the Financial Management Information System (FMIS) to save and print reports effectively. To avoid timeouts when saving large queries, choose 'Text with Headers' for quicker data compression. If printing errors arise, contact the OCFO Service Desk, as they are best positioned to resolve Citrix server issues. Users will learn to save query results, successfully print to mapped printers, and troubleshoot common printing and saving challenges.

E N D
If a user is unable to save a query when choosing the Excel with Headers file type (e.g., FMIS times out and exits while waiting for the query to save), choose the ‘Text with Headers’ file format option. This file format compresses the data which will take less time to save, as well as saves all of the data in the event the query exceeds 65,536 rows of data returned (which exceeds Excel’s capacity). If a user receives an error message similar to the one below after trying to print, it is necessary to contact the OCFO Service Desk. This is likely due to a Citrix server error which only the OCFO Service Desk can remedy. U.S. General Services Administration The Financial Management Information System SAVING AND PRINTING DATA QUICK REFERENCE CARD This Quick Reference Card is designed to provide users of FMIS with an understanding of navigation through the network drives in order to save and print reports generated within FMIS. KEY TAKE-AWAYS: To understand how to save query results to the local hard drive or the network for retrieval and use later, successfully print query results to mapped printers, and trouble-shoot the most common printing and saving issues Last Updated: March 2011 Figure 5: Printer Error Alert • FMIS RESOURCES • FMIS User Guide • FMIS Quick Reference Cards: • System Access and Log-In • Saving and Printing Data • VAT Data Collection Process • Queries • Frequently Used Queries • For additional support with FMIS, please contact the OCFO Service Desk at ocfoservicedesk@gsa.gov
SAVING DATA • To save a report generated in FMIS, the following five steps are required: • Select ‘File Save As’ or by clicking the ‘Save Data’ button. The default file format is text (.txt) with headers. • Change the file type by selecting from the drop-down list labeled ‘Save as Type’to ‘Excel with Header.’(DO NOT choose Excel5 – This format takes an unusual amount of time to save and produces erratic results when loaded into Excel.) • Second, name the file, keeping the file extension for the application (e.g., .xls for Excel). • Use the drop-down menu to select the preferred network drive or local disk which corresponds to the User’s computer - Remember the directory in which you save your file! • Finally, click the ‘Save’ button. The FMIS data has now been saved. • Important Note:To save data, users must allow the FMIS application to access local files by selecting ‘Full Access’ at log-in. • PRINTING DATA • Click the ‘Print’ button or at the main menu, click ‘File,’ and choose ‘Print.’ Users can choose to print a report in portrait or landscape format. Users will also be prompted to print a specific page or a range of pages (e.g., 3-10) of report, or the entire report. Click ‘OK’ and choose the printer for the job. • TROUBLE-SHOOTING SAVING PROBLEMS • If a user is unable to save data or cannot see the local printers, it is recommended to ensure proper log-in to FMIS with Full Access by logging-out and then back in, or by following the steps: • Double-click the Citrix Program Neighborhood Connection Status icon in the system tray. • In the screen that appears, click the FMIS connection, and then the ‘File Security’ button. • 3) The Client File Security window will then appear – select ‘Full Access’ and click ‘OK.’ Figure 1: Save Options Screen Figure 2: Print Options Screen Figure 3: Citrix Icon in System Tray Figure 4: Citrix Connection Center • Important Note: Some users with high security settings cannot see or save on all Client drives. In this case, only the C: Drive will be accessible. Figure 5: Citrix File Security Screen