Chemistry Model by David Bailey: Bonding Demonstrations
Engage students in hands-on chemistry lessons with a simple yet effective model created by David Bailey. Explore ionic and covalent bonding by using colored balls to represent atoms and electrons. Step-by-step instructions provided.

Chemistry Model by David Bailey: Bonding Demonstrations
E N D
Presentation Transcript
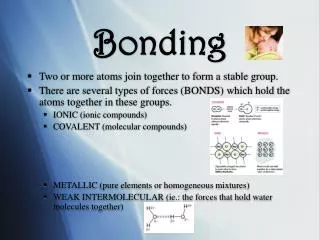
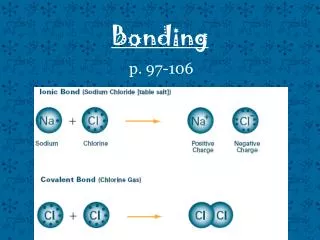
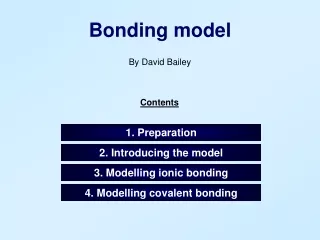
Bonding model By David Bailey Contents 1. Preparation 2. Introducing the model 3. Modelling ionic bonding 4. Modelling covalent bonding
1. Preparation Advance preparation You will need a set of coloured balls e.g. childrens’ ball pool balls (about £5 from a local supermarket) or tennis balls (the number needed of each colour will depend on the atoms modelled – in this model 10 blue balls and 6 yellow balls were used) In the lesson You will also need… 8 willing volunteers Possible demo of reaction (e.g. burning magnesium ribbon in oxygen)
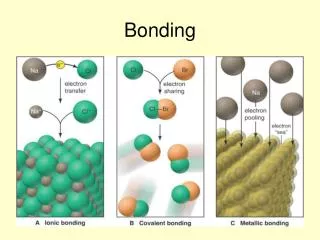
2. Introducing the model This lesson fits in well after the students have learned about the structure of atoms, about numbers of protons and electrons and how these electrons are arranged in shells. It can be used to model ionic (to show the electrons being swapped) and covalent bonding (to show sharing of electrons). In the model the students will model the atom, their hands the available spaces for electrons with a shell and the balls will model the electrons.
Setting up the model 1) Get four of the students to stand (or sit) back to back in a cross arrangement. 2) Tell them that they are going to model an atom (e.g. oxygen). 3) Ask a student to tell you which group oxygen is and/or how many electrons in its outer shell. 4) Give each of these balls (of the same colour) up to the number of electrons in the outer shell. 5) Ask the students to hold out their “electrons”. Model as seen from above.
6) Then get four more students to stand/sit back to back in a cross arrangement nearby the first “atom”. 7) Tell them they are going to model a different atom (e.g. magnesium). 8) Ask a student to tell you which group oxygen is and/or how many electrons in its outer shell. 9) Give each of these balls (of the same colour but a different colour to the first atom) up to the number of electrons in the outer shell. For metal atoms give each person an extra 2 balls to put in pockets. 10) Ask the students to hold out their “electrons” too. Model as seen from above.
3. Modelling ionic bonding The students here are modelling magnesium (blue) – two electrons in its outer shell and oxygen (yellow) – six electrons in its outer shell. When these atoms come close together there is a chance that they will react and swap electrons. The aim is to get a full outer shell!
The magnesium passes its two outer electrons to the oxygen. The oxygen now has a full outer shell. The magnesium has lost its outer electrons… The different colours help student keep track of where the electrons originated in the model. I’m sure they’ve just nicked our balls!
The students pull their next two electrons from their pockets. It is helpful if the metal atoms are boys as they are more likely to have pockets! That’s okay because we have another couple in our pockets.
As you can see, the magnesium atom reveals its electrons from the next shell down. Both atoms have full outer shells, leaving them as positive (smiling) and negative (sad) ions. They like to stay together because opposites attract.
Either before, during or after using the model you may wish to demonstrate the reaction (e.g. burn magnesium in air) to help them connect this with a way of modelling a real chemical reaction.
Other ionic compounds to model and discussion points… Sodium and chlorine is slightly simpler as it only involves the transfer of one electron and forms a well known compound (although the reaction is more difficult to show). Magnesium and chlorine is useful for getting across the idea of why formula is MgCl2. You might wish to discuss limitations of this model.
4. Modelling covalent bonding Set up the model as before, choosing two atoms that would form a covalent bond (e.g. chlorine and chlorine). Remember if you use hydrogen as one of your atoms you will only need one person to model each hydrogen atom. Arrange the “electrons” carefully to ensure that the spaces are near each other Model as seen from above.
Ask the student to suggest how both of these atoms can have full outer shells. Wait for the answer “share them”. The atoms can now share the electrons to let each one appear to have a full outer shell. Model as seen from above.
Other covalent compounds to model and discussion points… Carbon and hydrogen to form methane works well to get across idea of why formula is CH4. Carbon and oxygen work well to illustrate the idea of a double bond and their relative strength when compared with a single bond. Nitrogen and nitrogen work well for discussing triple bonds and the relatively inert nature of nitrogen molecules. This can be extended into the inert nature of the noble gases. You might wish to discuss limitations of this model.