Download
1 / 26
260 likes | 348 Views
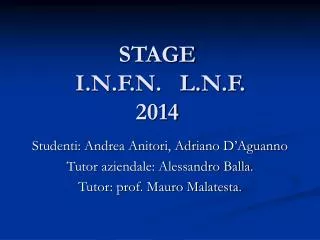
STAGE I.N.F.N. L.N.F. 2014. Studenti: Andrea Anitori, Adriano D’Aguanno Tutor aziendale: Alessandro Balla. Tutor: prof. Mauro Malatesta. What we are going to show you. General view of the board SoC FPGA (System on Chip Field Programmable Gate Array). Explanation of the software ISE.

E N D
STAGE I.N.F.N. L.N.F. 2014 Studenti: Andrea Anitori, Adriano D’Aguanno Tutor aziendale: Alessandro Balla. Tutor: prof. Mauro Malatesta.
What we are going to show you • General view of the board SoC FPGA (System on Chip Field Programmable Gate Array). • Explanation of the software ISE. • Language VHDL(VHSIC Hardware Description Language). • Explanation of the software XPS (Xilinx Platform Studio). • General description of the procedure to create an embedded processor. • How to create a peripheral. • Frequency meter. • Module. • Test Bench. • UCF(User Constraints File). • How to connect a peripheral to the processor throught the bus PLB(Processor Local Bus). • How to import a personal peripheral. • Description of the software SDK(Software Development Kit).
SoC FPGA(System on Chip Field Programmable Gate Array) • It’s a programmable chip. • It’s mounted on a board. • It’s linked to other devices like displays, switches, buttons, ethernet gates, USB gates…
FPGA(Field Programmable Gate Array) Serial ports (RS 232) VGA gate Clock Ethernet gate Expansion connectors FPGA USB gate Buttons Display Switches
ISE • ISE is the software which is used to program the FPGA.
VHDL (VHSIC Hardware Description Language ) • It is one of the most used programming language for the digital electronic systems(like SoC FPGA). VHDL module
XPS (Xilinx Platform Studio) • It is the software to create an embedded processor.
How to create an embedded processor What is an embedded processor? An embedded processor is a processor that is inside the FPGA. Creating one is very easy!
How to create an embedded processor • You must create a new source in the software ISE.
How to create an embedded processor • Select the option “embedded processor”.
How to create a peripheral What is a peripheral? A peripheral is a component used to communicate to the processor. Also creating a peripheral isn’t difficult, just follow a few instructions.
How to create a peripheral • Select the option “hardware”, and clic on “Create or import peripheral”…
How to create a peripheral • …select the option “Create templates for a new peripheral”…
How to create a peripheral • … and set up the peripheral.
Frequency meter • It is our custom peripheral that counts the input in a determinategate(time span). • It is composed by four channels of input. • It shows the output on the board’s display.
Test Bench • While a module is used to create the code for a peripheral, the Test Bench is used to simulate the peripheral.
Test Bench-simulation • The simulation waveform are shown inside ISE
UCF (User Constraint File) • It is the area where you can link the logical ports to the physical ports on the board.
How to connect a peripheral to the processor • It is possible to connect a peripheral to the processor through the bus PLB(Processor Local Bus).
How to import a personal peripheral • Also you can import a peripheral in a project already created. • The process is similar to that just described.
How to import a personal peripheral • Select the option “Hardware” and clic on “Create or import peripheral”.
How to import a personal peripheral • Select the option “Import existing peripheral”.
How to import a personal peripheral • Finally choose the peripheral.
SDK (Software Development Kit) • It is the application used to develop the software used by the embedded platform in XPS. • The programming language it uses is ‘C’.
SDK (Software Development Kit) • Our embedded processor , implemented in this project, reads the values from our frequency meter, and puts them in output on the board’s display. • We used SDK to program the display of the board. • The on board display shows the value in Hertz(Hz) of each channel.
Thank you foryour attention. We thank the I.T.S.T. “E. Fermi” and the I.N.F.N. to this oppurtunity.