Download
1 / 22
250 likes | 540 Views
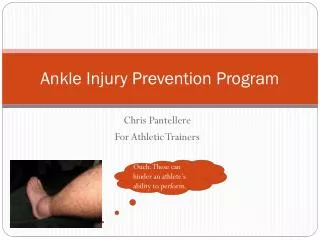
Ankle Injury Prevention Program. Chris Pantellere For Athletic Trainers. Ouch. These can hinder an athlete’s ability to perform. Bony Anatomy. The ankle is comprised of two different articulations each allowing different motions The talocrural joint

E N D
Ankle Injury Prevention Program Chris Pantellere For Athletic Trainers Ouch. These can hinder an athlete’s ability to perform.
Bony Anatomy • The ankle is comprised of two different articulations each allowing different motions • The talocrural joint • Comprised of the Tibia, Fibula, and Talus • Allows Plantar and dorsiflexion; slight inversion/eversion • The Subtalor joint • The subtalor joint is comprised of the inferior surface of the talus and the superior surface of the calcaneus (heel). • This joint allows for the motions commonly called inversion and eversion • The “high ankle” joint • This is called the syndesmosis joint • Articulation of distal tibia and fibula
Ligamentous support of the ankle • Talocrural ligaments • Lateral restraints: Anterior talofibular ligament, calcaneofibular ligament, posterior talofibular ligament • Medial Restraints: Deltoid complex
Subtalorligamentous support • Interosseoustalocalcaneal ligament • maintains alignment of talus and calcaneus • Ligamentumcervicis • Collateral support is gained from the lateral and medial(deltoid) ankle ligaments • Medial talocalcaneal ligament • Provides medial intrinsic support to the subtalor joint • Lateral talocalcaneal ligament • Provides lateral support to subtalor joint • Anterior glide of the talus on the calcaneus is partially restrained by the posterior talocalcaneal ligament
Syndesmosis ligaments • Anterior talofibular ligament • Posterior talofibular ligament • Interosseous membrane • Collectively these ligaments hold the tibia and fibula closer together preventing instability
Musculature acting upon the Ankle • Primary dynamic stabilizers: • Peroneallongus and brevis- plantar flexion and eversion • These muscles are the main dynamic stabilizers versus inversion sprains • Peronealtertius- dorsiflexion and eversion • Tibialis anterior- dorsiflexion and inversion • Tibialis posterior- plantar flexion and inversion • Flexor hallicuslongus • Extensor digitorumlongus • Assists the T.A. • Triceps suraecomples • Gastrocnemius, soleus, and plantaris Without a strong tibialis anterior the joint will be less stable
More musculature • Secondary dynamic stabilizers • Glueteals • Hamstings • Abductors • Adductors • Core muscles These muscles even though are far from the joint with dynamic movements and activity The Core musculature helps maintain a proper position for all the joints of the body
Prevention program • Phase 1: Basic strengthening • Before we can get into the heart of the prevention program we must build a basis of strength in order to work from • We must begin with strengthening the fore mention muscles before we can advance to more dynamic sport specific strengthening and activities. • Theraband exercises • Dorsiflexion, plantar flexion, inversion and eversion • Perform 3 sets of 12 repetitions isolating each movement • Make sure there is NO HIP MOTION. If there is the hip muscles are the primary movers • Apply pressure to the lateral aspect of the knee and focus on moving strictly at the ankle
Phase 1: basic strengthening (cont) • Calf raises • 3 sets 12 repetitions • Bent knee Calf raises • 3 sets 12 repetitions • **Maintain flexibility in these muscles so we have full DF • Wall squats with swiss ball (to 45 degrees) 3x10 • Place swiss ball against wall and on upper back; maintain proper positioning; no knees over the toes. (Bear in the woods) • Gluteals as well as eccentric hamstring control • Straight leg raises • Working adductors and abductors 3x10. side laying • Heel/Toe walks • Walk on toes or heels across the room for 4 separate times (there and back)
Phase 1: Basic core strengthening • Crunches:15 degrees of flexion • Isolates the core musculature; 3x 25; begin on ground advance to swiss ball • Planks • ‘elbows and toes’ • 30 seconds progress to 1 min up til 3 min • Can impororate side planks as well • Bridges with feet on swiss ball. • Bring butt of ground hold for 30 seconds Core stability is the key to optimal sports performance
Phase 2: strengthening • After about a week to 2 weeks we can advance to more challenging strengthening exercises. • Concentric/Concentric Diagonal patterns • Begin: Dorsiflexion and inversion plantar flexion and Eversion • Begin: Dorsiflexion and Eversion plantar flexion and inversion • Manual resistance with partner (resist both ways) 3x8 • Peroneals, TA, TP other lower leg muscles • Continue with other strengthening exercises previously stated. If have some weight machines progress to those • Wall squats to 90 degrees 3x10 • Single leg squats 3x10
Phase 2: Advancing Core stability • Reverse crunches with swiss ball • Bring swiss ball to your ches • 3x 15 • Prone leg tucks 3x15 • Planks on swiss ball (same progression) • Medicine ball toss with crunches. 3x15 • Regular crunches on swiss ball 3x20 • Stated earlier in the program • Progress to hands over head; can use medicine ball • Lateral crunch on swiss ball 3x15 • Full crunches 3x10 • Combination of reverse crunches and full crunches • Curl ball to chest and perform a full crunch also I have abs like that
Phase 2: Neuromuscular control and Proprioception • Early on in phase one basic NMC exercises can be implemented • 30 seconds single leg balance (4 sets); shoes on at first, then off; eyes open • 30 degrees knee flexion; hands on hips • Record any errors • Errors include: Touches down contralateral leg, lifts hands off waist, makes foot adjustments, a step stumble or fall, contralateral hip goes to more than 30 degrees of flexion or abd, contact with weight bearing leg, opens eyes (of eyes closed), remains out of testing position > 5 sec • As athlete becomes better progress to shoes off, then eyes closed, and then can incorporate unstable surfaces (bosuballs, foam pads) • Can also increase the time they perform balance for • Record number of errors. 10 seconds per error and then make them perform planks for that long. Can also use other core strengthening exercises for error • Ie: 5 reps per error. 5 errors= 25 crunches
2 3 1 4 Phase 2: More advanced NMC training • Quadrant hops • Make a ‘four square’ box on the ground • Number the boxes 1-4 • Hands on hips • 4 sets; 4 times through= 1 set • Clockwise / counterclockwise • 1-3-2-4 • 180o rotations w/ hops • Record errors • Other errors include doesn’t “stick” landing • Doesn’t maintain landing for 5 sec • Sways body significantly to regain balance • Can add resistance to this by making a theraband “belt” • Can progress to eyes closed also
More advanced NMC NMC training can help improve balance and train athletes to have more control of their lower extremity • Cup/cone pick ups on a stable surface • Progress to uneven surface • 4-6 cups • Bend at hips and waist pick up cups • Lunges on uneven surface. • Place one foot on the uneven surface. Hands on hips. Already in lunge position. Bend at knee can do backward lunges also. Just switch legs • Progress to eyes closed. • T-band kicks • Single leg balance with theraband attached to contralateral leg • Kick out in a 6 direction star patter • Start on stable surface and progress to uneven surfaces • Do ten reps in each direction (consecutively) • Perform 2 sets
Phase 3: Plyometrics • Double leg forward barrier jump • Jump fwd on both legs over 5 barriers spaced a few ft apart. Turn around and go back. Bring knees up with each jump, bend knees on landing and emphasize “soft” landings. Two sets • Lateral barrier hop • Hop back and forth laterally over a low cone or other barrier for 16 reps. To emphasize proper technique do in reps of 4 repetitions until 16 reps are completed. That will equal one set. Soft landings. Knees up. • Depth jump with vert jump • Step down from box land on both feet. Bend knees and extend shoulders on landing. Then explosively jump into a maximal vert jump. Reach hands above your head and slightly arch back. 10 reps. 2 sets • Tuck Jumps • Similar to squat jumps except quickly tuck knees to chest as you approach full height of the jump. 10 reps. 2 sets Make sure you have a nice soft landing
More Plyometrics • Lunge Jump • Land with leg in same position each time • 12 reps 2 sets • Box jumps • Jump up onto platform jump down repeat. 2 sets 12 reps. • Advanced lunge jump • Same as lunge jump except switch legs in mid air. • 2 sets 12 reps • Lateral box shuffle • One foot on the box jump vertically to other side switching feet. Use arms to increase jump height. Repeat rapidly for 20 seconds. 2-3 sets • Squat jumps • Start: knees flexed, finger tips on ground outside of feet. Jump straight up explosively as high as possible reach with both hands overhead and slightly arch back. When returning to ground bend knees touch ground and repeat. 10 reps 2 sets.
Agility Drills • Lateral 2 in 2 out drill • Step both feet in then out; progress to next box • Forward 2 in 2 out • Same as above except begin facing the length of ladder • Lateral shuffle drill • See picture • Scissor jumps • Start one foot in box switch feet. Keep progressing to each box • Lateral one-leg step in drill • One foot at a time in each box but both feet must enter box • Four corner cone drills • Modify for each sport. • All of these drills should be done 3 times. Time each one. Use as a motivator. Agility drills will not only make the athlete more agile for sports but it can also be used as a way of conditioning the athlete
Dynamic Agility drills • Should be sport specific • Break down each sport • What do they do? • Modify from there • Here are a few samples • Incorporate balls, sticks or other obstacles Agility drill for soccer. All rehabilitation should incorporate sport specific drills whenever the patient can tolerate them
More agility drills • Sport specific! This drill would be ideal for football as well as many other sports.
More agility drills This drill is very flexible to each sport Each time you stop at an X to change direction do 5 reps of sport specific drills Cone weave make sport specific x x x x x x x x x 10 Side-to-Side Ankle Hops to 10 Single Leg Ankle Hops to Sprint end x
Remember • This prevention program should progressively get harder as the athlete continues to improve and become more aware of the activities they are performing • As we progress to the next phase remember to keep some of the basic exercises still involved • This program is not the set program • Make sport specific • Alter certain exercises to make sport specific • Also to change things up; keep challenging • Safety First! And Have fun! Thanks for taking the time to review my power point!