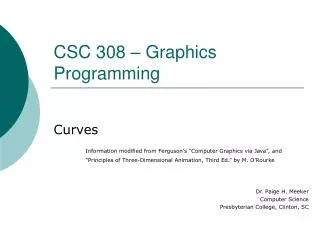
The Rendering Pipeline: Creating Images in OpenGL
Explore how OpenGL transforms modeling descriptions into images through a detailed rendering pipeline. Learn about geometry, transformations, color, depth, and more in this insightful guide.


The Rendering Pipeline: Creating Images in OpenGL
E N D
Presentation Transcript
Computer Graphics:Programming, Problem Solving, and Visual Communication Steve Cunningham California State University Stanislaus and Grinnell College PowerPoint Instructor’s Resource
The Rendering Pipeline How the OpenGL system creates the image from your modeling
A Different Perspective on Creating Images • Up to this point we have focused on the content of images, without much thought about how they are created • Rendering is the process of taking the descriptions you have provided and setting the appropriate pixels to the appropriate colors to create the actual image
The Rendering Pipeline • Rendering is accomplished by starting with your modeling and applying a sequence of operations that become more and more detailed: a pipeline • This chapter is really about the steps in that pipeline: what they are and how they are done
The Rendering Pipeline (2) • The basic steps in the pipeline are: • You will recognize many of the pieces from earlier chapters
The Rendering Pipeline (3) • The steps can happen in different ways • Software-only • On a graphics card • OpenGL only specifies the process, not the implementation
Two Parts to the Pipeline • The first part of the pipeline is the Geometry Pipeline • This works on the geometry you define and takes it to screen space • The second part of the pipeline is the Rendering Pipeline • This takes the basic geometry in screen space and actually sets all pixels
Model Space • The actual definition of your graphics objects happens in model space when you define • The vertices of your object - glVertex(…) • The way these vertices are grouped - glBegin(…) - glEnd()
Model Space to World Space • The vertices you defined are transformed through the modeling transformation that is currently active, and the results are vertices in world space • Grouping information is passed along • Light position can be affected if this is defined within your modeling
World Space to 3D Eye Space • The viewing transformation is applied to all points in world space in order to transform them into 3D eye space • In OpenGL, the modeling and viewing transformations are combined into the modelview transformation, and this is what is really applied • Grouping is passed along
3D Eye Space to Screen Space • This is performed by the projection transformation • Much more than geometry is done, however! • The glColor statement or lighting model give the point a color • The z-value in eye space is used to compute a depth • Clipping on the view volume is performed so only visible geometry is preserved • Grouping is passed along
A Point in Screen Space • A point is screen space corresponds to a pixel, but it also has a number of properties that are needed for rendering • Position • Depth • Color - RGB[A] • Texture coordinates • Normal vector
Rendering • To begin the rendering process, we have “pixels with properties” for each vertex of the geometry • The first step is to proceed from vertices to edges by computing the pixels that bound the graphics objects • The edges are determined by the grouping you defined as part of your modeling
Computing Edges • Edges are computed by interpolation • Geometric interpolation, such as the Bresenham algorithm, is used to compute the coordinates of each pixel in the edge • There are rules about edge computation that avoid including pixels that keep from including any pixel in two different edges and that do not include any horizontal edge
Computing Edges (2) • The interpolation is deeper than pixels • The geometry interpolation is extended to calculate the color, depth, texture coordinates, and normal for each edge pixel • If the projection used perspective, this also needs to be used to interpolate depth and texture
Result of Edge Computation • The result of the edge computation is a set of edges for each graphical object • Because OpenGL only works with convex objects, and because of the rules about including pixels in edges, for any horizontal line of pixels there are either zero or two edges that meet this line
Fragments • If there are exactly two edges that meet a horizontal line of pixels, we need to determine the color of all pixels between the two edge pixels on the line • These pixels are called a fragment
Fragments (2) • To determine the color of each pixel, • Interpolate from left to right on the line • For each pixel, • Calculate the depth • Calculate the color (interpolate the color or use the texture) • If depth testing, check the depth in depth buffer • If masking, check against mask • If the pixel passes the depth and mask tests • Perform any blending needed • Write the new color and depth to the color and depth buffers
Some OpenGL Details • The overall OpenGL system model
Some OpenGL Details (2) • Processing for texture maps
Some OpenGL Details (3) • Detail of fragment processing
Programmable Shaders • The OpenGL system model shown here uses a fixed-function pipeline where all the operations are already defined • This is being expanded to a pipeline that lets you define some of the functions by adding programs, called shaders, that you can define • These shaders can be applied as a few specific places in the pipeline
Geometry Shaders • Geometry shaders work as the primitives (vertices plus groupings) are defined • They will allow you to extend the original geometry with additional vertices or groups
Vertex Shaders • Vertex shaders let you manipulate the individual vertices before they are passed to the rasterization stages
Fragment Shaders • Fragment shaders let you manipulate individual pixels to apply new algorithms to color or select pixels
Shaders Are New… • … and are beyond the scope of a beginning graphics course at this time • If you have a shader-capable graphics card and a shader-capable OpenGL system, it will be interesting for you to experiment with them once your OpenGL skills are solid • We suggest that you use Mike Bailey’s glman system as a learning tool