Course Overview
Module 1 – General Introduction. Course Overview. General Introduction DTP Onyx PosterShop RIP Media Manager. Module 2 – System Configuration. Software Configuration. Mac/PC. RIP Station. HP Scitex XL1500. DTP. Onyx I-RIP. Machine Software. Module 3 – DTP. Subject Slide
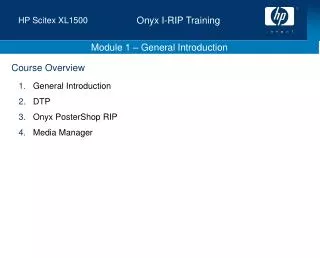

Course Overview
E N D
Presentation Transcript
Module 1 – General Introduction Course Overview • General Introduction • DTP • Onyx PosterShop RIP • Media Manager
Module 2 – System Configuration Software Configuration Mac/PC RIP Station HP Scitex XL1500 DTP Onyx I-RIP Machine Software
Module 3 – DTP Subject Slide DTP Work Flow 20 File Format – Input 21 File Format – Output 22 Macintosh Chooser 23 CMYK Separation Setup in Photoshop 24 Ink Coverage 25 Closing a PS File Using FreeHand 26 ICC – International Color Consortium 28 Insert ICC with PhotoShop 29
Module 3 – DTP DTP Work Flow Mac/PC Workstation: PhotoShop, Quark etc. Machine Application Onyx I-RIP PS, EPS, JPG, PDF 1-bit Tiff
Module 3 – DTP File Format – Input • PS (PostScript): A programming and page description language supported by most DTP and graphics applications. • EPS (Encapsulated PostScript): A version of PostScript file format that includes both a low resolution preview and a high resolution PostScript image description. • PDF (Portable Document Format): Independent file format (not in program, system or computer).
Module 3 – DTP File Format – Output • 1-bit TIFF A data file that is processed or output sequentially, bit by bit and line by line. This format has been developed especially for HP IID.
Module 3 – DTP Macintosh Chooser • Laserwriter 8.4.2.3 and above or AdobePS printer • PPD • Onyx Production House CD • Mac Tools directory in E:/Graphics folder on Prefix RIP server.
Module 3 – DTP CMYK Separation Setup in PhotoShop • Separation type GCR • Black generation Medium • Black ink limit 100% • Total ink limit 300%
1 2 3 Module 3 – DTP Ink Coverage 4 5 6 7
2 Module 3 – DTP Closing a PS File Using FreeHand 1 3
Module 3 – DTP Closing a PS File Using FreeHand (Cont.) 4 5
Module 3 – DTP ICC – International Color Consortium • International color standards for all devices • CMM – Color Matching Module • Use HP IID Profile Wizard to create ICC profiles • Input and output ICC profiles are set in Print properties during RIP
2 Module 3 – DTP Insert ICC with PhotoShop 1 3
Module 4 – Onyx I-RIP Subject Slide Hardware – Disk Drives 31 Onyx I-RIP Software 32 Before Installation 33 Installation and Configuration 35 Configuring the Printer 38 Main Window – Onyx RIP Queue 41 RIP a File 42 Opening an Image 43 Preflight – Printer and Media 44 Preflight – Previewing and Sizing 45 Preflight – Tiling 46 Preflight – Color Correction 47
Module 4 – Onyx I-RIP Hardware – Disk Drives
Module 4 – Onyx I-RIP Onyx I-RIP Software • Onyx I-RIP Server • Preflight • Media Manager • Step and Repeat
Module 4 – Onyx I-RIP Before Installation • Production House hardware and software recommended requirements: • Motherboard - 2 USB ports • CPU - Intel Pentium IV/AMD Athlon single/dual 3.2 GHz or higher. A dual processor will increase performance. • RAM - Minimum 2 GB per CPU • Hard disk - 3 or more SCSI 10000 RPM hard drives of 40 GB (minimum) each Recommended: 5 SCSI 10000 RPM hard drives of 80-120 GB each • Hard drive space for installation - 100 MB
Module 4 – Onyx I-RIP Before Installation (Cont.) • Operating system - Windows XP Pro Server • 2 Network boards – • 100 MB BASE-T • 1 GB Ethernet adapter for network connection It is recommended to use 2 network boards: one for the network connection and another for direct connection to the machine. • Monitor resolution - 1024 × 768 pixels with 16-bit color
Module 4 – Onyx I-RIP Installation and Configuration • To Install: • Make sure you have the Administrator Privilege. • Attach the HASP key to the parallel port (or attach the USB key to the USB port). • Insert the Onyx I-RIP program CD into the CD drive. • Follow the on-screen instructions and click Next. • Install the printer. • Once completed, restart the computer.
Module 4 – Onyx I-RIP Installation and Configuration (Cont.) Choose C:\Onyx Graphics
Module 4 – Onyx I-RIP Installation and Configuration (Cont.) • Upon completion of the installation procedure, the software will open a list of drivers to install. Choose and installs the HP Scitex XL1500 1bit printer. • In the Onyx I-RIP, you can install several different printers, and work on each one separately with different devices.
Module 4 – Onyx I-RIP Configuring the Printer Install the 1-bit printer
Module 4 – Onyx I-RIP Configuring the Printer (Cont.) • Before printing from the Onyx RIP-Queue, you must first configure each of the installed printers. • To configure your printer: • Start Onyx RIP Queue by: • Selecting Onyx RIP_Queue from the Start menu, or • Double clicking the Onyx RIP Queue icon from the Desktop. The Configure Printer Port dialog appears(when you run the Onyx RIP-Queue for the first time). • Select the Print to File port. • Configure the media and page size you would like to work with.
Module 4 – Onyx I-RIP Configuring the Printer (Cont.) • Choose Print to File and then configure the output directory. • Choose the media.If all media types do not appear initially, they will appear after importing. 1 2
Module 4 – Onyx I-RIP Main Window – Onyx RIP Queue Select the Printer Job Preview Hold
Module 4 – Onyx I-RIP RIP a File • There are two options to open and RIP a file: • Use the RIP server. • From the Hold to the Print area, drag the file. • File manipulation is not available in this option. • Open the file with preflight. • Manipulate the file, sizing, cropping, color correction etc. • Submit the file and the process will start.
Module 4 – Onyx I-RIP Opening an Image • From the File menu on the top left of the Main window select Open. • Select the file you want to RIP. • Select your printer by clicking from the printer drop-down menu. • Select a Quick Set that best represents your workflow. • Click Open. Choose preflight for file editing
Module 4 – Onyx I-RIP Preflight – Printer and Media Toolbar Select a Printer Select the Media Select the Mode Select the Profile
Module 4 – Onyx I-RIP Preflight – Previewing and Sizing Preview Size Orientation Cropping on Preview
Module 4 – Onyx I-RIP Preflight – Tiling • Enables the Printing of Jobs which are larger than the Media. Default Tile Size Custom Size Overlap
Module 4 – Onyx I-RIP Preflight – Color Correction • Tools which allow alterations in the output color. Filter Tools Saturation Color Curves
Module 4 – Onyx Production House RIP Preflight – Color Correction (Cont.) • Color Replacement
Module 4 – Onyx I-RIP Preflight – Color Correction (Cont.) • Submitting your Work Number of Copies
Module 5 – Server Configuration Subject Slide Printer Configuration 53 General Settings 60 Quick Sets Editing 61 Quick Set Advanced Options 63 Change Media and Placement 71
Module 5 – Server Configuration Printer Configuration
Module 5 – Server Configuration Printer Configuration (Cont.)
Module 5 – Server Configuration Printer Configuration (Cont.)
Module 5 – Server Configuration Printer Configuration (Cont.) • Print To Resolution Specific Folder – every output RIP is sent to its resolution type folder. • Print To Media Specific Folder – every output RIP is sent to its media type folder. • Print To Image Specific Folder – every output RIP is sent to its image name folder. • Rotating alternate tiles – it is possible to rotate automatically only the odd tiles. • Use light ink at 100% color density – This is the amount of light color at 100% dark color.
Module 5 – Server Configuration Printer Configuration (Cont.)
Module 5 – Server Configuration Printer Configuration (Cont.)
Module 5 – Server Configuration Printer Configuration (Cont.)
Module 5 – Server Configuration General Settings
Module 5 – Server Configuration Quick Sets Editing
Module 5 – Server Configuration Quick Sets Editing (Cont.) Quick Set Name Media Configuration Resolution & Color Management Advanced Options
Module 5 – Server Configuration Quick Set Advanced Options • Output
Module 5 – Server Configuration Quick Set Advanced Options (Cont.) • Tiles
Module 5 – Server Configuration Quick Set Advanced Options (Cont.) • Marks
Module 5 – Server Configuration Quick Set Advanced Options (Cont.) • Crop Marks The Zero-Line Tile Mark option is applied to tiled jobs which have a defined overlap. The crop marks are printed in a crosshair configuration, with each of the 4 segments measuring 1/4”. The inner 1/8” of each segment is white (with neither mark nor image data printed), and the outer 1/8” of each segment is black.
Module 5 – Server Configuration Quick Set Advanced Options (Cont.) • Postscript File
Module 5 – Server Configuration Quick Set Advanced Options (Cont.) • Postscript