WebCam Astrophotography
WebCam Astrophotography. By Tej Pratap. Before We Start …. Make sure you have downloaded and installed registax V5 in your computer. If not, just download it right now, takes a few minutes. http://www.astronomie.be/registax/download.html 2. Get the Raw data files from the secys .

WebCam Astrophotography
E N D
Presentation Transcript
WebCam Astrophotography By TejPratap
Before We Start … • Make sure you have downloaded and installed registax V5 in your computer. If not, just download it right now, takes a few minutes. http://www.astronomie.be/registax/download.html 2. Get the Raw data files from the secys. 3. We’ll start in 10 mins when everyone settles down.
Prologue … • There are a few things in life which we can master only by practice. Since, this is the first time we are trying to process the astrophotographs , don’t get disappointed if the results are not that good. • We’ll try our best to avoid that situation
Afocal Method : • Put the camera in front of the eyepiece and take the picture. • Problems : Vibrations, very difficult if you don’t have an adapter, Only for bright objects. • Advantages : High magnification, very very easy.
Piggyback • For Deepsky. • Problems : Noise etc … Need a tracker system.
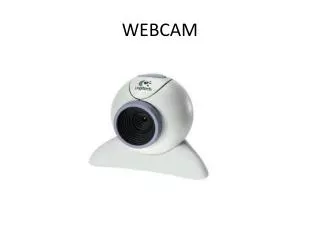
Webcam Videos • Advantages : Can get large no of frames without actually putting in any efforts. Can choose the best frames (ref sky conditions etc). • Everyone has an access.
Why processing ? Why not take a single pic ? • More details • To improve signal to noise ratio.
Lets Begin with the processing Part • Registax : Freeware • Deepsky Stacker • Regim • Iris • Etc
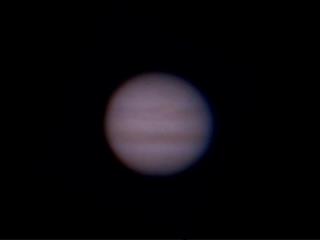
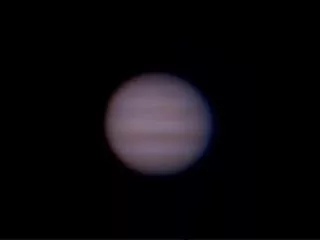
Load your captured movie or series of images into Registax. I primarily use a Meade DSI Color, so I use a series of .bmp images. Either through a Windows or Registax bug, I can only open about 250 at a time using the "open" ("select" in Registax) dialog box, but you can just drag and drop the files from Windows Explorer. • Select an alignment box that is a little larger than the planet, click the center of the planet, and then click "Align". Registax will do the initial alignment and rank the pictures by quality and alignment error (the graph to the right). Amazing, how mediocre the unprocessed frames are, isn't it? • The slider near the bottom of the window determines how many frames are kept. For this tutorial I'll keep a couple hundred. Up to about 2/3 of these might be usable, though. It depends on how many you have and how bad they are, but obviously, when the quality curve starts to drop off a lot, they need to be rejected. • Click the "Limit" button. Registax will cut unused frames and move to the Optomization section.
Click "Optomize". Registax will correct alignment errors as best it can. • Click the "Stack" tab to move to the stacking section. • For expedience, you can just click the "Optomize and Stack" button, which will skip you to step 4. That works fine when you can see from the initial alignment that you won't have any major alignment errors and won't need to reject any more low quality images.
Click "show stackgraph". If you want, you can cut off a few more frames using the sliders for quality and registration difference. Sometimes there are anomalous spikes (there is one in the initial alignment in step 1) and if they aren't corrected, those frames will need to be cut out because they won't align and stack correctly. For this example, the graph looks pretty good and no further adjustment is necessary. • Here I've also clicked the "expand image" option. This uses the entire width of every frame added together. If there is a lot of movement, that may mean you only have a few frames covering part of the image and that can degrade quality. Here, only part of the right side is cut off in some frames and it isn't noticeable when they are stacked. • Click the "Stack" button.
I don't fully understand what wavelet processing is, but it appears to be a local contrast enhancement algorithm. It detects and amplifies small differences in contrast and it is amazingly effective. The top slider is coarser detail and the bottom one finer detail. Usually my wavelets look like a bell curve, with the top slider being most sensitive to overprocesing (it'll look grainy or pixelated if it is overdone). The more images you stack, the more you can amplify the detail. Use trial-and-error to find what looks best.
First timers , needn’t lose heart … • All you need is gud raw data and then processing is just a matter of practice. • Hope you will come up to do it yourself. If you wish to do so, u can always contact the cordinators : jishnub@, manshul@