Download
1 / 19
190 likes | 225 Views
Learn how to create stunning PowerPoint presentations from scratch, including adding slides, design elements, animations, and transitions. Discover the secrets to making professional slides with WordArt, fonts, and custom animations.

E N D
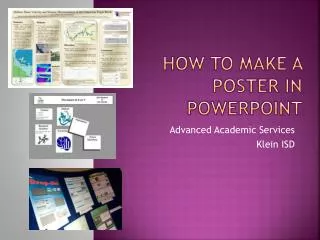
How to Make a PowerPoint Yes you can do it too!
How to(legally)Download PowerPoint • http://us7.trymicrosoftoffice.com/product.aspx?family=officehomestudent&culture=en-US • Click on • First make sure you are able to Download (it is a trial so it will not last forever!)
How to Begin • This is how the page will first look like when you open a new page. • Adding a title is as simple as clicking and typing. • To edit, re-click text box.
Getting started… • Choose a blank presentation.
Layouts • Depending upon what you would like to do, you can choose the number of text and image boxes. • You can use image boxes for graphs and videos too! • You can always add extra text or image boxes after. • It is also easy to change the size of the boxes.
Using Templates • Click Design (top right in between Font Color and New Slide) To choose the background for your slide.
Making a New Slide • After you made your first page, click (top right) on New Slide, to make your second, third, forth page etc…
Adding Color and Design • To make your slides spiffy, you can click Design and then Color Schemes and choose your colors.
Adding more Color & Design • If you don’t like any of the available pre-made color schemes, click on the text at the bottom of the panel that says “Edit Color Schemes.” A new window will pop up that will allow you to make your own custom color scheme
Word Art How to Make • To Open click View >> Toolbars >> WordArt • 1 - Insert WordArt • 2 - WordArt Edit Text • 3 - WordArt Gallery • 4 - Format WordArt • 5 - WordArt Shape • 6 - WordArt Same Letter • 7 - HeightsWordArt Vertical • 8 - TextWordArt Alignment • 9 - WordArt Character Spacing
All About Fonts • "Formatting Toolbar." If you do not see it in PowerPoint, then go to the menu bar and select View >> Toolbars >> Formatting to access this toolbar. • You can also edit your text using the Format Text Window. This window presents a few more advanced and detailed options for modifying your text. To access this menu, go to the menu bar and select Format >> Font (you must be in a text box in order to access this window).
Drawing Stuff • The “Drawing” toolbar can be found on the bottom of your screen. • 1 - Insert Picture from File • 2 - Color • 3 - More Contrast • 4 - Less Contrast • 5 - More Brightness • 6 - Less Brightness • 7 - Crop • 8 - Rotate Left 90◦ • 9 - Line Style • 10 - Compress Picture • 11 - Recolor Picture • 12 - Format Picture • 13 - Set Transparent Color • 14 - Reset Picture
Show Time! • Not only can you modify the appearance of text and slides, but you can also change how the slide show presents itself. The Slide Show menu gives you the ability to change how slides transition from one to the other, and you can also change the way text appears on the slide.
Slide Transitions • To keep your slide show interesting, you may want to consider applying slide transitions to your slides. A transition is an effect used to introduce slides from one to another. You can access the slide transitions by going to the menu bar and selecting Slide Show >> Slide Transition.
Slide Design • When you select a text box, an image object, a graph, or any other sort of PowerPoint object, you can choose to apply an animation to it. View the Animation Schemes by going to the menu bar and selecting Slide Show >> Animation Schemes.
Custom Animations • For more advanced work with animations, you can choose to make your own special effects to apply to objects. Go to the menu bar and select Slide Show >> Custom Animation. The custom animation options will appear in the “Slide Design” panel on the right side of the screen. You can come up with just about any kind of combination of transitions, directions, timing, and grouping of words/letters/objects.
Setup Presentation • When you have finished your slide show presentation, you can do a bit of prep-work before you view your presentation. Go to the menu bar and select Slide Show >> Set Up Show
Saving PowerPoint Online • To save your slideshow presentation for the web, go to my Wiki Page (Technical Q&A) And click on the link PowerPoint112. • Click on the link I made for your group. • Open your page and Edit. • Click on Attach File. • Attach your file.
If you got to this step … Well You are Done! (really, honestly, truly)Or you skipped ahead. • Ok so what is going to happen is BY SUNDAY NIGHT (Saturday is better) you will attach your PowerPoint onto Wiki. • On Sunday/Monday I will copy your PowerPoint onto my computer for the presentations on Tuesday/ Thursday, so you don’t need to worry about them