Download
1 / 28
310 likes | 1.32k Views
2. SMAW Unit Topics. During this overview, we will discuss the following topics:SafetySMAW Basics Equipment Set-UpWelding VariablesProcess Advantages and Limitations AWS ConnectionNational Academic Standards Connection. The SMAW process is great for maintenance and repair work! . 3. Unit Objectives.

E N D
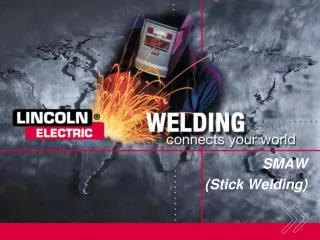
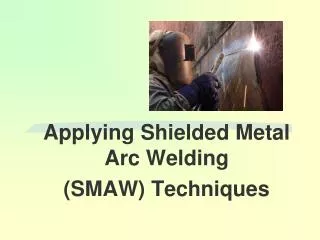
1. SMAW
(Stick Welding) SECTION OVERVIEW:
Section Overviews are provided on the introductory slides at the front of each topical area to explain the intended use for the slides included in the section.
Slide numbers are included on the Section Overview slides for easy reference when preparing for delivery of the slide content.
TEACHER NOTES:
Teacher Notes are included on the Section Overview slides as a reference tool when making class preparations.
Suggested Activities are included as ideas for teachers to use to help students gain practical experience with the welding content. However, these are designed to be supplemented by each teacher based on local program needs.
Slides have been developed to incorporate content information regarding performance standards from the American Welding Society (AWS) and the National Academic Standards for English, Science, and Math.
INDIVIDUAL WELDING LESSON NOTES ARE AVAILABLE IN LESSON PLAN FACILITATOR�S GUIDESECTION OVERVIEW:
Section Overviews are provided on the introductory slides at the front of each topical area to explain the intended use for the slides included in the section.
Slide numbers are included on the Section Overview slides for easy reference when preparing for delivery of the slide content.
TEACHER NOTES:
Teacher Notes are included on the Section Overview slides as a reference tool when making class preparations.
Suggested Activities are included as ideas for teachers to use to help students gain practical experience with the welding content. However, these are designed to be supplemented by each teacher based on local program needs.
Slides have been developed to incorporate content information regarding performance standards from the American Welding Society (AWS) and the National Academic Standards for English, Science, and Math.
INDIVIDUAL WELDING LESSON NOTES ARE AVAILABLE IN LESSON PLAN FACILITATOR�S GUIDE
2. 2 SECTION OVERVIEW:
This slide is meant to start generating conversation and thoughts about content to be covered in this lesson.
TEACHER NOTES:
Bulleted information on topical areas is provided to lead class discussion on areas which are to be covered in the training.
SECTION OVERVIEW:
This slide is meant to start generating conversation and thoughts about content to be covered in this lesson.
TEACHER NOTES:
Bulleted information on topical areas is provided to lead class discussion on areas which are to be covered in the training.
3. 3 Unit Objectives Upon successful completion of the SMAW Unit of Study, you will have learned to:
Properly protect yourself and others while welding
Set up and operate SMAW equipment
Strike and maintain an arc
Make welds in four positions using different electrodes
Understand a weld inspection process
Apply the AWS electrode classification system
Take the next step to becoming a certified welder
SECTION OVERVIEW:
This slide is included to explain the objectives of this unit of study.
TEACHER NOTES:
Teachers could use this opportunity to give a high-level overview of the importance and application of SMAW welding in today�s society.
SECTION OVERVIEW:
This slide is included to explain the objectives of this unit of study.
TEACHER NOTES:
Teachers could use this opportunity to give a high-level overview of the importance and application of SMAW welding in today�s society.
4. 4 SECTION OVERVIEW:
The next few slides are meant to point out safety requirements when doing SMAW welding.
TEACHER NOTES:
Slides 4-6: Bulleted information on topical areas is provided to lead class discussion on important areas of safety to be practiced in the SMAW welding environment.
To download your own copy of �Safety in Welding, Cutting and Allied Processes� (ANSI Z49.1) go to: www.aws.org/technical/facts/Z49.1-2005-all.pdf
To download your own copy of Lincoln Electric�s Arc Welding Safety (E205) document go to: http://content.lincolnelectric.com/pdfs/products/literature/e205.pdf
To order copies of Lincoln Electric�s Arc Welding Safety (E205) document and poster (E201) go to: www.lincolnelectric.com (Quick Link: Literature Request)
MSDS can be obtained from Lincoln Consumable packaging, online at www.lincolnelectric.com (Quick Link: MSDS) or by calling 1-216-481-8100
For a free DVD on Welding Safely, submit order form in the back of the Lesson Plan Facilitator�s Guide (shipping and handling charges apply).
See Facilitator�s Guide for more information on welding hazards such as Fumes and Gases and Electrical Shock.SECTION OVERVIEW:
The next few slides are meant to point out safety requirements when doing SMAW welding.
TEACHER NOTES:
Slides 4-6: Bulleted information on topical areas is provided to lead class discussion on important areas of safety to be practiced in the SMAW welding environment.
To download your own copy of �Safety in Welding, Cutting and Allied Processes� (ANSI Z49.1) go to: www.aws.org/technical/facts/Z49.1-2005-all.pdf
To download your own copy of Lincoln Electric�s Arc Welding Safety (E205) document go to: http://content.lincolnelectric.com/pdfs/products/literature/e205.pdf
To order copies of Lincoln Electric�s Arc Welding Safety (E205) document and poster (E201) go to: www.lincolnelectric.com (Quick Link: Literature Request)
MSDS can be obtained from Lincoln Consumable packaging, online at www.lincolnelectric.com (Quick Link: MSDS) or by calling 1-216-481-8100
For a free DVD on Welding Safely, submit order form in the back of the Lesson Plan Facilitator�s Guide (shipping and handling charges apply).
See Facilitator�s Guide for more information on welding hazards such as Fumes and Gases and Electrical Shock.
5. 5
6. 6 SMAW Safety Fumes and Gases can be dangerous
Keep your head out of the fumes
Use enough ventilation, exhaust at the arc, or both, to keep fumes and gases from your breathing zone and the general area
The SMAW process can withstand wind and exhaust near the arc from ventilation equipment
Electric Shock can kill � to receive a shock your body must touch the electrode and work or ground at the same time
Do not touch the electrode or metal parts of the electrode holder with skin or wet clothing
Keep dry insulation between your body and the metal being welded or ground
Arc Rays can injure eyes and skin - Choose correct filter shade (See chart below)
7. 7 SECTION OVERVIEW:
These slides are meant to lead into the discussion of the SMAW process
TEACHER NOTES:
Slides 7-16:
For more information on the American Welding Society, see �Arc Welding Basics� and www.aws.org
Discussion could be given on stick electrodes commonly being between 9-18� long, and come in diameters ranging from 1/16� to 1/4�. An activity could be to show 3 electrodes all the same diameter: E6010 or E6011, E7018, and E7024. Ask students to compare flux coatings (color, thickness, feel)
The size of the electrode is determined by the diameter of its metal core. PLEASE NOTE: The overall diameter of the electrode changes due to flux coating even though metal diameter remains the same.
An arc digs into the base metal much like water from a nozzle on a garden hose digs into the earth. (The flow of the water is like welding current and water pressure is similar to voltage)
SECTION OVERVIEW:
These slides are meant to lead into the discussion of the SMAW process
TEACHER NOTES:
Slides 7-16:
For more information on the American Welding Society, see �Arc Welding Basics� and www.aws.org
Discussion could be given on stick electrodes commonly being between 9-18� long, and come in diameters ranging from 1/16� to 1/4�. An activity could be to show 3 electrodes all the same diameter: E6010 or E6011, E7018, and E7024. Ask students to compare flux coatings (color, thickness, feel)
The size of the electrode is determined by the diameter of its metal core. PLEASE NOTE: The overall diameter of the electrode changes due to flux coating even though metal diameter remains the same.
An arc digs into the base metal much like water from a nozzle on a garden hose digs into the earth. (The flow of the water is like welding current and water pressure is similar to voltage)
8. 8
9. 9 SMAW Welding Circuit Current flows through the electrode cable, to the electrode holder, through the electrode, and across the arc
On the work side of the arc, the current flows through the base material to the work clamp and back to the welding machine
10. 10 SMAW Process Let�s take a little closer look at the SMAW process�
11. 11 1- The Electrode Is a consumable - it gets melted during the welding process
Is composed of two parts
Core Rod (Metal Filler)
Carries welding current
Becomes part of the weld
Flux Coating
Produces a shielding gas
Can provide additional filler
Forms a slag
12. 12 2- The Arc An arc occurs when the electrode comes in contact with the work-piece and completes the circuit � like turning on a light!
The electric arc is established in the space between the end of the electrode and the work
The arc reaches temperatures of 10,000�F which melts the electrode and base material
13. 13 3- Weld Puddle As the core rod, flux coating, and work pieces heat up and melt, they form a pool of molten material called a weld puddle
The weld puddle is what a welder watches and manipulates while welding
14. 14 4- Shielding Gas A shielding gas is formed when the flux coating melts.
This protects the weld puddle from the atmosphere preventing contamination during the molten state
15. 15 5- Solidified Weld Metal As the molten weld puddle solidifies, it forms a joint or connection between two pieces of base material
When done properly on steel, it results in a weld stronger than the surrounding base metal
16. 16 6- Slag Slag is a combination of the flux coating and impurities from the base metal that float to the surface of the weld.
Slag quickly solidifies to form a solid coating
The slag also slows the cooling rate of the weld
The slag can be chipped away and cleaned with a wire brush when hard
17. 17 SECTION OVERVIEW:
These slides provide an overview of the SMAW process.
TEACHER NOTES: (Explanation of Activity)
Slides 17-18: After discussing the parts included on this slide, students will take a quiz as an application activity.
For the activity, have participants work individually and mark 1-6 on a piece of paper.
Explain that this activity is meant to check whether each student understands SMAW before beginning to apply the process in the lab.
Project slide on the screen and have each student fill in the blanks on a piece of paper to be turned in. Collect papers and discuss.
Answers to the Application Activity are:
1. Electrode
2. Arc
3. Weld Puddle
4. Shielding Gas
5. Solidified Weld Metal
6. Slag
SECTION OVERVIEW:
These slides provide an overview of the SMAW process.
TEACHER NOTES: (Explanation of Activity)
Slides 17-18: After discussing the parts included on this slide, students will take a quiz as an application activity.
For the activity, have participants work individually and mark 1-6 on a piece of paper.
Explain that this activity is meant to check whether each student understands SMAW before beginning to apply the process in the lab.
Project slide on the screen and have each student fill in the blanks on a piece of paper to be turned in. Collect papers and discuss.
Answers to the Application Activity are:
1. Electrode
2. Arc
3. Weld Puddle
4. Shielding Gas
5. Solidified Weld Metal
6. Slag
18. 18
19. 19 SECTION OVERVIEW:
These slides explain how to set up the equipment for SMAW and the process variables used.
TEACHER NOTES:
Slides 19-21: These slides explain SMAW equipment set up and operator controlled variables
The exposed metal end of the electrode should fit securely within the jaws of the electrode holder
Discuss how the correct amperage setting for any given electrode is important to ensure proper shape of bead, proper penetration, and minimal spatter.
Explain when the amperage is set too high the bead may be flat, have excessive spatter, have some porosity and the electrode will overheat. If the amperage setting is too low, difficulty is experienced in striking the arc and maintaining the correct arc length. The weld bead becomes convex with excessive overlap and poor penetration.
Discuss polarity � All stick electrodes run on DC. Not all will weld on AC. All electrodes have a preferred polarity and most are designated by the AWS.
SECTION OVERVIEW:
These slides explain how to set up the equipment for SMAW and the process variables used.
TEACHER NOTES:
Slides 19-21: These slides explain SMAW equipment set up and operator controlled variables
The exposed metal end of the electrode should fit securely within the jaws of the electrode holder
Discuss how the correct amperage setting for any given electrode is important to ensure proper shape of bead, proper penetration, and minimal spatter.
Explain when the amperage is set too high the bead may be flat, have excessive spatter, have some porosity and the electrode will overheat. If the amperage setting is too low, difficulty is experienced in striking the arc and maintaining the correct arc length. The weld bead becomes convex with excessive overlap and poor penetration.
Discuss polarity � All stick electrodes run on DC. Not all will weld on AC. All electrodes have a preferred polarity and most are designated by the AWS.
20. 20
21. 21 SMAW Process Variables Settings on the machine
Polarity : AC, DC+, DC-
Amperage Output
Operator Controlled Variables
Work Angle
Travel Angle
Arc Length
Travel Speed
22. 22 SECTION OVERVIEW:
These slides discuss striking an arc and making a weld
TEACHER NOTES:
Slides 22-29: When using these slides, teachers may prefer to discuss the importance of the following topics:
Striking an arc
Work angle
Travel angle
Arc length
Travel speed
Filling a crater
Restarting the beadSECTION OVERVIEW:
These slides discuss striking an arc and making a weld
TEACHER NOTES:
Slides 22-29: When using these slides, teachers may prefer to discuss the importance of the following topics:
Striking an arc
Work angle
Travel angle
Arc length
Travel speed
Filling a crater
Restarting the bead
23. 23
24. 24 Work Angle The work angle is the angle between the electrode and the work as depicted on the left
Work angles can vary depending on the position the weld is being made in
25. 25 Also commonly called Lead Angle
The travel (lead) angle is the angle between the electrode and the plane perpendicular to the weld axis
26. 26 Arc Length After striking the arc, maintain a 1/8� distance between the electrode and the workpiece
If the arc length becomes too short, the electrode will get stuck to the workpiece or �short out�
If the arc length becomes too long; spatter, undercut, and porosity can occur
27. 27 Travel Speed The travel speed is the speed at which the electrode moves along the base material while welding
Too fast of a travel speed results in a ropey or convex weld
Too slow of a travel speed results in a wide weld with an excessive metal deposit
28. 28 Filling the Crater At the end of the weld, the operator breaks the arc which creates a �crater�
Use a short pause or slight back step at the end of the weld to fill the crater
Large craters can cause weld cracking
29. 29 Restarting a Bead Here is the proper technique for restarting a weld:
30. 30 SECTION OVERVIEW:
The next slide discusses several troubleshooting topics.
TEACHER NOTES:
Slide 30-31: Weld troubleshooting. The beads on the pad depict changes in welding variables and their results. Discuss the following:
A � Good Weld: Proper Current, Travel Speed and Arc Length
B � Current too low: Ropey, convex bead appearance
C � Current too High: Excess spatter and possible burn-through of base materials
D � Arc Length too short: Poor wet-in at toes, electrode can �short� to base material
E � Arc Length too Long: Excess spatter, undercut and porosity
F � Travel Speed too slow: Wide weld with excess metal deposit
G � Travel Speed too high: Ropey and convex bead
SECTION OVERVIEW:
The next slide discusses several troubleshooting topics.
TEACHER NOTES:
Slide 30-31: Weld troubleshooting. The beads on the pad depict changes in welding variables and their results. Discuss the following:
A � Good Weld: Proper Current, Travel Speed and Arc Length
B � Current too low: Ropey, convex bead appearance
C � Current too High: Excess spatter and possible burn-through of base materials
D � Arc Length too short: Poor wet-in at toes, electrode can �short� to base material
E � Arc Length too Long: Excess spatter, undercut and porosity
F � Travel Speed too slow: Wide weld with excess metal deposit
G � Travel Speed too high: Ropey and convex bead
31. 31
32. 32 SECTION OVERVIEW:
This section is meant to lead into a discussion regarding the advantages and limitations of using the SMAW process.
TEACHER NOTES:
Slides 32-34: The advantages and limitations of SMAW
Advantages:
Low start up costs � SMAW equipment is less expensive than GMAW equipment
Portable � electrode leads are easy to move from job to job
Easy to use outdoors - The process does not require a shielding gas so it is resistant to winds
All position capabilities
SMAW can be used on variety of materials � just change the electrode and you�re ready for the next project
Limitations:
Electrodes are 60-65% efficient - 1.5 to 2� of the electrode (stub) is thrown away. The slag and spatter also contribute to SMAW consumable losses.
Difficult to weld very thin material �
Frequent restarts � Most electrodes are 9-18� in length. As the electrodes are consumed they continually need to be replaced
Operating factor of 5-25% - Operators using the SMAW process spend only 5-25% of their time welding. Time is spent chipping slag, cleaning spatter, changing electrodes, repositioning the part, etc.
It takes practice to become a good welder using the SMAW process. The GMAW process is generally easier to learn.SECTION OVERVIEW:
This section is meant to lead into a discussion regarding the advantages and limitations of using the SMAW process.
TEACHER NOTES:
Slides 32-34: The advantages and limitations of SMAW
Advantages:
Low start up costs � SMAW equipment is less expensive than GMAW equipment
Portable � electrode leads are easy to move from job to job
Easy to use outdoors - The process does not require a shielding gas so it is resistant to winds
All position capabilities
SMAW can be used on variety of materials � just change the electrode and you�re ready for the next project
Limitations:
Electrodes are 60-65% efficient - 1.5 to 2� of the electrode (stub) is thrown away. The slag and spatter also contribute to SMAW consumable losses.
Difficult to weld very thin material �
Frequent restarts � Most electrodes are 9-18� in length. As the electrodes are consumed they continually need to be replaced
Operating factor of 5-25% - Operators using the SMAW process spend only 5-25% of their time welding. Time is spent chipping slag, cleaning spatter, changing electrodes, repositioning the part, etc.
It takes practice to become a good welder using the SMAW process. The GMAW process is generally easier to learn.
33. 33
34. 34 Limitations of SMAW Lower consumable efficiency
Difficult to weld very thin materials
Frequent restarts
Lower operating factor
Higher operator skill required for SMAW than some other processes
35. 35 SECTION OVERVIEW:
This section is meant to lead into a discussion regarding the AWS Classification of SMAW Electrodes
TEACHER NOTES:
Slides 35-36:
For more information on the AWS classification of SMAW electrodes see Lincoln Electric�s free �Stick Electrode Product Catalog� - http://content.lincolnelectric.com/pdfs/products/literature/c210.pdf SECTION OVERVIEW:
This section is meant to lead into a discussion regarding the AWS Classification of SMAW Electrodes
TEACHER NOTES:
Slides 35-36:
For more information on the AWS classification of SMAW electrodes see Lincoln Electric�s free �Stick Electrode Product Catalog� - http://content.lincolnelectric.com/pdfs/products/literature/c210.pdf
36. 36
37. 37 SECTION OVERVIEW:
These slides are used for practicing lesson content in the lab setting.
TEACHER NOTES:
Slides 37-53: When using these slides, teachers might want to reference information included in the Facilitator�s Guide.
Recommended equipment � Only one of the single process or multi-process machines is required to complete the lesson.
SECTION OVERVIEW:
These slides are used for practicing lesson content in the lab setting.
TEACHER NOTES:
Slides 37-53: When using these slides, teachers might want to reference information included in the Facilitator�s Guide.
Recommended equipment � Only one of the single process or multi-process machines is required to complete the lesson.
38. 38
39. 39 SMAW Lesson #2 Objective: To run a straight bead on flat plate and to fill the crater
Equipment:
Single Process - Constant Current Power Source
Idealarc 250 and accessories
Precision TIG 225 and accessories
Multi-Process
Power MIG 350 MP
Material:
Mild Steel Plate 3/16� or thicker
1/8� Fleetweld 37 (E6013)
40. 40 SMAW Lesson #3 Objective: To run a bead with the whip technique
Equipment:
Single Process - Constant Current Power Source
Idealarc 250 and accessories
Precision TIG 225 and accessories
Multi-Process
Power MIG 350 MP
Material:
Mild Steel Plate 3/16� or thicker
1/8� Fleetweld 5P+ (E6010) for DC or Fleetweld 180 (E6011) for AC
41. 41 SMAW Lesson #4 Objective: To build a pad
Equipment:
Single Process - Constant Current Power Source
Idealarc 250 and accessories
Precision TIG 225 and accessories
Multi-Process
Power MIG 350 MP
Material:
Mild Steel Plate 3/16� or thicker
1/8� Fleetweld 37 (E6013)
42. 42 SMAW Lesson #5 Objective: To make a fillet weld on a lap joint in the horizontal position (AWS Position 2F)
Equipment:
Single Process - Constant Current Power Source
Idealarc 250 and accessories
Precision TIG 225 and accessories
Multi-Process
Power MIG 350 MP
Material:
Mild Steel Plate - 10 gauge
1/8� Fleetweld 5P+ (E6010) for DC or Fleetweld 180 (E6011) for AC
43. 43 SMAW Lesson #6 Objective: To make a fillet weld on a tee joint in the horizontal position (AWS Position 2F)
Equipment:
Single Process - Constant Current Power Source
Idealarc 250 and accessories
Precision TIG 225 and accessories
Multi-Process
Power MIG 350 MP
Material:
Mild Steel Plate - 10 gauge
1/8� Fleetweld 5P+ (E6010) for DC or Fleetweld 180 (E6011) for AC
44. 44 SMAW Lesson #7 Objective: To make a fillet weld on a tee joint in the horizontal position (AWS Position 2F)
Equipment:
Single Process - Constant Current Power Source
Idealarc 250 and accessories
Precision TIG 225 and accessories
Multi-Process
Power MIG 350 MP
Material:
Mild Steel Plate - 10 gauge
1/8� Excalibur 7018 (E7018) for DC
or Lincoln 7018AC (E7018) for AC
45. 45 SMAW Lesson #8 Objective: To make a three pass fillet weld on a tee joint in the horizontal position (AWS Position 2F)
Equipment:
Single Process - Constant Current Power Source
Idealarc 250 and accessories
Precision TIG 225 and accessories
Multi-Process
Power MIG 350 MP
Material:
Mild Steel Plate � ��
1/8� Excalibur 7018 (E7018) for DC or
Lincoln 7018AC (E7018) for AC
46. 46 SMAW Lesson #9 Objective: To make a fillet weld on a lap joint in the vertical position welding down(AWS Position 3FD)
Equipment:
Single Process - Constant Current Power Source
Idealarc 250 and accessories
Precision TIG 225 and accessories
Multi-Process
Power MIG 350 MP
Material:
Mild Steel Plate - 10 gauge
1/8� Fleetweld 37 (E6013)
47. 47 SMAW Lesson #10 Objective: To make a fillet weld on a tee joint in the vertical position welding down (AWS Position 3FD)
Equipment:
Single Process - Constant Current Power Source
Idealarc 250 and accessories
Precision TIG 225 and accessories
Multi-Process
Power MIG 350 MP
Material:
Mild Steel Plate - 10 gauge
1/8� Fleetweld 5P+ (E6010) for DC or Fleetweld 180 (E6011) for AC
48. 48 SMAW Lesson #11 Objective: To make a fillet weld on a lap joint in the overhead position (AWS Position 4F)
Equipment:
Single Process - Constant Current Power Source
Idealarc 250 and accessories
Precision TIG 225 and accessories
Multi-Process
Power MIG 350 MP
Material:
Mild Steel Plate - 10 gauge
1/8� Fleetweld 5P+ (E6010) for DC or Fleetweld 180 (E6011) for AC
49. 49 SMAW Lesson #12 Objective: To make a fillet weld on a tee joint in the overhead position (AWS Position 4F)
Equipment:
Single Process - Constant Current Power Source
Idealarc 250 and accessories
Precision TIG 225 and accessories
Multi-Process
Power MIG 350 MP
Material:
Mild Steel Plate - 10 gauge
1/8� Fleetweld 5P+ (E6010) for DC or Fleetweld 180 (E6011) for AC
50. 50 SMAW Lesson #13 Objective: To make a single pass fillet weld on a tee joint in the vertical position welding up (AWS Position 3F)
Equipment:
Single Process - Constant Current Power Source
Idealarc 250 and accessories
Precision TIG 225 and accessories
Multi-Process
Power MIG 350 MP
Material:
Mild Steel Plate � 1/4�
1/8� Fleetweld 5P+ (E6010) for DC or Fleetweld 180 (E6011) for AC
51. 51 SMAW Lesson #14 Objective: To make a three pass fillet weld on a tee joint in the vertical position welding up (AWS Position 3F)
Equipment:
Single Process - Constant Current Power Source
Idealarc 250 and accessories
Precision TIG 225 and accessories
Multi-Process
Power MIG 350 MP
Material:
Mild Steel Plate � 1/4�
1/8� Fleetweld 5P+ (E6010) for DC or Fleetweld 180 (E6011) for AC
52. 52 SMAW Lesson #15 Objective: To make a single pass fillet weld on a tee joint in the vertical position welding up (AWS Position 3F)
Equipment:
Single Process - Constant Current Power Source
Idealarc 250 and accessories
Precision TIG 225 and accessories
Multi-Process
Power MIG 350 MP
Material:
Mild Steel Plate � 1/4�
1/8� Excalibur 7018 (E7018) for DC or Lincoln 7018AC (E7018) for AC
53. 53 SMAW Lesson #16 Objective: To make a three pass fillet weld on a tee joint in the vertical position welding up (AWS Position 3F)
Equipment:
Single Process - Constant Current Power Source
Idealarc 250 and accessories
Precision TIG 225 and accessories
Multi-Process
Power MIG 350 MP
Material:
Mild Steel Plate � 1/4�
1/8� Excalibur 7018 (E7018) for DC or
Lincoln 7018AC (E7018) for AC
54. 54 SECTION OVERVIEW:
The next few slides discuss the connection of this unit with AWS and the certification process.
TEACHER NOTES:
Slide 54-55: Content included in this unit of study is designed to be used by interested students as a building block in the learning process if interested in pursuing a certification programSECTION OVERVIEW:
The next few slides discuss the connection of this unit with AWS and the certification process.
TEACHER NOTES:
Slide 54-55: Content included in this unit of study is designed to be used by interested students as a building block in the learning process if interested in pursuing a certification program
55. 55
56. 56 SECTION OVERVIEW:
The next slide discusses how the content covered in the welding unit is applicable to English, Math, and Science classes.
TEACHER NOTES:
Slides 56-57: These slides contain information regarding how this welding unit of study relates to the National Academic Standards.
SECTION OVERVIEW:
The next slide discusses how the content covered in the welding unit is applicable to English, Math, and Science classes.
TEACHER NOTES:
Slides 56-57: These slides contain information regarding how this welding unit of study relates to the National Academic Standards.
57. 57