Instrument Processing
Instrument Processing. Module 5. Nancy Goodwin, CDA, RDH, MEd. All rights reserved. Some things to think about…. How do you decide if something should be sterilized or if it can be disinfected? How should sterilized items be stored? How do you prepare items for sterilization?


Instrument Processing
E N D
Presentation Transcript
Instrument Processing Module 5 • Nancy Goodwin, CDA, RDH, MEd. • All rights reserved
Some things to think about… • How do you decide if something should be sterilized or if it can be disinfected? • How should sterilized items be stored? • How do you prepare items for sterilization? • What would prevent something from becoming sterilized in an autoclave?
Objectives Upon completion of this instruction, participant will be able to: • Define the following classification of instruments: critical, semi- critical, non-critical. • Discuss the five steps of instrument processing and the rationales and procedures for each step. • List the approved methods for precleaning dental instruments. • List the three most common methods for sterilization of instruments. • Demonstrate the procedure for testing for proper ultrasonic function. • Describe the steps for cleaning and sterilization of highspeed dental handpieces. • Describe the three forms of sterilization monitoring. • Explain the differences between process indicators and integrators. • Discuss the recommended schedule and the procedure for conducting in-office biological monitoring. • Describe the CDC guidelines for sterilization and disinfection of patient items. • Describe the CDC guidelines for preparation and packaging of dental instruments prior to sterilization.
Classification of Patient-Care Items In order to determine the appropriate treatment for any item that has been used in patient care, you will need to classify them into one of the following three categories: • Critical • Semicritical • Noncritical
Are defined as those used to penetrate soft tissue or bone Since the risk of transmission would be high, they must be heat sterilized Examples: Surgical instruments Scalers Forceps Scalpels Bone chisels burs Critical Items
Clinical Application • What do you use clinically everyday that is considered a critical item? • How do you treat these items before they are used again?
Touch mucous membranes or nonintact skin Have a lower risk of transmission. However, if an item can be heat sterilized, it should be heat sterilized. Examples: Mouth mirrors Amalgam condensers Impression trays X-ray film holders Semicritical Items
Semicritical instruments which cannot tolerate the high temperatures of sterilization must be processed by using a sterilant or high level disinfectant. • These products achieve sterilization (kills all forms of life including spores) after immersion in the solution for 3 to 10 hours. Follow manufacturer’s instructions for the product in your office.
Clinical Application • Which items do you use daily which are considered semi-critical? • Do you routinely sterilize these items? • If not, what is your method for assuring that they have remained in the disinfectant or sterilant for the necessary length of time?
Immersion Disinfectants FDA-Approved for use in dentistry • Sterilants: • Gluteraldehyde -6 to 10 hour contact time • Hydrogen peroxide (7.3%) 6 hour contact time. • Gluteraldehyde and phenol/phenate-12 hour contact time • Hydrogen peroxide and peracetic acid-3 hour contact time
High level Disinfectants • Ortho-phthalaldehyde (12 minute contact time) • Gluteraldehyde- 20 to 90 minute contact time • Hydrogen peroxide- 30 minutes contact time • Gluteraldehyde and phenol/phenate- 20 minute contact time • Hydrogen peroxide and peracetic acid-15 minute contact time. (remember to wear all recommended PPE when dealing with these chemical disinfectants)
Definitions to remember…. • Sterilization is the process that kills all microorganisms and is considered the highest level that can be achieved. It is accomplished by the proper use of immersion chemical sterilants or by heat. • High level disinfection is used when a semicritical item cannot withstand heat sterilization. Used correctly, it is intended to kill disease producing microorganisms but not spores. These products are not used for surface disinfection, but for immersion.
Contact intact skin only. Have a low risk of disease transmission. Some of these (*) should be precleaned and disinfected or barrier protected. Examples: Blood pressure cuff *X-ray cone (PID) Stethoscope *Lead apron Noncritical Items
Universal Sterilization “…means that all reusable instruments and handpieces are sterilized (rather than disinfected) between use on patients. This provides the highest level of patient protection.” Miller & Palenik, p. 196
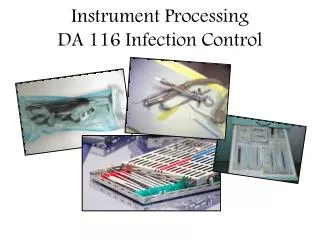
Instrument Processing Area • Instruments should not be processed in the treatment area but be transported to a central area. • The ideal instrument processing area should have separate areas for “dirty” and “clean” and should be set up in a linear or u-shaped area for maximum efficiency and safety.
Remember to carefully transport instruments to the sterilization area. Ideally, they should be in closed cassettes and handled with utility gloves. http://www.hu-friedy.comwww.smartpractice.com
Packing Area Contaminated Area Sterilization And Storage Area Instrument processing- linear pattern Contaminated area: throw away disposables, place instruments in holding solution or preclean with ultrasonic cleaner or other approved method, dry instruments, dip in rust inhibitors if applicable. Packaging area: Place process integrators or biologic monitor (weekly),in packaging fully wrap instruments, place process indicator tape on the outside of the package, label, place in heat sterilizer. These will be discussed more later. Sterilization and storage area: After sterilization is complete, store sterilized instruments in their packaging, record results of spore tests.
Sterilization And Storage Area Contaminated Area • Instrument processing: U-shaped pattern Packing Area
Step by Step Instrument Processing • Remove items from the operatory and transport to processing area • Place the instruments, in their cassettes in a detergent holding solution if they cannot be cleaned immediately • The instruments, much like clinical contact surfaces, must be cleaned before sterilization to prevent the baking on of debris.
Clinical Application • Is the sterilization area in your office designed to follow the flow from contaminated to clean? • Are sterilized items kept separate from contaminated ones? • If not, how could you change the flow to follow the recommended pattern?
Cleaning can be accomplished by two automated approved methods: • Instrument washers- (which resemble a dishwasher but are made to clean instruments; regular dishwashers are not appropriate nor are they recommended) • Ultrasonic cleaners Always use a recommended ultrasonic solution. Also, establish a schedule for testing the effectiveness of the ultrasonic. To do this, simply dip several inches of a sheet of aluminum foil in the ultrasonic and turn on for 20 seconds. If the unit is functioning properly, the foil will be full of indentations and holes. If not, a repair is needed.
Ultrasonic cleaner This solution is considered highly contaminated. Retrieve instrument cassettes while wearing utility gloves Don’t forget to close the lid during operation to reduce aerosols!
They may also be cleaned manually, but this presents more risk of an occupational exposure. If you must clean instruments manually, wear all PPE, use a scrub brush with a long handle, and scrub just a few at a time while holding deep in a sink. Rinse and inspect each instrument before packaging. They should not have any debris remaining.
Preparing and packaging- loose instruments should be placed by procedure in approved packaging if not in cassettes. Unpackaged instruments are immediately exposed to contaminants and are not considered sterile. • Sterilization- Methods approved for dental instruments are: • Autoclave (steam heat under pressure) • Dry clave (dry heat) • Unsaturated chemical vapor Be sure to follow all manufacturer’s directions regarding use to achieve sterilization.
Take care not to overload steam heat sterilization equipment. if steam cannot circulate and penetrate, instruments may not be sterile.
Store sterile and clean patient care items Instruments will remain sterile indefinitely unless their packaging becomes wet or torn. Generally, rotate instruments so that you use the packages sterilized earlier first (“first in, first out”). If possible, store in a closed area where there is no chance that they will become wet. OSAP, p. 47
Instrument processing flowchart Remove Items from operatory Use holding Solutions if necessary Clean by Automated Or manual method Package Store Sterilize
Sterilization Monitoring To assure that sterilization equipment is functioning properly and that instruments are in fact sterile, dental personnel must use various procedures to monitor this process. The three forms used are: • Physical • Chemical • Biologic
Physical Monitoring • Physical monitoring of equipment involves checking and recording the readings on the gauges for temperature, pressure and exposure time. These readings indicate chamber conditions (not individual pack conditions.) • Although this does not assure sterility of instruments, the gauges are often a first sign that something is wrong with the equipment.
Process Indicators Are placed on the outside of individual packages before sterilization. A change in their color indicates that the pack was exposed to a certain temperature (NOT a test for sterilization!) Process Integrators Are placed inside instrument packages before sterilization. They respond to the temperature, pressure, and time. (NOT a test for sterilization!) Chemical Monitoring
Process Indicators • Do not indicate sterility. • Simply indicate that the autoclave reached a certain temperature. • Show at a glance if a load has been run.
Process Integrators • Should be placed inside each cassette, especially surgical packs. • May be single or multiparameter • Indicate conditions inside the individual cassette. • Not a test for sterility. www.crosstex.com Multiparameter:
Examples of Process Indicators Autoclave tape Color changing markings on packaging Examples of Process Integrators Strips Tabs Tubes of liquid that change color. These indicators provide an immediate indication of the conditions in sterilizing equipment. Since they do not indicate sterility and should always be used along with Biologic Monitoring.
Biologic Monitoring • Also called Spore Testing • Is the only way to determine if sterilization has occurred • The CDC, ADA, and OSAP recommend that each piece of sterilization equipment be tested with a biologic monitor at least once weekly. • Testing can be done in office or with the use of a mail system.
In-Office Incubator for Biologic Monitoring
Biologic Monitoring Procedure Be sure to choose the appropriate spore for your equipment: • For autoclaves or chemical vapor sterilizers: Bacillus stearothermophilis or Geobacillus stearothermophilis • For dry heat sterilizers: Bacillus subtilis or Bacillus atrophaeus
Mark one monitor for each piece of equipment to be tested and place the appropriate spore in packaging • Place in the middle of the sterilization equipment with a full load of instruments • Process through a normal sterilization cycle • Record time, date and initial in sterilization log. • After the load has been run, remove monitor(s), allow to cool, and place in incubator or send to an approved monitoring service.
If you are conducting the monitoring in office, place monitor(s) in incubator and replace the lid. You will also need to place one “Control” monitor in the incubator. This control does not go through a sterilization cycle. Record the time in log. • Incubate all monitors for the recommended time; usually 48 hours. • At the end of the time period, remove the monitors from the incubator and read the results. The control should be positive (+) for spores, all others should be negative (-).
The purple vials have been processed with a load of instruments and are Negative for spores The yellow vial was the Control and is Positive for spores. A positive result in a test that was processed indicates sterilization failure.
Biologic Monitoring Video Click here to watch a demonstration of the Biologic Monitoring Procedure
Link http://www.cdc.gov/oralhealth/infectioncontrol/faq/sterilization_monitoring.htm Find out from this link what can influence the effectiveness of sterilization. Is there a causes of failure that could be a factor in your office?
Handpiece Sterilization • Because the dental handpiece is likely to become contaminated with blood, saliva, tooth fragments and restorative material, they must be cleaned and heat sterilized before use on another patient. • The two steps for this process are: • flushing • sterilization
Flushing procedures • Will increase the life of the dental handpiece • Will remove debris from the head of the handpiece • Before flushing, clean any visible debris • To flush correctly, attach the intake tube to a pressurized handpiece cleaner and flush to remove debris. Then blow out the handpiece with compressed air. Follow the manufacturer’s directions for your particular equipment. **note: running coolant water through the handpiece does not run through the turbine chamber where debris can collect and is therefore inadequate.
Sterilization Procedure • After flushing, clean any visible debris from the outside of the handpiece. • Package in approved packaging • Recommended methods: Autoclave and chemical vapor (other methods may be too hot) • Do not run a handpiece “hot” out of sterilization, and do not run under cold water to cool. This can damage the intricate metal parts.
Remember… As a dental auxiliary, you are legally and ethically responsible for carrying out these procedures as recommended by the CDC and other agencies responsible for infection control in dentistry. Careful compliance with these recommendations is intended to protect you and the patients you serve.
References • Miller & Palenik, (2005). Infection Control & Management of Hazardous Materials for the Dental Team. St Louis,MO. OSAP, Elsevier/Mosby. • From Policy to Practice: OSAP’s Guide to the Guidelines (2004).Annapolis, MD. OSAP.