Download

1 / 18
190 likes | 447 Views
A Five Step Process for Finding WMSD* Hazards in Your Workplace. * W ork-Related M usculo- S keletal D isorders. This slide show provides…. …a method and a set of tools to help you find WMSD hazards in your workplace. Apply a simple process to identify WMSD hazards your workplace.

E N D
A Five Step Process for Finding WMSD* Hazards in Your Workplace *Work-Related Musculo-Skeletal Disorders
This slide show provides… …a method and a set of tools to help you find WMSD hazards in your workplace.
Apply a simple process to identify WMSD hazards your workplace This slide show will help you… • Locate resources and contacts for more assistance
WMSDs • WMSDs are workplace injuries to the soft tissues such as: • muscles • tendons • ligaments • joints • blood vessels • nerves
Causes of WMSDs Some jobs include tasks which can cause injuries, such as: • Lifting • Awkward postures • Forceful gripping or pinching • Repetitive motions • Intensive keying • Hand-arm vibration A link to information on recommended safe exposure levels for these hazards is in the appendix at the end of this presentation
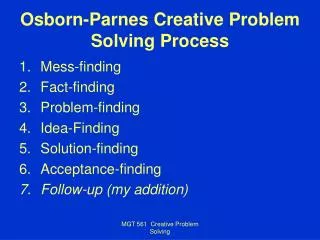
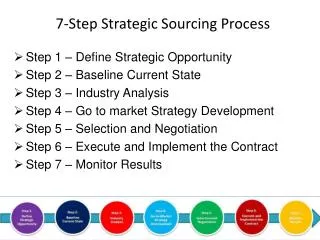
Five-step process for preventing WMSDs • Identify jobs that may have hazards • Educate and involve employees • Evaluate jobs for hazards • Identify and implement solutions • Re-evaluate to make sure solutions are effective A concern
Step 1: Identify jobs that may have hazards Jobs with: • Injuries • Employee/supervisor concerns • Bottlenecks • Quality problems • Unnecessary steps
Step 2: Educate and involve employees • Use safety committees or ergonomics committees • Provide employees with basic awareness of ergonomics principles. * • Have employees participate in finding and implementing solutions to hazards in their jobs. They have the most knowledge about their jobs. They may already know how to improve them. * A link to a basic ergonomics awareness slide show is in the appendix at the end of this presentation.
Step 3: Evaluate jobs for hazards Tools: • Checklists • Calculators for lifting tasks • Employee interviews Also helpful: • Photos or videotape • Symptom surveys • Safety committee meeting minutes • OSHA 300 or incident logs • Claims history
Step 3: Evaluate jobs for hazards - Checklists Checklists are quick ways to evaluate jobs to see if further review is needed A link to easy-to-use checklists is in the appendix at the end of this presentation
Step 3: Evaluate jobs for hazards – Lifting Calculator What you need to know: • Weight of item • Lifting location (hand zone) • Frequency of lifts • Duration of lifting • Does the person twist? Links to this calculator and two others are in the appendix at the end of this presentation
Step 3: Evaluate jobs for hazards - Interviews Ask employees: • How long does this job take? • Why do you do this job this way? • Do you get tired or feel any discomfort? • Any ideas of ways to do it better? Ask supervisors: • Are there jobs that people do not like to do? • Any complaints or symptoms of injury? • Any bottlenecks or quality problems?
Step 3: Evaluate jobs for hazards – Photos or videos Videos to evaluate movements Photos to show static postures A link to OSHA’s videotaping guidelines is in the Appendix at the end of this presentation.
Step 3: Evaluate jobs for hazards – symptom surveys Symptom surveys are good ways to find problems before injuries occur A link to a symptom survey form is in the Appendix at the end of this presentation.
Step 4: Identify and implement solutions Solution Tools: • Ergonomics Ideas Bank • Industry Association • Vendors • Catalogs • Create them in-house A link to a slide show showing simple solutions to common WMSD hazards is in the appendix at the end of this slide show A link to this web page is in the appendix at the end of this presentation
Step 5: Re-evaluate to see if solutions are effective • Use checklists and other tools to make sure you eliminated or reduced the hazards. • Make sure you did not create new hazards. • Ask workers if they feel better or notice positive differences. • Review your ergonomics activities once a year.
Help is available • L&I offers a number of services at no cost to employers in Washington State. Follow the links below to learn more: • On-site consultations • Workshops • More information on ergonomics
Ergonomics Awareness slide show Appendix – Links to Helpful Tools Ergonomics Analysis Tools Symptoms Survey Checklists OSHA Videotaping Guidelines Lifting Calculators ACGIH ® TLV ® for Lifting L&I Lifting Calculator L&I Lifting Analysis paper version NIOSH Lifting Equation calculator NIOSH Lifting Equation user manual Common WMSD Hazards in Your Workplace and Some Solution Ideas Recommended exposure limits for preventing WMSDs slide show L&I Ergonomics Ideas Bank