Descriptive Geometry
Descriptive Geometry. Ref. Descriptive Geometry Metric PARE/LOVING/HILL Fifth edition. Descriptive Geometry. Descriptive Geometry: is the science of graphic representation and solution and space problems. projections. Tow common types of projections:

Descriptive Geometry
E N D
Presentation Transcript
Descriptive Geometry Ref. Descriptive Geometry Metric PARE/LOVING/HILL Fifth edition
Descriptive Geometry • Descriptive Geometry: is the science of graphic representation and solution and space problems
projections • Tow common types of projections: 1) perspective projections (used by architects or artists) 2) orthographic projections (perpendicular to the object)
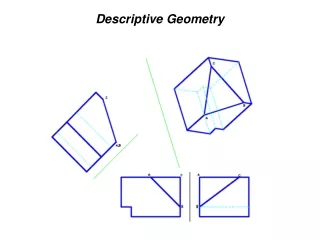
Steps to obtain a view • Establish the line of sight. • Introduce the folding line • Transfer distances to the new view • Determine visibility and complete the view
Step 1: Establish the line of sight. Primary Auxiliary Views Step 2: Introduce the folding line Step 3: transfer distances a,e d,h y b,f c,g H 1 Step 4: determine visibility and complete view D2 1 D1 D y h d g k1 e D2 c y f a D1 f,e g,h b b,a c,d
All views projected from top view has the same height dimension
All the views projected from front view have the same depth dimension
the true angel between a line and any projection plane appears in any view shows the line in true length and the projection plane in Edge View.
Bearing , Slope, and Grade N N aH aH S55oE 55 b b Bearing: a term used to describe the direction of a line on the earth’s surface
Azimuth Bearing N aH aH 125o N125o b b
problem • A 160-m segment AB of a power line has a bearing of N 60o and a downward slope of 20o from the given point A. Complete the front and top views. ah aF
D1 D1 D1 D1 b 1 20o H 160 m N b N 60o a1 ah H F aF b
Grade Grade: another way to describe the inclination of a line from the horizontal Plane
Chapter 4 Planes
Locating a Point in a Plane • Problem: Given the front and side views of a plane MON and the front view of a point A in the plane. Determine the side view n n m m aF x oF oP
Solution n n m Y m Y aF x aPx X X oF oP
Lines in Planes b g c aH e b aF c e Complete the front view
Lines in Planes b x g c aH e b aF x g c e

