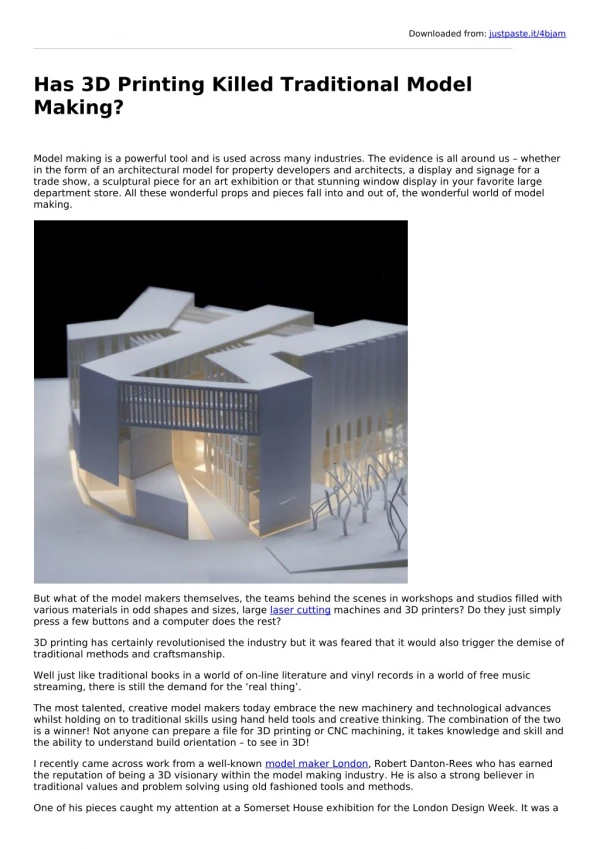
3D Map Model Making
???. 3D Map Model Making. Session given by Minnie Griswold Tuesday May 4, 2010 Learn how to create and construct a 3D model of the Anoka Ramsey Community College-Cambridge Campus area out of cardboard!
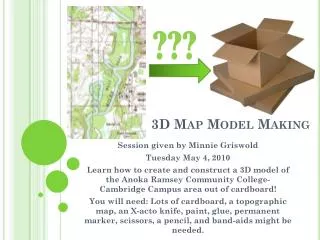

3D Map Model Making
E N D
Presentation Transcript
??? 3D Map Model Making Session given by Minnie Griswold Tuesday May 4, 2010 Learn how to create and construct a 3D model of the Anoka Ramsey Community College-Cambridge Campus area out of cardboard! You will need: Lots of cardboard, a topographic map, an X-acto knife, paint, glue, permanent marker, scissors, a pencil, and band-aids might be needed.
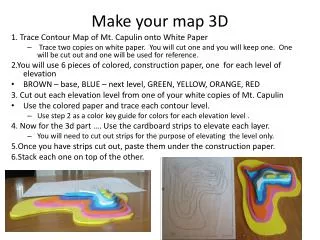
Step One: Coloring The Lines • Use crayons to color code the lines of depth. This way it will be easier to determine which line to cut when creating your pieces.
Step Two: Cutting along the Lines • Next along the same colored line with as much precision as possible. Step Three: Tracing • Then trace the piece that you just cut out onto a piece of card board.
Step Four: Cutting the Cardboard • With the Xacto-knife, CAREFULLY, cut the pencil marked shape you traced on the cardboard. Take your time because this the most tedious process.
Step Five: Cleaning up the Cut • With a scissors trim away the unwanted pieces on the edges of the piece you just cut. This will give you a more clean edge to work with.
Step Six: Stacking • Place the piece of cardboard that you just cut on top of the base of the map and the other pieces you’ve cut before. Repeat steps 2-6 until you have created all the pieces.
Steps Seven: Gluing the Pieces • Place lines of glue on the back of the pieces of cardboard and then place on top of one another. This will hold the pieces together.
Step Eight: Painting • Using any kind of paint ( I used nail polish) indicate where the Rum River is locating by brushing on blue paint.
Final Step: Adding the Final Details • Locate where Highway 95, the Anoka-Ramsey CC is located. Also show where some swamp and marshes are located. Label where any major local icons are using permanent markers or paint.
CONGRATULATIONS!!! • Your local map is finally complete! Good work!
Photo Sources • http://www.simply-boxes.co.uk/NewsEngineer.asp?page=9043 • http://howtostartacandlemakingbusiness.com/make-candles-from-crayons.html • http://afod.wordpress.com/2009/01/ • http://www.crestock.com/images/870000-879999/878275-xs.jpg • http://210teenlibrary.files.wordpress.com/2009/07/fireworks.jpg • http://profalbrecht.files.wordpress.com/2009/05/happy-face.gif