Download
1 / 12
160 likes | 475 Views
Architraves, Dado’s and Picture Rails. CC2009K QCF10. Architrave. Architraves provide a decorative finish around internal openings, especially doors, and cover the joint between frame and wall finish.

E N D
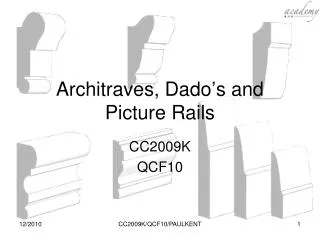
Architraves, Dado’s and Picture Rails CC2009K QCF10 CC2009K/QCF10/PAULKENT
Architrave • Architraves provide a decorative finish around internal openings, especially doors, and cover the joint between frame and wall finish. • They are available in lengths ranging from 2.1m – 5.1m, increasing in 300 mm multiples; or as sets consisting of 2 × 2.1 m legs (the sides of the opening) and 1 × 900 mm head (the top of the opening). • Architraves are usually between 50 mm – 75 mm wide and are usually 19 mm – 25 mm thick before they are planed. • There is a range of commercially available architrave mouldings. CC2009K/QCF10/PAULKENT
Architraves continued These are produced in a variety of different materials including the following • Softwoods • Hardwoods • MDF • Plastics These are the materials that you will most likely come in contact with, however,many metals, stone or other composite materials could also be used. CC2009K/QCF10/PAULKENT
Architraves continued The next steps show how to fit an architrave to a smooth surface. If the surface is not smooth, the back of the architrave may have to be scribed to fit to it before finally fixing in place. This is described later on. CC2009K/QCF10/PAULKENT
Fixing Architraves How to fit an architrave Step 1 • Architraves are kept back from the front edge of a frame by 6 mm –10 mm, which is known as the margin. Use an adjustable set square to do this. • This is the line we work to when fitting architraves. • Hence, as Step 1 shows, draw the margin on the front edge of the legs and head of the frame until they meet. CC2009K/QCF10/PAULKENT
Fixing Architraves Step 2 With the heel (narrow point or inner edge) of the architrave to the margin, place the leg on the floor and mark the architrave where the margin marks intersect each other on the frame. Mark the other leg and head piece in the same way. CC2009K/QCF10/PAULKENT
Fixing Architraves Step 3 • Cut the 3 pieces of architrave using either a mitre saw or mitre box. • Alternatively, use a combination square to mark a 45° angle on the architrave and cut freehand. CC2009K/QCF10/PAULKENT
Fixing Architraves Step 4 • Position one of the cut legs against the margin marks and fix with suitable nails. • When possible try and nail through the quirks in the moulding to help hide the nails. • If the surface is uneven you may need to shape the back of the architrave to fit to it before finally fixing. CC2009K/QCF10/PAULKENT
Fixing Architraves • Step 5 • Repeat step 4 for the other leg. Now offer the head piece in position, it is a good idea to pin the middle first as you can pull the mitres in to position easier to give a good fit. • Secure the mitres together by nailing a pin through the mitre joint, this would preferably done through the top so that you can not see the fixing. • Punch all nails below the surface ready for filling. CC2009K/QCF10/PAULKENT
Scribing Architraves Scribing to walls • Scribing is to mark the profile of something onto the surface against which it is to be butted. • In the case of architraves (or skirting) it is used so that the back can be shaped to fit against an uneven surface. Step 1 • Lightly nail the architrave 20 mm – 25 mm in front of the door frame or lining of the opening, and parallel to it. CC2009K/QCF10/PAULKENT
Scribing Architraves Step 2 • Measure the distance between the front edge of the architrave and the margin mark. Step 3 • Cut a block, or set a pair of compasses, to the measurement you have just worked out. Copy the shape of the uneven surface onto its face by running a compass, or block and pencil, down the uneven surface. CC2009K/QCF10/PAULKENT
Scribing Architraves Step 4 • Using a saw or a plane cut down to the line. • Try in position, making sure the front of the architrave is level with the margin mark. • Fix with nails. CC2009K/QCF10/PAULKENT