Mastering the Line Tool: Create Straight Lines and Arrows Effortlessly
Discover the versatility of the Line Tool, a fundamental feature that allows for the creation of various types of straight lines and arrows. Found conveniently on the left-hand toolbar, the tool offers three distinct styles: Pixels, Shape, and Path. Whether you’re laying down unalterable lines in Pixels, creating vector-controlled shapes in Shape, or drawing adaptable paths in Path mode, the Line Tool can enhance your projects significantly. Learn how to use it effectively to manipulate lines with precision and ease.
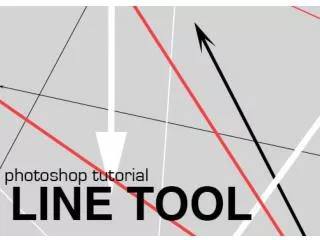

Mastering the Line Tool: Create Straight Lines and Arrows Effortlessly
E N D
Presentation Transcript
OVERVIEW The line tool can be used to make various types of straight lines and arrows. It is one of the basic shape tools with a simple and intuitive process of application and can be a very useful addition to a project.
The line tool can be found on the toolbar on the left hand side. Because of its properties it is classified as a shape and is found in the shape menu as the 5th one down. The menu can also be selected by pressing the key “U”.
There are three different types of basic line styles that can be created: Shape – Creates the line in its own vector layer, allowing it to be manipulated in a number of ways after already being drawn. Path – Creates the line as a highlighted path that can be used as a selection or turned into a shape vector. Pixels – Allows the line to be laid down in the current layer as a simple shape.
PIXELS We’ll start off with the pixels section, because it is the simplest and most direct of the line tool types. When on pixels, lines are laid down on the selected layer, and cannot be altered after they have been created. A few settings can be made before the line is laid down, however, such as: -Basic controls such as the mode and opacity -Anti-alias: Smoothens out any graphics through resampling the line at a lower resolution. -Arrows: These can be added to either end of a line and are able to be adjusted in width, length, and concavity. -Line Weight: how thick the line is created.
SHAPE There are a few distinct characteristics of the shape setting that make it useful: -Normally, each line that is created gets its own vector layer that allows it to be controlled in unique ways (fill, stroke, height, width) after it has been laid down. -There are a few exceptions to this, however: Pressing “Shift” while making a new line will add a line to the same vector. This line can only be at a 45 degree angle, however. Pressing “Option” while making a new line will create add an empty line that, when intersected, will void the fill and stroke of previously created lines on the same vector.
PATH The path setting can function in a couple of different ways. After a basic path is set down, it can be set to either be a selection, mask, or shape. Selection: Creates a shape selection bound by the edges of the line that allow the shape to be manipulated. Mask: This allows the shape to function as a mask, and it is similar to the selection option. It is available once the user is in a rasterized layer. Shape: Clicking this will solidify the path and turn it into a shape on its own vector. For multiple shapes that are created, a variety of different selection options are also available (ex. Only allowing a fill in the intersection points of two lines, excluding the intersections, etc.) The path setting also has the standard weight control option, as well as the option to add arrows.