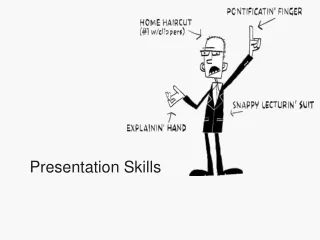
Presentation Skills
Presentation Skills. By Manjeet Dhillon. Outline. 4 Types of Presentations 4 Audience Types Constructing Your Presentation (Opening, Body & Conclusion) Business Presentations (General) Bringing Your Message to Life (Vocal variety and Body Language) Audiovisual Aids

Presentation Skills
E N D
Presentation Transcript
Presentation Skills By Manjeet Dhillon
Outline • 4 Types of Presentations • 4 Audience Types • Constructing Your Presentation (Opening, Body & Conclusion) • Business Presentations (General) • Bringing Your Message to Life (Vocal variety and Body Language) • Audiovisual Aids • Team Presentations - Do's & Don'ts • Handling Question-Answer Sessions • Leading and Controlling Discussions • Coping with Fear • Recommended References
WHAT ? These persons want mastery and competence. they want to be able to remember the information or perform the skill. Presentation Tip: Provide facts, lecture, citations, quotes, examples, demonstrations, practice, feedback, drill, organization, detail & sequence. Engage them with facts. • SO WHAT ? These people want personal involvement and relationships with other participants. They want to respond to the topic through interpersonal relations. Feeling tone is important. Presentation Tip: Provide emotional hooks, personal stories, inventories, opportunities for sharing, choosing and relating the topic to self and others through hands-on and group exercises. Attend to their feelings.
WHY ? These people want to understand and comprehend. They want to reason with the topic information. Presentation Tip: Provide concepts, ideas, data, opportunities to process/examine the data, formulate explanations, make judgments, and inquire. Involve them in formulating ideas. • WHAT IF ? These people want to adapt, modify, extend, explore, and create. They want to reorganize information into new & different arrangements. Presentation Tip: Provide opportunities for creative self expression, individual and group exploration, reorganizing what is known to make new connections & create new or original creations. Take them on flights of fantasy.
Opening (10% of time) The opening of a speech should be designed to catch immediate attention. It must arouse the audience's interest (suspense and curiosity) in your topic. Of course, the opening must also lead into the subject of the speech; if you merely shock the audience, they will remember the opening clearly, but forget the point of the speech. As part of your opening, state the importance of the topic and link your remarks to the occasion. Examples of a good opening are: • a startling question or a challenging statement • an appropriate quotation, illustration or story • a display of some appropriate object or picture • an attention-getting generalization that ties in with your subject
Body (80% of time) The body of your speech contains the factual support for your purpose. The amount of information you can include will be determined by the amount of time available to you. You will generally want to include: • a statement of facts • proof of your facts • a refutation of contrary views
Conclusion (10 % of time) The conclusion of your speech is the climax, the destination at which you hope to leave the audience. This is where your speech should produce results. Your conclusion should always tie in with your opening. It should leave no doubt about what you want the audience to do with the information you have given them. Finish forcefully and confidently to leave a lasting impression. A weak, inconclusive or apologetic conclusion can kill even the best speech. Like the opening, the conclusion should be firmly fixed in your mind. Examples of good closings are: • a summary of the points you have made & the conclusions to be drawn from them • a specific appeal for action • a story, quotation or illustration that emphasizes the point you are making Recommendation: Memorize and rehearse your Opening and Conclusion!
A business presentation involves the preparation and presentation of critical information for the purpose of explaining, instructing, persuading or reporting. The goal of a business presentation is effective communication conveying your procedures, concepts, ideas, plans and data in a manner that will accomplish your goals. • Business presentations are the mainstay at conferences, staff meetings, boards and committees.
1. Determine Your Objective Knowing your objective will help you to avoid wasting time, effort & narrow the focus of the presentation. Here are 5 common objectives
2. Plan Your Briefing Gear your presentation to the audience’s level of interest and expertise 3. Select Your Material The material you choose should directly relate to the purpose of your presentation. • Assess your information and material by referring to the following guidelines: • Should the entire subject be presented or only a portion(s) of it? • What information can be eliminated if necessary? • Will there be any opposition to your ideas? Should you discuss it? • How much detail should be included? • What information can be covered during a Q & A period, following the presentation? 4. Organize Your Material As in any other talk or speech, your presentation should follow the basic speaking guidelines. Be sure to plan an effective opening, body and conclusion. 5. Plan a Question-Answer Period, if required. A question-answer period is always recommended, so you can check perception & reactions to your presentation.
Elements of Voice • Articulation: Individual letter sounds • Pronunciation: Accentual patterns • Resonance: Amplification of sound • Pitch: Highs and lows • Volume: Loudness • Rate: Words per minute (WPM) • Vocal Qualities to strive for: • Expressive - varying pitch, volume and resonance • Clear and correct - articulation and pronunciation • Emphatic - effective use of pauses for "meaning"
Articulation However horrible and harassed Harry felt, he held the highest head in the whole hall. The harrowing and horrendous hoard helped haggard Harry heave his harp into the hall. • Emphasis and Meaning 1. The instructor thinks the student is a fool. vs. The instructor, thinks the student, is a fool. 2. I saw a peacock with a fiery tail I saw a blazing comet drop down hail I saw a cloud wrapped with ivy round I saw an oak creep on along the ground
Body language contributes over 50% of the meaning of your message. It can boldly reveal your conscious and unconscious attitudes and emotions as well as validate your sincerity (or insincerity) and commitment to your topic and audience. Effective body language can also provide an outlet for nervous tension or accumulated energy. • Body Language is the most natural visual aid you possess. It consists of eye contact, facial expressions, gestures, appearance and "whole-body" movements. Each gesture is like a word in a sentence. • Following, are examples of ways your body can "speak" for you:
Gestures and Facial Expressions • When at rest, keep your hands at your side and loose. • Your hands and body should work together. Try to avoid "programming" gestures. • Try to exaggerate your gestures. • Smile. It shows openness and enthusiasm and tells your audience, "I like myself and I like you too." Eye Communication • Avoid:Eye darting, the "Triangle" and the "Copywriter" • Instead:Practice extended eye communication. Look an individual in the eye for 3-5 seconds then. look away. This will involve your audience and reveal how they are responding to your speech. It makes you look more confident. • In large audiences, look to different parts of the room -- at the back and to the sides (the • orphans). • If you feel intimidated, look at the individual in a spot between the eyebrows. • It will give the impression you are looking them in the eye.
Posture and Movement Avoid: Rocking from side to side Leaning on one hip Slouching over papers Leaning on and holding on to the lectern Instead: Stand tall. Stand against the wall with your heels, buttocks, shoulders and the small of your back against the wall, and walk away. Try the "ready" position. Have both knees flexed with your weight on the balls of your feet. This position is the base from which you should move. Try the "two-step". From the ready position, look at someone in your audience and move two steps toward them. (One step is tentative & half- hearted.) Body Language Exercise "Show", as you "tell" the following: Slowly, yet proudly, he walked to the front of the room, steadied himself, took a deep breath then, began to speak.
1. Can my audience see this visual? A visual is useless if it is not seen by the audience. Check "sight-lines" in advance & in the case of overheads, check to ensure you are not obstructing the view. 2. Does this visual clarify my point? Visual aids should contain only additional (not repetitive) information. E.g. Chart with cost comparisons. 3. Does this visual summarize what I have said? Important points can be outlined and used to reinforce your ideas. 4. Does this visual illuminate or expand my audience's understanding of a point I am making? "A picture is worth a thousand words." 5. Will this visual be a distraction? Movements when using the visual must not bother the audience. E.g. Turning the overhead projector on and off can detract from a message.
6. Where do I want the audience focus to be? Visuals are aids to you and your message however, "focus" must be controlled. Determine when and for how long you want the audience to focus on the visual and how you are going to change the focus when you need to. 7. Do I have the resources I need? It is wise to arrange for and check equipment in advance. Verify you have a screen, extension cord(s), bulbs, and people you need to help. 8. Have I practiced enough? Visuals can make you look professional only if they are smoothly and effectively used. 9. Are these visuals as "professional" as they could be? Production of visual aids often requires the help of professionals.
Choosing & Using Audio Visuals Aids
Research shows that people remember only about 20% of what they hear, or about 30% of what they see, but they retain more than 50% of what they see and hear together. • Those figures aren't very encouraging - especially when it's important to get your message across to your audience. How can you improve your chances of getting and keeping your audience's attention long enough to get your information across? • The answer lies in effective use of audiovisual aids, each with it's own advantages and limitations; each requiring a different level of expertise. Following are four commonly used aids and corresponding notes to guide you.
White boards & Chalkboards • This is one of simplest and most economical A/V aids. If the board is clearly visible to your audience, the group is small (up to 15 people), and your writing is legible, the board can be an effective aid. • Talk to your audience. Brainstorm with them, and use the board to highlight important points. You can use color effectively with a variety of chalk/pens. Changing one of the points on the board takes only a quick pass of the eraser. Flip Charts • Flip charts work well for small groups; 15 maximum. Prepare the headlines of your presentation ahead of time, then you and the group can add points to it, spontaneously. • Make sure your lettering is large enough and neat enough to be easily read by the person with the "worst seat in the house". Use different color markers to add variety to your presentation, but stay away from yellow, orange, light green and other pastel colors - they are difficult to read.
Overhead Projectors • This is a very popular A/V aid. But, don't cram all your information on one transparency. List key points only. Diagrams and graphs can readily be prepared to scale with overheads, so you can use this aid for more technical presentations. • Use print large enough for everyone to read easily. Use color to emphasize points. Underline information on your transparency as you speak. In this case, you can use pastel or "highlight" markers not desirable for flip charts. • Use the "masking reveal" technique - keep the bottom of the transparency covered and "reveal" key points as you explain them. This will help you control your pace and hold audience attention.
Slide Presentations • Scripted slide presentations, more expensive than any of the other A/V aids discussed to this point, can get your message across effectively provided the script is carefully prepared and your slides illustrate and recap major points. • You must allow sufficient lead time for preparation: developing your script until you have a final draft. • Get your slides designed or have a photographer take them. When you are ready to make your presentation, keep the following in mind: • Run through your presentation at least once to make sure all slides are in order and right side up. • If you are working with projectionists, run through the show and make sure they have a copy of the final script, complete with each slide change marked on it. • Make sure the projector is in focus so you don't have to do any adjusting while your audience is waiting. • If you are running the show manually, know how to use the remote control. • Arrange to have someone look after the lights for you. • Check the view from the "worst seat in the house". • Always start and finish your slide presentation with a "black" slide. It's much less distracting to the audience than a bright, blank screen. • Be prepared: carry extra light bulbs, an extra script, an extension cord or two, and masking tape to tape extension cords to the floor.
Team Presentations Do’s & Don'ts
DO • Determine a logical ‘flow’ of information and presenters • Use a “relay” style of introducing speakers • Alternate speaker “styles” • Build “Bridges” • Use appropriate “lead in” statements to take audience from “where they have been” and why, to “where they are going” and why. Speak from the audience point of view. • Use caution and carefully chosen words to “correct” mis-information given by previous speakers • Select a strong team leader to deliver opening and closing remarks • Meet for a “dry run” or, at least, an overview of the presentation • Keep visuals consistent (format, color, scheme and type style) • Plan and stick to timing DON’T • “Steal the Thunder” of subsequent speakers • Abuse time allotted to other speakers • Duplicate content
Handling Question & Answer Session
Q&A Periods allow opportunities for presenters to reinforce their messages by elaborating on main points & to obtain valuable feedback from the audience. Q&A sessions must be planned. Prior to making a presentation, it is wise to arrange the details of handling the Q&A period. In your introduction, mention that a Q&A session will follow your presentation. • Planning the Q&A Period Anticipate the kinds of questions you are likely to be asked. Most questions raised during Q&A periods are easy to handle, providing you know your subject. However, be prepared for complex questions that challenge your intellect, tact, and persuasive skills. • Introducing the Q&A Period The transition between the presentation and the Q&A should be made smoothly and without delay. TIP: Suggest to the audience that questions should be of interest to the entire group, then encourage someone to begin.
Responding to Questions • Recognize the questioner. Use first names whenever possible. • Restate the question. Perhaps everyone did not hear the question. Simplify the question if • necessary. • Spot loaded questions. The loaded question is one based on false premises or assumptions. • It may result from ignorance, or the questioner may be baiting you. For example: After introducing a change in the structure of a company, you might be challenged with: “Since it is your purpose to go against tradition and reorganize this department, why don’t you apply your program to the X, Y and Z departments as well?” First, point out firmly and pleasantly that you are not going against tradition. Restate the benefits of the change, explaining how it will effectively increase revenue and productivity. • Divide complex questions. If a questioner raises two or more points, help yourself and your listeners by dividing it into its component parts. Then answer each part as a separate question. • Divert irrelevant questions. If a posed question is clearly out of place, has nothing to do with the subject, or is an unfair personal attack, tactfully decline to respond. • Keep things moving. Rotate your selection of questioners. Allow all individuals seated or standing in all areas an opportunity to speak. Also, volley the questions and answers back and forth in a brisk manner. Don’t prolong an answer, even if you have more to say. • Keep your answers brief and to the point, with many members of the audience participating.
Concluding Question-Answer Periods • Keep an eye on the time or have someone signal you. • Then, announce, “We have time for 1 more question.” • Be prepared with some appropriate closing remarks. • Acknowledge the audience’s interest in the subject, comment on your appreciation for the opportunity to respond to questions and comments. • End with a summary statement that wraps up the essential message you want them to remember.
Leading & Controlling Discussions
OPEN THE DISCUSSION • Start on time. • Establish a friendly, informal atmosphere. • Review background information. Eg. "Why are we here?" • Define what is expected from the group. • Seek involvement and "buy-in". PRESENT THE TOPIC • Present the subject in a way which helps participants relate it to themselves. • Use personal experiences and illustrations as much as possible. • State objectives to be achieved by the end of the discussion. • Outline time frames. • Define terms/words which may not be clear.
DIRECT THE DISCUSSION • Ask questions to seek maximum involvement. Examples: Why do you say that? - How does this relate to you? What do you have in mind? - Do you support this statement? How would you answer that? - Does everyone agree? • Keep discussion "on track". - Restate the key question. - Summarize the discussion thus far. • Keep discussion free of personalities. • Refer questions raised by participants to the group before answering them yourself. • Try to discourage the "talkative" member. • Use charts, chalkboards and other visual aids to explain or clarify points. Supplements such as case studies, checklists or demonstrations would also help. • Use, when required, "closure statements" such as: - This looks like a good list --- let's move on." - "We have time for 1 or 2 more points."
SUMMARIZE THE DISCUSSION State, in logical sequence, essential points explored and conclusions reached. Present a summary of group discussion. Be sure the summary relates to the objectives.
Public speaking is the “phobia of phobias”, the Number 1 Fear on the list of “10 things People Fear Most”. • Most people experience an attack of nerves when asked to speak before a group. • Symptoms include cold, sweaty palms, butterflies in the stomach and trembling knees. • Overcoming stage fright is no easy task, but there are some things you can do to relieve your anxiety and become an effective speaker:
Types of Fear 1. Fear of the Audience • Do an effective audience analysis • Arrive early and talk with members of the audience • Establish eye contact, especially with “friendly” individuals • Be “message” oriented • Recognize that the audience is really just a collection of individuals 2. Fear of Incompetence and/or Failure • Visualize success • Monitor self-talk (recite positive affirmations) • Practice! Practice! Practice! • Master the art of “recovery” 3. Fear of the Subject • Research and prepare your topic thoroughly • Consider difficult questions which may be asked
No Worries !!! • Psyche Yourself In! • Keep telling yourself you will do well. • Take charge of your “stage”. • Practice breathing and relaxation techniques. • Remember --- your audience is supportive; they want you to do well. • Acknowledge your nervous habits and gestures and consciously try to do something about them. • Maintain your enthusiasm and professionalism. • Try to “dress the part” --- looking good helps you feel good. • Stage Fright is Good for You! • It shows you are taking your “job” seriously and are respectful of your audience. • You may never get rid of the butterflies --- but you can help them “fly in formation”!