Download
1 / 7
70 likes | 189 Views
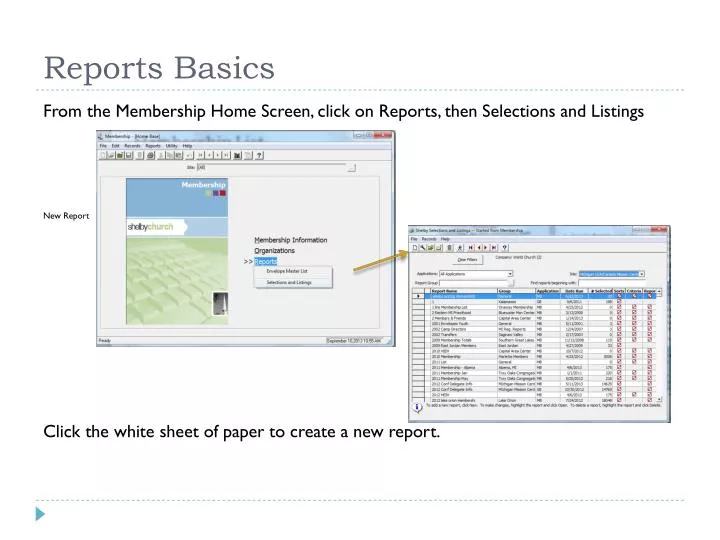
Reports Basics. From the Membership Home Screen, click on Reports, then Selections and Listings New Report C lick the white sheet of paper to create a new report. Reports, cont. GlobaFILE , Membership, and Multi-Site Link will be highlighted by default. Click OK. Enter a report name.

E N D
Reports Basics From the Membership Home Screen, click on Reports, then Selections and Listings New Report Click the white sheet of paper to create a new report.
Reports, cont. • GlobaFILE, Membership, and Multi-Site Link will be highlighted by default. Click OK. • Enter a report name. • If your Shelby access includes more than one site (MC or congregation), then you will double click on Sites (OU) to choose which site your report will include.
Reports, cont. Use the tree view in the pop-up window to select the site(s) you would like to pull data from. You may choose as many as you would like by clicking in the box next to the site. A check mark will appear. Click OK.
Specific Reports • Membership List • After choosing the site(s), you will need to specify which types of individuals you want to include in the report. • Active: any record should be active • unless individual is deceased • or withdrawn • Inactive: no longer being used • Deleted: individual is deceased or • withdrawn
Membership List, cont. Double Click on Formatted (ALL) From this screen, you may choose the information you want to include on the report. For addresses and phone, choose Address Types or Phone Number Types. You may choose as many fields as you prefer by double clicking on the left side, or by highlighting and using the pointed finger to move them to the right.
Membership List, cont. Print to Printer will default. By clicking on OK at this point, your report will appear as a PDF. If you prefer an Excel file, (txt) choose Print to File, and Include Fieldnames in the first record. Specify a file destination in the box provided (this will be a text delimited file) Click OK. If you have chosen to include Address Types or Phone Number Types, a pop up window will appear, asking you to choose which types. You may choose as many as you would like. Click OK.
Membership List, cont. • Save and Close the report Run the report by clicking on the running figure (make sure your report is highlighted). At this point, you may get a a pop up window. Click on No. If your report is a PDF, it will automatically appear. If you created a txt file, you will open Excel and find the file. Close Save