Download
1 / 31
310 likes | 417 Views
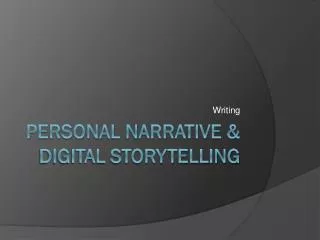
Writing. Personal Narrative & Digital Storytelling. Obectives. identify key moments, people, and places in their lives. create an evaluative scale, from high points to low points, ranking the key moments. order key moments in chronological order.

E N D
Writing Personal Narrative & Digital Storytelling
Obectives • identify key moments, people, and places in their lives. • create an evaluative scale, from high points to low points, ranking the key moments. • order key moments in chronological order. • choose illustrations and text that relate to the key moments.
Content Standards • 5-3 State and develop a clear main idea for writing. • 5-4 Determine a purpose and audience. • 5-5 Use organizational strategies (e.g., rough outlines, diagrams, maps, webs and Venn diagrams) to plan writing. • 5-6 Organize writing beginning with an introduction and body and a resolution of plot, closing statement or a summary of important ideas and details. • 5-7 Vary simple, compound and complex sentence structures. • 5-8 Group related ideas into paragraphs including topic sentences following paragraph form and maintaining a consistent focus across paragraphs. • 5-9 Vary language and style as appropriate to audience and purpose. • 5-10 Use available technology to compose text. • 5-11 Reread and assess writing for clarity, using a variety of methods (e.g., writer's circle or author's chair). • 5-12 Add and delete information and details to better elaborate on a stated central idea and to more effectively accomplish purpose. • 5-13 Rearrange words, sentences and paragraphs, and add transitional words and phrases to clarify meaning. • 5-14 Use resources and reference materials (e.g., dictionaries and thesauruses) to select more effective vocabulary. • 5-15 Proofread writing, edit to improve conventions (e.g., grammar, spelling, punctuation and capitalization) and identify and correct fragments and run-ons. • 5-16 Apply tools (e.g., rubric, checklist and feedback) to judge the quality of writing. • 5-17 Prepare for publication (e.g., for display or for sharing with others) writing that follows a format appropriate to the purpose, using techniques such as electronic resources and graphics to enhance the final product.
NCTE Standards • 4 - Students adjust their use of spoken, written, and visual language (e.g., conventions, style, vocabulary) to communicate effectively with a variety of audiences and for different purposes.5 - Students employ a wide range of strategies as they write and use different writing process elements appropriately to communicate with different audiences for a variety of purposes. 6 - Students apply knowledge of language structure, language conventions (e.g., spelling and punctuation), media techniques, figurative language, and genre to create, critique, and discuss print and nonprint texts. 12 - Students use spoken, written, and visual language to accomplish their own purposes (e.g., for learning, enjoyment, persuasion, and the exchange of information).
Resources • Graphic Map Pictures • Planning Sheet • Rubric
Symbolizing events • What are some images that people use as symbols for events in their lives? • Work with your group to review the images and brainstorm possible life events that the images might symbolize or illustrate? • Record these ideas.
Symbolizing events • Pick one person from your group to share one of your ideas. Try not to repeat ones that have been said. • Were there any others that we can post? • These lists will be used to work on individual graphic life maps. • Use the remaining time to browse the list more closely and brainstorm more ideas.
Samples • Sample 1 • Sample 2 • These are copies of peoples life maps. What do you notice about them? • How are the images used? • How did they rank items? • What about the amount of text that they wrote?
Creating Graphic Life Map • Brainstorm with your group significant life events. • Happy memories • Sad memories • Scary memories • Important places • Important people • Try to come up with at least 30 different life events and record your ideas on chart paper.
Creating Graphic Life Map • Present your group’s work to the class • After everyone has finished review the class ideas silently and begin brainstorming possibilities for your own individual life map in your journal. • Compile a list of at least 15 items that could be included on your life map.
Creating Graphic Life Map • Use the Graphic Life Map Planning Sheet to record your 15 life events and the date/time that they happened • Using a scale of -3 to +3 rate each event • In the image column you may draw a quick sketch or describe the type of image you wish to use. • Add a brief note that will help remind you of the event later.
Creating Graphic Life Map • Begin planning your own life maps, using the information gathered • Work collaboratively to share ideas and get positive suggestions • When you have finished, sketch out your life map. • Do you have a lot of +3s? • Do you have a lot of -3s?
Creating Graphic Life Map • Try to narrow down the events that you will publish to 10 things. • Try to pick the 10 most important things!
Publishing the Graphic Life Map • We will use Construction Paper to publish our graphic life maps • If time, we can also use the computer • We will add captions for each item and use images to represent each event. • The events will be connected using a road or highway.
Publishing Graphic Life Map • Make sure you have a piece of graph paper. • Put your 10 items in chronological order. • The year will go on the horizontal axis and the rating will go on the vertical axis. • Place your dots on the paper • Connect them using straight lines. • Transfer this to the construction paper
Creating Graphic Life Map • Besides each graphed event write a short description and add illustrations
You will need to. . . • identify the one main topic of a story • focus on one main topic • write a short narrative centered around one main topic
Identifying a Topic • Look at your graphic life map and pick one of the events that you have listed to write about • Think about that event in detail and brainstorm different things that you could write about.
For example. . . • Maybe you picked “The day I got my puppy” and some stories you could write about your dog might be • The first night he stayed at our house • The time that he chewed up my stuffed animal • The day our puppy learned to sit
For example. . . • My big brother Kurt • The time I accidentally punched him in the nose • The winter when we drove each other around the farm on the go-cart. • The time my grandpa threw him into the snow for throwing snowballs at me
For example • You might have picked “My Grandpa Died” or “My Grandma Died” • Write a specific story about them such as: • The time you stayed the night at their house • Their 50th wedding anniversary • Helping your grandpa around the farm.
Brainstorm • Take this time to brainstorm some topics that you think you could write about. • You may pick more than one event to brainstorm topics on, but you can only write about one of them.
Where should the story begin? • If the story is about bungee jumping at Grandfather Mountain, where should the story begin? • when your brother dares you to jump with a bungee cord. • when you start to climb the tower. • when you get to Grandfather Mountain. • when you decide to spend the weekend in the mountains.
Where does your story begin? • Look at your topic that you chose to write about and come up with 3 possible places/times during that day that you could start your narrative.
What to include • Having a focus is important to readers! • It is important to narrow the topic/focus to a major action with related elaboration that develops the story. • Why is it often difficult to focus on a topic or main event?
Activity • This is a writing response to a 4th grade girl’s paper on an Achievement Test. • The prompt asked to tell about a fun time with a friend. • Look to see how she managed to narrow her focus.
Prompt & Personal Narrative • Prompt • Narrative
Narrowing your topic • Look at your topic and then list all of the details that you could write about. • Was your topic too broad? • Will you have too many things to write about? • Are all of the details important?