Download
1 / 21
210 likes | 422 Views
Living History Through Clay Animation. By Shelly Laschkewitsch. Why Clay Animation?. Engages multiple intelligences Helps students showcase their knowledge Reaches a variety of learners: visual, auditorial , kinesthetic Helps students grasp certain concepts or events

E N D
Living History Through Clay Animation By Shelly Laschkewitsch
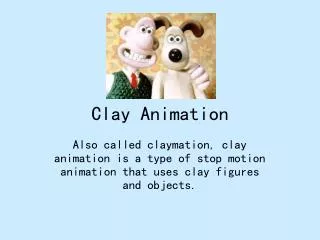
Why Clay Animation? • Engages multiple intelligences • Helps students showcase their knowledge • Reaches a variety of learners: visual, auditorial, kinesthetic • Helps students grasp certain concepts or events • Motivates and engages students to learn • Encourages connections and communication • Helps students learn better while transforming information
National Educational Technology Standards • Creativity and Innovation • Communication and collaboration • Research and Information Fluency • Critical thinking, problem solving, decision making • Digital Citizenship • Technology Operations and Concepts
History Ideas Have students create a clay animation movie that depicts a historic event, reflecting the culture, political climate and social structure at that time- • Explore what it might have been like to live during a particular time in history • Dr. Martin Luther King giving a speech • Characters discussing rights and freedoms • Explain cultural differences • Show how Egyptians might have built the pyramids
Equipment • Digital Camera and tripod • Modeling Clay • Wire or pipecleaners • Sculpting tools • Craft materials • Computer • Stop Motion Animation Software
Production Cycle • Set up student teams • Research the topic • Write or outline a script • Storyboard • Design background, props and scenery • Make clay figures • Film clay animation • Transfer photos to computer • Edit animation on the computer • Format animation • Share animation with class
Storyboard • Make a storyboard: a visual map that shows how the project will proceed • Helps plan the main shots • Use basic shapes, stick figures, simple background • A working document • Can use index cards
Backgrounds Background scenery can be made from a variety of materials: e.g., a trifold cut in half, construction paper, calendars, felt board, cardboard box, wood, draped fabric or use a green screen
Scenery To make the animation more interesting and engaging, you’ll want to add scenery and props such as trees, bushes, rocks, benches, furniture, etc. Scenery materials: paper maché, cardboard, Legos®, Lincoln logs, sand, moss, live plants, dollhouse furniture, etc.
Clay Figures • Materials suggested: modeling clay, pipe cleaners or 16-gauge wire, styrofoam balls, foil, googly eyes, beads, sequins, fabric • Craft tools: rolling pin, clay modeling tools, pasta maker, popsicle sticks, foam sheets, baby wipes • Tips: keep characters simple, make large feet, don’t make head heavy, make figures short
Clay • Best is nondrying modeling clay such as: -Claytoon™ -Sargent Art -Prang -Alex -KleanKlay -RoseArt
Armature SuggestedMaterials: 16-gauge wire pipe cleaners foil masking tape styrofoam cork Armature is the skeleton of the clay figure. It helps keep the figure strong, flexible and dense.
Digital Camera Want a camera that: • Has a close-up setting • Can be attached to a tripod • Has a memory card with at least 4 GB • With 4-megapixels or larger • Has a retractable 3x zoom lens • Has a USB connection
Filming Use a tripod to keep camera steady Position camera about 2 feet away Use good lighting Take multiple photos of each shot Move figures about ¼” at a time Make basic movements Use fishing line to hang figures in the air
Stop Motion Software • Frames • SAM Animation • Movie Maker • iMovie • Claymation Studio • StopMotion Pro Tech4learning Tufts University Honest Technology
Editing • Delete unnecessary frames • Edit & rearrange frames • Add sound effects • Record sounds or voice • Add dialogue as text if desired • Add title • Add credits • Set timing for animation
Tips • Purchase supplies at RAFT, dollar stores, craft stores, Target, Home Depot, online • Clay figures shouldn’t be too tall • Move figures in tiny increments • Take 2 frames (photos) for each movement • Film on a surface that clay sticks to • Be patient
Classroom Integration • Use handouts: Project Proposal Form, Plan Form, Project Rubric, Self Assessment Form • Show samples of clay animation movies • Keep animation short • Expect to take about 8 hours • Have students work in teams • Maybe complete a unit of study on a particular time period
Sample Clay Animations Mission Life American Indians Basket Weaving D-Day
Lewis & Clark Expedition American Indians Fishing
Living History Hopefully through the experience of your students making a clay animation about a historical event, they will have “lived” that event…………..