Advanced First Aid and Resuscitation Training Course Overview
This comprehensive 9.5-hour Advanced First Aid and Resuscitation course equips participants with essential skills for emergency situations. The curriculum covers advanced resuscitation techniques, oxygen administration, and the operation of an Automated External Defibrillator (AED). Participants will engage in practical assessments, case studies, and develop safety action plans. By the end of the course, learners will be proficient in assessing casualties, using resuscitation equipment, and managing emergencies effectively. Prerequisites include basic first aid knowledge, and a learning manual will be provided for reference.

Advanced First Aid and Resuscitation Training Course Overview
E N D
Presentation Transcript
Housekeeping Emergency Evacuation Course timings and breaks Assembly point Exits Facilities • Language, literacy and numeracy • Incident/injury notification • Prerequisites • Appeals process • Enrolment form Phones
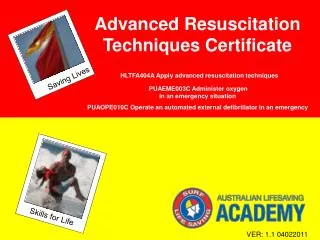
Course Content HLTFA404A Apply advanced resuscitation techniques PUAEME003C Administer oxygen in an emergency situation PUAEME010C Operate an Automated External Defibrillator in an emergency situation. Course Duration: 9.5 hours The First Aid Training Manual or Public Safety and Aquatic Rescue manual may also be used as a reference 3
Learner Guide icons Remember this Case study Assessment activity Reading material Individual activity Group activity Course objectives
Course outcomes • assess the casualty and develop a management plan • check and use resuscitation equipment • maintain an airway by: • using suction • using OP airways • resuscitate a casualty using oxygen resuscitation equipment • use oxygen to provide therapy • recover and restore oxygen equipment • check defibrillation equipment • attach and operate a defibrillator • recover and restore defibrillation equipment By the end of the course you should be able to:
Assessment Assessment purpose: • to demonstrate your competence after the learning • to meet organisational requirements for your role Assessment process: • written assessment • practical assessment including scenarios • RPL
Topic 1 – First Aid and Resuscitation Review Learning outcomes On completion of this topic candidates will be familiar with: • the legal implications associated with first aid • infection controls for communicable diseases • the chain of survival • Emergency Action Plan (EAP) • review of CPR 7
Legal implications of first aid • Duty of care • Documentation • Confidentiality 8
Duty of care No requirement to provide assistance unless you already owe a duty of care to the sick or injured person. Examples include: • a first aider at a worksite • someone caring for children • taking on a duty of care once you begin giving first aid Once you begin giving first aid, you have a duty to do everything reasonable and you cannot abandon the casualty 9
Recording Make a record at the time of the incident to: • assist with management and handover • create a legal record The following information may be required: • date and time • what happened • what assistance you provided.
Confidentiality • Information about a casualty should not be shared with others not involved in their treatment (ie it is acceptable to share information with parents, other first aiders assisting with treatment or ambulance personnel) 11
First aid safety • Wash hands after treating a casualty • Use appropriate PPE (gloves, resuscitation masks, protective eyewear) • Place sharps in sharps containers • Dispose of contaminated wastes into appropriate labelled containers • Be aware of the signs in yourself or colleagues and seek support 12
Activity 15
Emergency action plan (EAP) • Pause and plan • Call for emergency assistance • Primary assessment • Secondary assessment • management of injuries • vital signs • history • body check • treatment • Ongoing management
Pause and plan This reminds the first aider to remain calm, stop and think. When pausing and planning consider? safety equipment length of time you may be out in the elements communications further assistance Is 000 required 17
Call for emergency assistance Four Ps Position Problem People Progress 18
Primary assessment Danger Response Send for help Airway Breathing Compression Defibrillation 19
Primary assessment - CPR Jaw thrust is essential when performing airbag resuscitation Leadership during CPR You will be looked to for leadership by other first aiders You may need to instruct a bystander in CPR 20
Secondary assessment Management of injuries Vital signs History Body check Treatment 21
Ongoing management Reassess the casualty’s vital signs at regular intervals Continue to identify actual or potential problems and plan appropriate care Notify the ambulance service of any change to the casualty’s status as appropriate Hand over casualty to ambulance personnel Who should be sent to hospital? How long will an ambulance take to respond to your area? 22
Assessment 23
Topic 2 – Advanced Resuscitation and Oxygen Administration Learning outcomes • Oxygen equipment components • Oxygen equipment safety precautions • Equipment checks • Oropharyngeal (OP) airways 24
Why use oxygen? Oxygen is useful in most situations where the casualty does not appear adequately perfused (oxygenated) • Increases oxygen uptake • Promotes recovery in most first aid situations • Minimises risk of cross-infection 25
Why use oxygen? Unconciousness Chest pain After resuscitation Shock Circulatory distress Anaphylaxis Injuries Asthma Blood loss Shortness of breath Severe pain Not breathing
Respiratory noises • Cough • Wheeze • Stridor • Gurgling • No sound 29
Respiratory conditions • Hypoventilation • Chronic Obstructive Airways Disease (COAD) • Asthma • Hyperventilation 30
Activity 33
Safety precautions Oxygen must be used with care and respect at all times • Never use oxygen near an open flame • Never use oxygen near cigarettes • Never use grease or oil with oxygen equipment • Never use oxygen when delivering a shock via a defibrillator
Oxygen cylinders C size Pin indexed. 440-490L capacity. White/blue sleeve over outlet of full bottle. White cylinder labeled Medical Oxygen (changed from black with white shoulder to all white between September 2009 and June 2011) • Operational times: 50 Min, Therapy (8L per min). • 30 Min, Resus (14-15L per min). • Replace cylinders when less than half full (can be used for training). 36
Preparing cylinders for use Check heat warning tag. Remove protective plastic wrap. Open or ‘crack’ valve safely. Ensure yoke is clean and dry, sealing washer in place. Attach the yoke – do not over tighten. Slowly open valve fully, then back half a turn. Check contents (Under half full replace), Ensure system is free of leaks. When finished using, turn valve off, then release pressure from regulator. Mark cylinder with contents and date checked Protective plastic wrap Heat warning tag 37
Oxygen equipment • Check tubing • Check flow • Check that there is no odour • Close cylinder valve and drain unit of oxygen 38
Ancillary equipment • Therapy masks (adult and child) • Resuscitation masks (adult and child) • OP airways • Chalk • Pencil, sharpener and paper • Gloves • Spare sealing washers 39
Activity 40
Administering oxygen therapy • Check oxygen equipment • Place equipment so the operator can reach and see the contents gauge • Attach tubing to mask and turn on • Secure mask to casualty’s face NOTE: If the casualty does not want to use the mask, remove the mask and direct oxygen flow around the mouth and nose
Jaw Thrust Opening the airway Maximum Head Tilt (Except Infants) Use Pistol Grip Jaw Support 42
Mouth-to-mask with oxygen Used when rescuer is not ARC/ARTC qualified or airbag is not working correctly 43
Air bag resuscitator Extension tube (optional) Oxygen Inlet valve Self refilling Recoil bag Resus mask Reservoir bag Patient valve 44
Pre Use Airbag Checks(Assembled components) 3 1 Fill reservoir bag, connect to inlet valve Squeeze Squeeze recoil bag lifts yellow membrane Seal patient valve Check the airbag for leaks Check reservoir valve “blow off” 2 4 Fill reservoir bag, connect to inlet valve Fill reservoir bag, place over patient valve Squeeze Squeeze lifts yellow membrane Reservoir bag deflates Check patient valve for non-breathing Check intake valve 45
Airbag operation • Gentle squeezing motion 1.5-2 seconds • Adult: 2 hands • Child:1 hand • Squeeze airbag before use to fill with oxygen • Watch rise and fall of casualty’s chest • If unhappy with equipment, discard • Airbag may still be used when cylinder is empty 46
Activity 47
Assessment 48
Oropharyngeal (OP) airways Flange • curved plastic device • assists in the maintenance of an adequate airway in the unconscious casualty • keeps the airway clear and the tongue in place Bite block 49
OP airways • An airway blocked by the tongue • Using an OP airway to assist with a clear airway 50