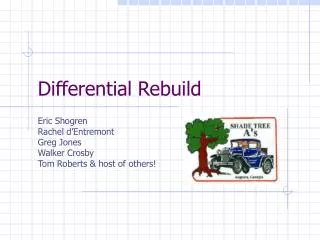
Differential Rebuild
Differential Rebuild. Eric Shogren Rachel d’Entremont Greg Jones Walker Crosby Tom Roberts & host of others!. Tools. Must Haves Patience Patience Patience Rear Spring Spreader Large jack stands Seal driver Nice to Have Inch-pound torque wrench. Why?.

Differential Rebuild
E N D
Presentation Transcript
Differential Rebuild Eric Shogren Rachel d’Entremont Greg Jones Walker Crosby Tom Roberts & host of others!
Tools • Must Haves • Patience • Patience • Patience • Rear Spring Spreader • Large jack stands • Seal driver • Nice to Have • Inch-pound torque wrench
Why? • Noise – often mistaken for Transmission noise • Four types • Drive Noise • Cost Noise • Float Noise • Bearing Noise • Worn pinion/ring gear first three – makes a whine • Worn bears – low growl. Sound like a pump try to pump rocks • Broken Pinion Gear Teeth
Basic Steps • Remove rear axle/drive shaft • Disassembly • Inspection • Bearing preload • Carrier bearings • Pinion bearings • Reassembly • Reinstallation
Remove Rear Axle/Drive Shaft • Support the car via the frame – your pulling the rear axle • Rear of the car needs to be higher – meaning more dangerous!
Remove Rear Axle/Drive Shaft • Remove • Wheels • Brake backing plates • U-Joint housing • Shock Links • Speedo cable • Install spring spreader • Support banjo on Jack • Remove Spring Shackles • Support the front end of the torque tube
Disassembly • Remove the drivers side axle housing from banjo • Pull axle and carrier out • Remove torque tube • Remove torque tube roller bear race and grease seal • Place a 1-1\16 inch, 1/2 drive, socket over the spline end of the drive shaft. • Slide the torque tube down over the drive shaft until it seats against the end of the socket. Hold the torque tube in a vertical position and gently bounce it up and down until the socket pushes the grease seal and roller bearing race out the end of the torque tube.
Disassembly • Before disassembling carrier make sure everything is marked for re-assembly
Disassembly A Handy Jig
Disassembly • Removing pinion bearing double conical race • Also drive our axle housing races
Bearing Preload - prep • Install bearing on carrier • Should be pressed on, but a rubber mallet works too • Install races in axle housing and banjo • Keep races in freezer & heat housings • Best to press them in, but if all else fails – the old rubber mallet again • Assemble carrier without axles
Bearing Preload - prep • Installing 1st pinion bearing
Bearing Preload • As Rachel says this requires: • Assembling 481 times • Disassembling 482 times
Bearing Preload • Pinion bearing preload is easier • Preload done with 2 thin locking nuts • 1 1/16th inch socket on end of drive shaft with an inch-pound torque wrench • Spec: 20 in-lbs
Reassembly • Install 3 grease seals • Install drive shaft roller bearing race • Assemble carrier with axles • Torque carrier nuts to 35 ft-lbs & lock wire • Reassemble axle housing with the right gaskets combo & without sealant (changes dimensions) torquing nuts to 35 ft-lbs
Reassembly • Install drive shaft roller bearing race • Install torque tube torquing nuts to 35 ft-lbs and lock wiring • Install roller bearing, speedo gear & lock ring • Paint
Reinstallation • Insert drive shaft into U-Joint • Install shackles between spring and spring perches • Install U-Joint housing – 1 whole tube of grease • Install brake backing plates & brake rods • Fill with 600w until it runs out fill hole.